MyFreeCopyright.com Registered & Protected
Showing posts with label Just Because Cards. Show all posts

November 30, 2012

Sample Project Highlights and Cricut Cartridges for Sale!

I was organizing some of my cricut cartridges and I noticed I had some duplicates as well as some that I just thought was time to sell. 

If you are interested in any of these, please email me (by hitting reply on your email subscription to this blog) or comment on this link with the title of the cartridge that you are interested in.  I will need your email contact information.  Note: I cannot be responsible for lost or errors on behalf of blogger or any email nor ISP.  

Payment is by paypal only and the product will only ship out after the funds are fully deposited. 

Many of these are rare, exclusives, hard to find and/or retired.  I have photographed them in sets of two but, they are available individually.

These also work in all of the cricut machines including but, not limited to the baby bug, original, cricut create, cricut expression, Anniversary Edition Expression 2, Expression 2, Cricut Imagine, Cricut Cake, Martha Steward Cricut Cake, and/or the cricut mini. 

You can also use these with Cricut Design Studio, Cricut Craftroom, Jutebox or even just straight in the cricut machine(s).


B is for Boy Cricut Cartridge* $30.00 plus shipping

Click here!  for sample project and free tutorial not included in the sale.

SOLD Sugar and Spice lite Cricut cartridge*

Click here! for sample project and free tutorial not included in the sale.


Carousel cricut cartridge* (see below) $60.00 plus shipping

Click here! for sample project mini album not included in the sale.

SOLD Cricut Everyday cricut cartridge.** exclusive (see below)

Click here! for sample mini album project not included in the sale.


Elegant Cakes Cricut Cartridge not just for the cricut cake machines.  It cuts out amazing cuts for all cricut machines as do all the carts I am listing. $24.99 plus shipping

Click here! for a sample mini album project not included in sale.


sample layout not included in sale:


click here to see tutorial!

EXTREMELY RARE! Cricut Storefront cricut cartridge $79.99 plus shipping.  This was only given as a sample during CHA etc.  This is the one that has the beloved Cricut cuts etc. 


Jubilee Celebration Cricut Cartridge $26.00 plus shipping

click here! for a sample project using cartridge not included in sale.

Doodlecharms cricut cartridge $31.00 plus shipping

Click here! for a card  sample using cartridge not included in sale.
Click here for 20+ projects sample using cartridge not included in sale.


SOLD "Just Because" Cards cricut cartridge or Just Because Cards cricut cartridge


Click here!  for sample card using cartridge not included in this sale.


Robotz cricut cartridge $24.99 plus shipping


Preserves cricut cartridge $24.99 plus shipping

Click here! for sample project layout using cartridge not included in sale.

Jubilee Celebrations cricut cartridge $26.00 plus shipping  (yes, I do have more than one copy)


Savory Cricut Lite Cricut Cartridge* $24.99 plus shipping

Bloom Cricut Lite Cricut Cartridge* $24.99 plus shipping


SOLD Shall We Dance? Cricut Cartridge great for ballet for a little girl or all sorts of genre.** exclusive (see below)

Click here! for a sample project using cartridge not included in sale.

SOLD French Manor Cricut Cartridge ** exclusive (see below)

Click here! for sample card using cartridge not included in sale.


Cricut Imagine best friends cartridge *** (see below)

Click here! for a sample layout using cartridge not included in sale.

Cricut Imagine Kate's Kitchen cartridge or Kates Kitchen cricut imagine cartridge *** (see below)

Click here! for a sample card using the cartridge not included in sale.

Cricut Imagine cartridge snapshot: everyday only works in the cricut imagine **** (see below)

Cricut Imagine cartridge Heirloom only works in the cricut imagine **** (see below)

Click here! for a sample card using the cartridge not included in sale.


Please share this post on facebook and any other messageboards or such
To see what these carts do, please click on the cartidge links under this post in the Labels section or on my blog on the right hand side is a list of projects by cartridge.

*Note: these were originally available at walmart but, it seems it is no longer available. Don't let these slip from your fingers.

**This is an exclusive cricut circle cartridge only available to members paying for exclusive membership to the cricut circle.


***Note: the cricut imagine art cartridges only work in the cricut imagine for print and cut, print and/or cut only.  However, you can also use them in the cricut expression 2 on cut only feature.

 ****Note: the cricut imagine paper cartridges only work in the cricut imagine.


July 26, 2011

Guess what carts were used to make this BBQ layout!

Lori here from ScrappinMyStressAway with this week's Mix-It-Up project for SweetSassyDiva.  Our theme was to use several cartridges (check) BBQ theme (check) and a Bold Color (check).  I do not have either of the BBQ themed cricut cartridges, so my Gypsy and I got to work!

The tree is from Just Because Cards sized to 6.23w x 14.93h (real size is 5.78 x 6.92).  The sun is from H20 sized at 2.56w x 2.54h.  The grill shape is from Creative Memories Cheerful Seasons ~ it is the watermelon at 3.79w x 1.59h (minus the slice) and the oval is from George 0.99w x 2.68h rotated 90 degrees.


For the legs of the grill, I used 2 "A"s from Cherry Limeade at 1.52w x 1.94h.  I put another oval on my mat for the grill top.  Again I used George and sized the oval to 0.99w x 2.68h, rotated 90 degrees.  I cut these out in black.

On the 3rd Layer, I put some grass from Everyday Paper Dolls at 12.0w x 2.73h.  I copied a second grass on the mat.  I put the banner from Birthday Bash on the mat at 6.01w x 4.06h.  I put BBQ from Cherry Limeade at .80 inches and the watermelon from Creative Memories at .73 inches.  I copied the watermelon and layer and then hid the watermelon half from each as I only needed the slice. 

I put four skinny balloons (aka hotdogs) on my mat from George and Basic Shapes sized at 0.21w x 0.57h.  I put four circles (hamburgers) on my mat from George at 0.36w x 0.33h.  I put three clouds from Create A Critter on my mat at 2.49w x 2.06, 1.92w x 1.59h and 2.63w x 2.18h.  I hid the inner cut on all three.

Here are the pieces all cut out.

Here is my grill all assembled.

Some hamburgers complete with grill marks! 
Some hot dogs with grill marks!

 
I used some stickles to create the grill top and the smoke.

I put orange stickles on the bottom layer of the sun (under the swirl) and some waterfall stickles on the cloud.

I added some journaling and twine to my layout.

I cut the bird off my banner and added BBQ and the watermelon slice.  I did change my paper for the banner to match the photo mats.

I put some gold stickles on the swing rope.

Here are a couple of photos from our 4th of July BBQ.  I can almost smell the grill!!

January 15, 2011

Just Because!

I didn't get any new cartridges for Christmas, so I decided to go with one of my Favorite Cartridges. I just love, "Just Because Cards," because it is so easy to use. All the planning and ideas have already been done, you just need to copy the picture and you have a cute card.


I did three cards that are some of my favorites. The "Thanks a Melon" card, "Cute As A Bug" card," and "DogGone good" card. These cards are so simple.


Supplies Needed:


Just Because Cards Cricut Cartridge

Black, Red, White, and Green, Card Stock

Black and White Polk a Dot Patterned Paper

Three different sizes of Black Polk a Dot Ribbon

Adhesive and Glue Dots

Pop Dots

Ribbon Glue

Bling


Recipes:


Thanks a Melon Card


Make a card out of Black Card Stock, using one from the cartridge or cut one using your trimmer. I made my card at 4X4 1/2 folded. Or 4X9 before folding.


Cut a red melon at 2.92X3.59 in Layer 1 mode. Gypsy size.


Cut a black melon the same size in Layer 2 mode to go underneath the red one.


Cut a green melon at 3.11X 3.82 in Layer 2 mode. Gypsy size.


Cut the red "thanks a Melon" at 4.03X3.71 Gypsy size.


Adhere the black melon underneath the red melon.


Adhere the red/black melon onto the green melon rind at the top center.


Adhere the "thanks a Melon" to the top of card. (Opening of card is at the left).


Adhere the Melon to the bottom right of card.


Adhere a black polk a dot ribbon with small dots to the left side of card. (I wrapped it inside the card and tied it in a bow on the front of the card.)


Cute as a Bug


Make a card out of White Card Stock, using one from the cartridge or cut one using your trimmer. I made this card to fold at the top at 4 1/2 when folded by 5 1/2 from left to right.


Cut a piece of black and white polk a dot paper 1/8th inch smaller than the front of card and adhere it to the front of card.


Cut two white lady bugs from Layer 1 mode. One 1 inch high and one 1 1/2 inches high.


Cut two black lady bugs from Layer 1 mode just a little smaller to go on top of the white ones.


Cut two red lady bugs using Layer 1 Shift mode just a little smaller than the black lady bugs and adhere to the top of the black layer.


Cut the red "cute as a bug" using Word mode 2.53.X4.65 inches high.


Make a knot from large black and white polk dot ribbon and glue dot it to the top of card.


DogGone good


Make a card out of Black Card Stock, using one from the cartridge or cut one using your trimmer. I made my card at 4X4 1/2 folded.


Cut a White Card Stock piece 1/8th inch smaller than the black card.


Cut a Red Card Stock piece 1/8th inch smaller than the white piece.


Cut a Black Polk a Dot Patterned piece one half the size of the Red Card Stock piece.


Cut a white dog at 2.28X4.53. Gypsy size.


Cut a black dog at 2.34X4.65. Gypsy size.


Cut a black "DogGone good" at 3.73X5.59. Gypsy size.


Adhere the White Card Stock piece to the Black Card.


Adhere the Red Card Stock piece to the White Card Stock.


Adhere the Black Polk a Dot piece to the bottom of the Red Card Stock piece.


Cut a ribbon the length of the Red Card Stock and glue it with ribbon glue over the top of the black polk a dot piece.


Adhere the "DogGone Good" to the center of the top of the card.


Tie a small black polk a dot ribbon to the dogs neck.


Put a bling on the ribbon around the dogs neck with glue dot.


Adhere the Dog to the middle of the front of the card.

December 4, 2010

Post-it Blog Hop Today!

Welcome to the Post-it Blog hop! Grab your beverage of choice and enjoy the wonderful projects as well as a chance to win some blog candy along the way! The challenge is to use the Post-it Paper in a unique project.

Christmas Countdown Calendar


For Thanksgiving, I was in Maryland with my darling Grandson. Oh and my daughter and son-in-law too. I decided to start on my calendar for the Dec 4th Blog Day. I had to make it simple so I could make Gingerbread Cookies and play with Zachary. Well, I found this neat Christmas Paper Stack from DCWV that made it ever so easy. Then I cut the little Christmas Goodies for it when I got back home to Kentucky

-Donna


Supplies:

The Homemade Christmas Stack from DCWV

Scalloped Page and several other pages from the DCWV Stack for the blocks for the numbers

Post-It Full Adhesive Papers in Red, White, Black, Yellow, and Green

Cricut Cartridges - Just Because Cards, Christmas, Joy of The Season, Winter Frolic, Christmas Cheer, and Black Letter

Pop Dots

Adhesive

White Pigment Pen


Recipe:

Use the Red Scalloped Border Page for the Calendar

Use several of the pages for the blocks for the numbers
Cut 25 blocks to fit onto the page inside the stitching that is already there for you. (I cut them different sizes from 1 1/2 inches to 2 inches)


Cut the numbers from 1 to 25 from the Cricut Black Letter cartridge at 1 inch each


Cut the skate, candle, stars, Christmas Bulb, train, hat, glove, stocking, tree, candy cane, snow flake, and sleigh out of Post It- Full Adhesive Papers using the Cricut Christmas cartridges listed above.

The Gingerbread man was cut from Just Because Cards and inked with white pigment pen


Cut the layers/or blackouts for the two-tone ones or cut a doubles using different colors and cut the part you need as in the hat, stocking, and glove.

The Post-It paper makes it so easy to cut the intricate cuts for the sleigh, candy cane, etc.

Decide your layout for the blocks to make sure they all fit and still have the stitching showing on the top, bottom, and sides

Stick the numbers down onto the blocks (No adhesive required since they are self-adhesive)

Adhere every other block with a pop dot so that it will stand up from the calendar

Adhere the rest of the blocks with adhesive

Adhere layers to items that have them (which is everything but the star, gingerbread man, and snowflake

Stick all the Christmas Goodies onto the numbered blocks that you have pop dots under

Put it in a picture frame if you have one that size, or glue a magnet on the back and put it on the fridge or front door if it is metal.


Now for some blog candy!


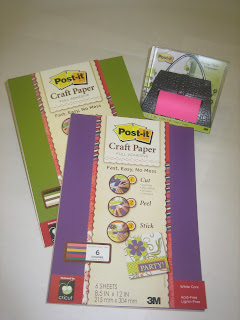
Post-it has donated some wonderful Post-it paper and a Post-it paper purse dispenser to be given away to one lucky follower!!  You can find this paper in your craft stores such as Joann's, Michael's or online at Amazon.com 

To enter to win:

1) Please leave me a comment and be sure to leave information where you can be reached if you win!  If you become a follower, it makes it easier and eliminates the need to publish your email address.  If you are on email subscription, click here: to go to the blog to enter a comment for a chance to win.


2) Become a follower, if you haven't become one already!

3)  Leave a comment on each of the blogs with a way to contact you.  Some of the blogs are sharing their own blog candy as well.  I will use Random.org to determine the winner on Monday from all the entries.  

4) For extra chances, post a link on your blog, facebook, twitter, or other messageboards etc. and add another post telling me where you posted it.  (This is not required but, adds additional chances)

Also....Enter for your chance to win....CHAMPAGNE EXPRESSION AND BROWN LEATHER TOTE & A SCRAP'N TOTE also, other prizes such as a Gypsy!!  Click here for details on how to enter!

Here is the blog list for today:

SWEETSASSYDIVA DESIGNERS!


SweetSassyDiva You are here!

If you arrived here first, you are in the right spot. Your next stop is with Rebecca at http://creationswithbecka.blogspot.com/ to see all the wonderful projects that everyone made! 
Special thank you to Post-it for donating the wonderful blog candy!

Be sure to check back tomorrow for some more projects.  Myself and the SweetSassyDiva Designers create new projects daily. 

I hope that all of our creations have gotten you in the crafty mood and that the blog hop inspires you to create some beautiful Holiday projects. 

Happy Holidays!
- SweetSassyDiva