MyFreeCopyright.com Registered & Protected
Showing posts with label Lyrical Letters. Show all posts

May 16, 2012

Creative Teacher Gift!

Lori here from ScrappinMyStressAway with my project for the challenge ~ 3 or more cartridges.

I wanted to make something special for Tanner's kindergarten teacher.  Mrs. Stock is an awesome teacher! I wanted to personalize something for her and kept coming back to a tile.

I started with gold vinyl, but the gold seemed thin and I had some issues with it bubbling and tearing.  I was ready to scrap the whole project and started removing the gold words and decided to leave the apple.  I kept thinking that a golden apple is kind of like an academy award for teachers.....so I kept going.

Here is my screen shot.  I used several words and icons from 15 cartridges:  Cheerful Seasons, Cindy Loo, George, Graphically Speaking, Gypsy Wandering, Hannah Montana, Home Accents, Home Decor, Locker Talk, Lovely Floral, Lyrical Letters, Makin' the Grade, Elegant Cake Art, Nursery Rhyme and Plantin' Schoolbook.

I opened a 12x24 mat and put all of the words and icons on my mat.  I started with Mrs. Stock (used a heart instead of a period) in the center.  I like subway art and wanted to make this look like some.  The words I chose are: discover, create, patience, inspire, transform, direction, explore, #1 Teacher, guide, adventure, learn details energy and 2011-2012.

It took some time to move words around and size them to get my final piece.

I erased the apple from my screen and cut out the rest in black vinyl.  

When you cut vinyl, set your Cricut to 3-3-3 (speed, pressure and blade depth) for a kiss cut.  I use my Cricut pokey tool (dental tool) to weed out the extra vinyl pieces.

I usually use clear contact paper with vinyl, but I was having trouble with the amount of stick and my pieces were tearing and not clinging to the tile.  I was getting frustrated not knowing if it was the gold vinyl or the contact paper or a combination of both.  I bought the ProvoCraft transfer tape and had much better luck!

I use my scraper to burnish the vinyl to the transfer tape.

I used my E2 and set it to cut on Vinyl.  You can see here that the blade did cut through the paper backing in a couple of places.  I honestly have better luck with my E cutting vinyl, but it is a pain to dig it out for one project!!

I bought my 12x12 tile at Home Depot.

  Here is my tile with the gold apple still on it.  I set the transfer tape right over it, burnished the vinyl into the tile and peeled the tape off.

Here is my tile all finished up!  I just need to get an easel so she can display it in her room.

Thanks for having me over today Bobbi Jo!!

May 9, 2012

Plant some Love!

Happy Mother's Day Week!!!  This is a fun week for me ~ it is my Birthday Week and Mother's Day!!  Lori here from ScrappinMyStressAway with a fun project that my daycare kiddos made for their moms.
I got this awesome painting idea from Teach Preschool which is an awesome blog I get many ideas from for my daycare kids as well as my son.  I bought these clear plastic squeeze bottles from Wal-Mart in the Wilton section and filled them with paint.  Yes I took the kids shirts off since I used acrylic paint.

Even the little ones had fun.  Only one tried to eat the paint!!!

We turned the 4 inch clay pots upside down and dripped the paint on.  This was easy and not nearly as messy as I feared.

While the kids were at nap, I got out my Gypsy and some vinyl.  I used Lyrical Letters and sized the "m" to 2.92 inches and the heart to 3.92 inches (1.17 inches if you use Real Size).  I copied enough to fill the mat.

Because we used such bright colors, I thought black would show the best.  I cut out the vinyl using the vinyl setting on my E2, but if you are using a regular Cricut you set your machine to 3-3-3 (blade depth, speed & pressure).  When I weeded away the extra vinyl, one of my "m"s tore ~ good thing I cut out extra!!

I used my scraper and clear contact (after I de-sticked it a little on my jeans) to transfer the image from the paper backing to the flower pot.


Once the pot is dry you can adhere the vinyl.

It is cute, but hard to see all of the letters at once.

I also put the letters and heart on one at a time since the pot is curved.  I did not want the design to appear wonky!
This is the one Tanner painted for me :)  The other kids will be planting their flowers on Friday so they have a better chance of staying alive for Mother's Day!!!

Have a wonderful Mother's Day to all of the mommies, mother-in-laws, step-mothers, and surrogate mommies out there!!

September 5, 2011

Mini Album!

Good Morning! This is Jen from 3 Cats and a Bug. This week at SSD, the DT is honoring Grandparent's Day!

Come January 2012, I will be a Grandma to a little baby boy! The timing was perfect, we just found out they were having a boy, I've only had Fancy Frames for a short time and Grandparent's Day is just around the corner. It seemed a perfect time to make a brag book for the other new Grandma.


I used 5 different frames, repeating the first one for the back cover also. The front and back were cut @ 5X6.5 and the others were cut @ 4.75X6.25.


On each frame I cut the frame front, the back frame minus the inside cut (hide contour) and a 2nd frame front that I flipped.


The top of each frame was left open to slide pictures into. The outside of the back cover I used hide contour again to the inside cut, so it wasn't a frame. I used my Cinch to punch two holes and put it all together.


I added 3 ribbons to each ring.


I used another frame, cut @ 5X6.5 for a card front and I used my Cricut markers and Lyrical letters to "write" Happy Grandparent's Day".


Stop by 3 Cats and a Bug to see what else I've been up to!


Thanks for looking!

Be sure to enter the SweetSassyDiva Design Team Call!

June 26, 2011

Stripes for 4th of July Challenge!

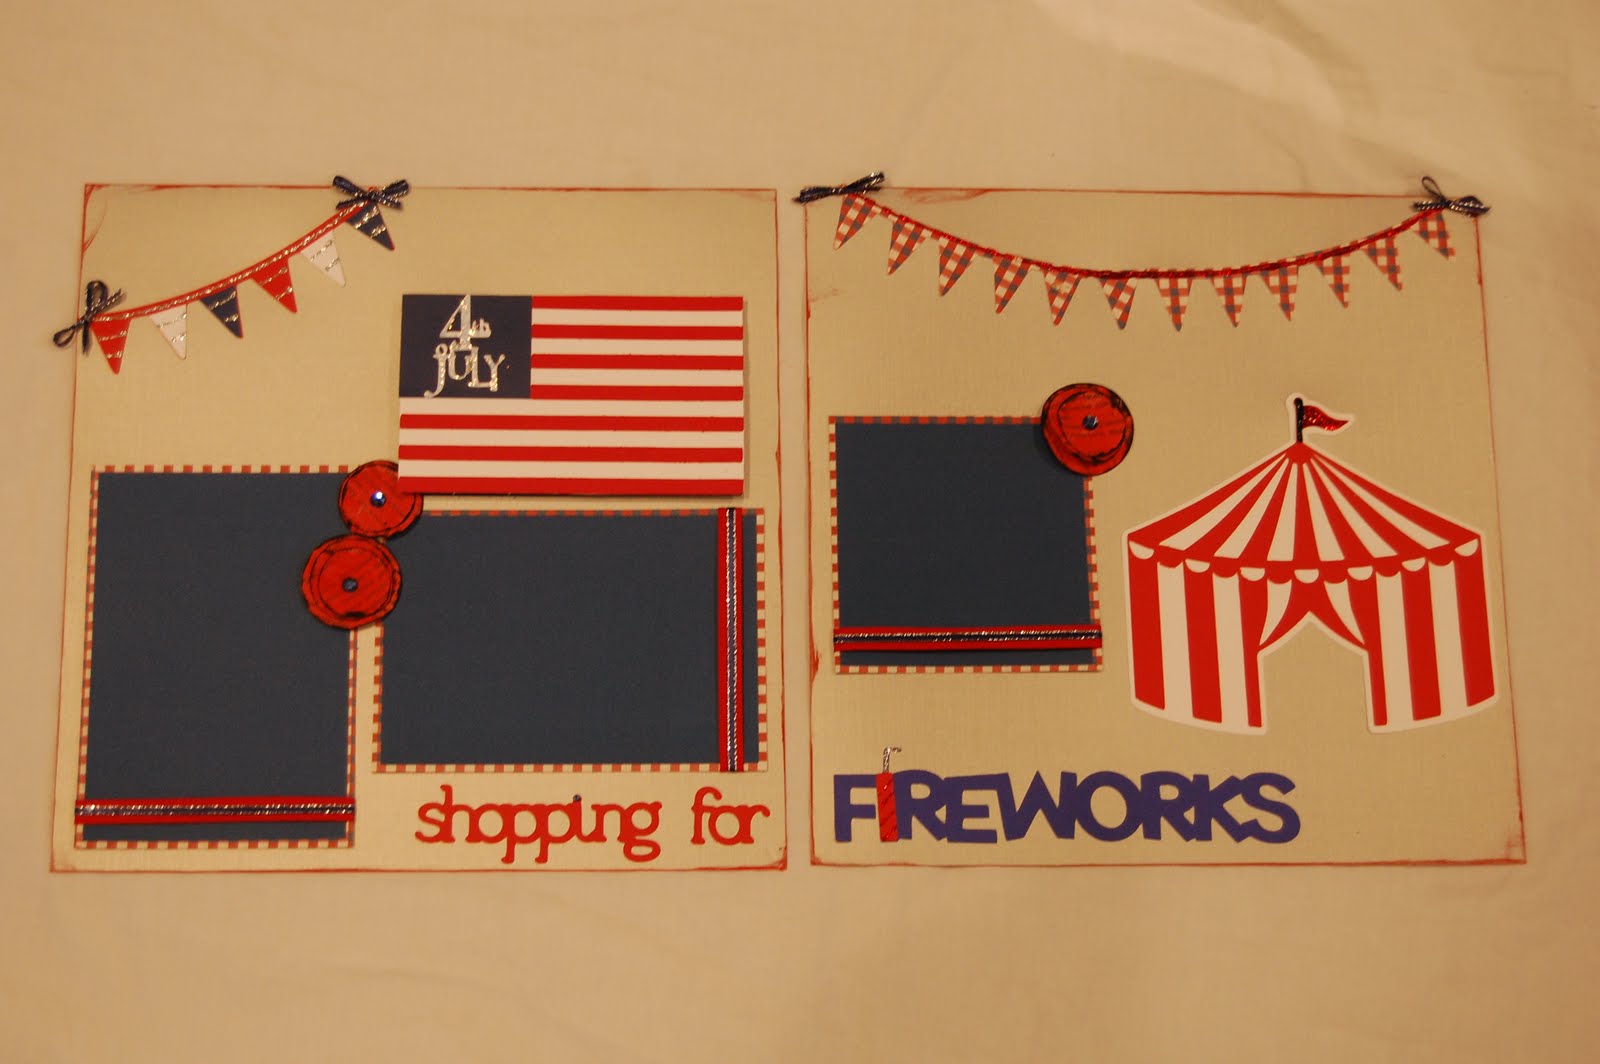
Hi!  Lori here from ScrappinMyStressAway!  My challenge for SweetSassyDiva was to create a 4th of July project using stripes but no stars.  This was not as easy as I thought it would be!!  I started out thinking about making a card and was thinking about the flag without using stars.  I thought it was too plain for a card, so I merged this idea with another one I started a while back ~ a layout about shopping for fireworks!

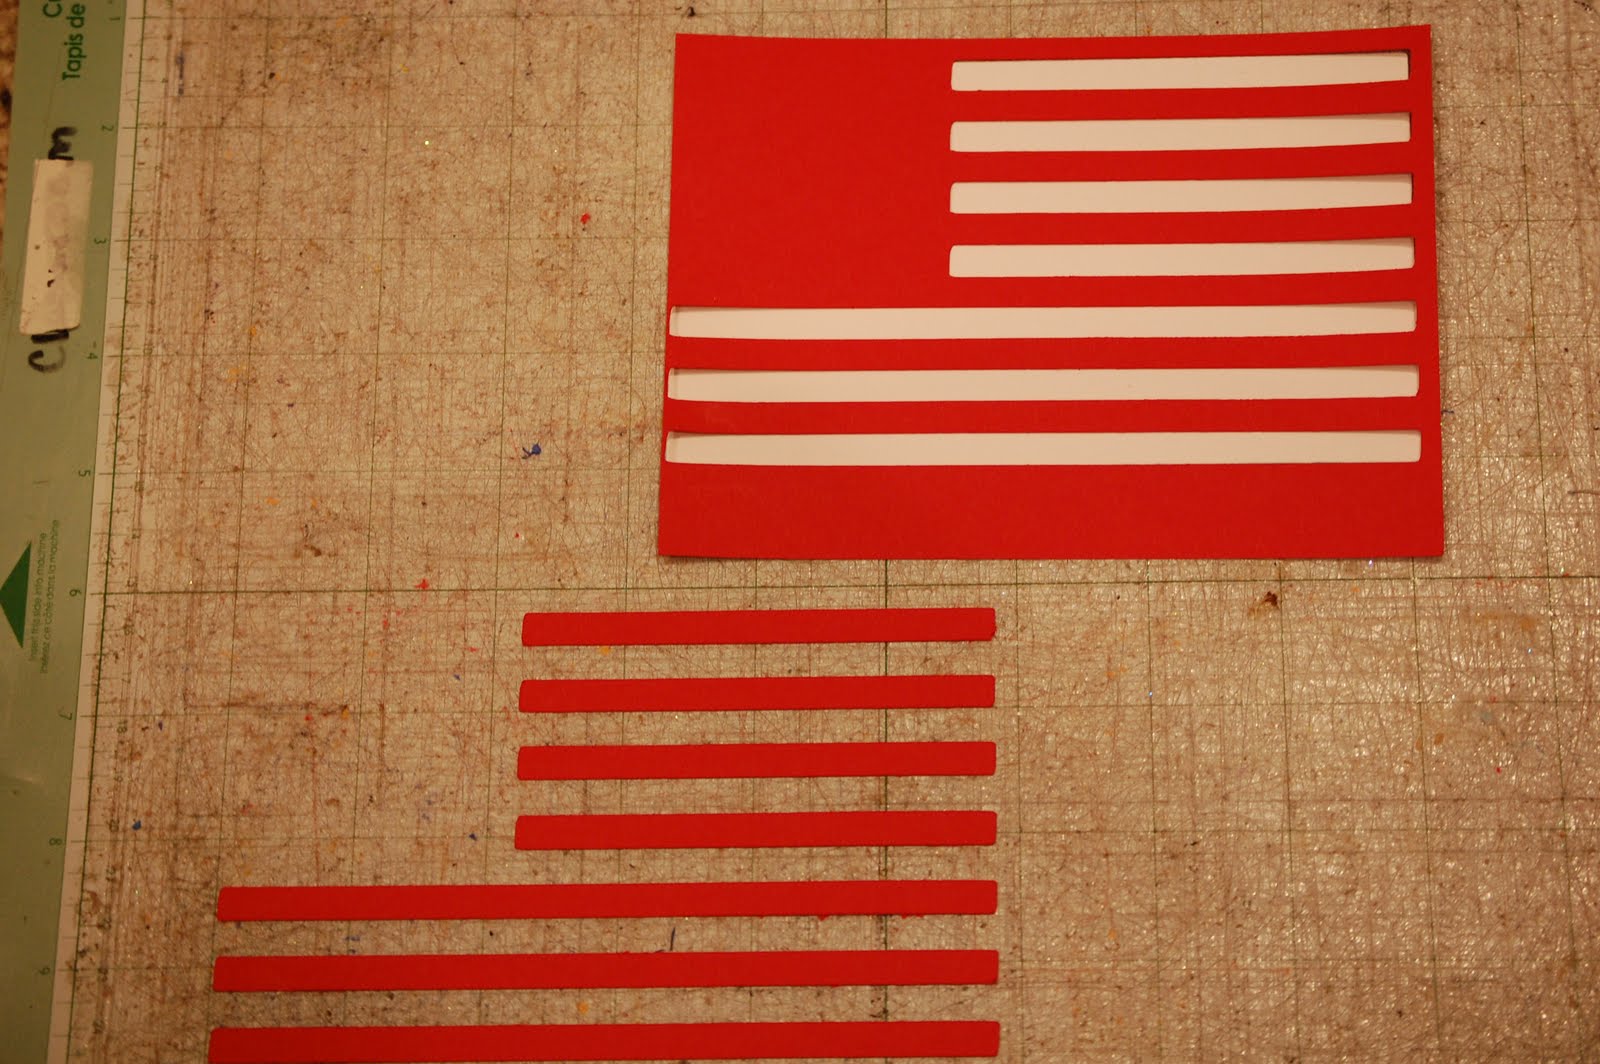
I found this flag on Independence Day and cut it out at 5.96w x 3.50h.  I cut out the flag in white and stripes in red.

I cut out 4th of July from Stand and Salute to fit in the square where the stars would go.  I wasn't sure if I was going to put white on blue or blue on white, so I cut out both.

I ran the stripes through my Xyron.

I used the negative piece as a template to adhere the stripes to the flag.

I pulled off the negative piece.  As you can see, I leave the pieces on the mat until I am ready for them.  This way I don't lose anything!!

Nope....did not like this look!

Much better!  But the blue looked too long, so I looked it up online and realized the first long stripe is white.  I trimmed the blue and resized and recut the 4th of July.

Then I cut out the tent and banners from Carousel.  The tent is sized at 6.58w x 5.75h..  I cut out the banner at 5.67w x 2.23h.

I cut out the base of the tent and more banners on the next layer.

I used the font on Batman for the word FIREWORKS at 1.31h.  I cut an extra I in red and welded a fuse (a lower case L from Lyrical Letters) to the first L.  I welded the fuse to the L and welded the word together.  I welded and cut out the words shopping for (at 1"h) from Lyrical Letters

I cut apart the blue and white banners and glued them to the red one.


I took these circles (3 different sizes) that I punched out from a thesaurus.

I crinkled them up.

I painted them red with acrylic paint.  I used a little black paint to ink the edges.

I layered them into flowers with a blue crystal in the center.
I took my flag and made it into a secret journaling flap.  Or maybe I will have an extra picture to stick inside...

I like hidden photos and journaling!!

Here is my little firework.  I used stickles to stripe it and to cover the fuse.

I inked the edges of the paper with red paint.  I added stickles to the 4th of July.  I added stickle stripes to the banner.  I also added a stripe of ribbon (or two) to the photo mats.

Here is the other page.

In our family, shopping for fireworks is a big tradition!  My husband (biggest kid in the family) goes as often as I allow him to!!  We have a big party every 4th!

Now, what to do with my discards and scraps.....well make a card of course!!

  
I kept with the stripe theme and glued down some stripes.

I took this scrap and just cut out three circles.  I crinkled them and inked the edges with black paint.

I added some gems and the white 4th of July (the one that was too big for the flag)!

Thanks so much Bobbi Jo for having me on your blog for the 4th of July Stripes Challenge!!!
,