MyFreeCopyright.com Registered & Protected

October 31, 2011

The Magic of Winter!

This is Jen, from 3 Cats and a Bug. Part of the requirement to join Sweetsassydiva's design team was doing a Tis The Season project. For my project, I decided to do a Tri Shutter card with more non traditional colors.


Tri Shutter cards look like they may be difficult to make, but they really are super easy. You start out with your card stock cut at 5.50 x 12. Next you start at 1 inch down from the top and 2 inches in and cut a line to the 10 inch mark. Do the same thing again only 1 inch up from the bottom. Now you score your card at 2, 4, 8 and 10. It should look like the photo below.


I decorated my card using two different patterned papers, but you can use only one if you like. I also like to have my patterned papers to be smaller than the card stock. That's also a personal choice, so the sizes you cut depend on what you want your card to look like. I also used my color box chalk to ink the outside of light colored paper.


You can see the green borders once I attached my paper.


I did the same thing with the darker patterned paper, except the inking.


Now it's ready to decorate! Around my house, all winter long and sometimes even into spring, you'll hear me say "tis the season!" to my husband. He's a born and bred Texan! He moved to Wisconsin about 11 years ago and he's never totally adjusted to our winters. After the first winter, he's hated snow and the bone deep cold. So every time it's really cold or the snow flies, I just tell him "tis the season!" I couldn't resist making him a card with that saying on it. lol With the help of my gypsy, I was able to lay out several colors of paper on my mat to cut everything except the words.


I used Winter Woodland for almost everything.

The snow man and woman were cut @ 4.5 with their layers. I also used a black pen and stickles on them.


The mittens were cut @ 2. I used my Gypsy and hide the scarf. I used stickles and gems to dress them up.


The hat was also cut @ 2 and I used pink stickles on that one.


"The magic of winter" was cut @ 3, although I tweaked it a bit to fit in the boxes the way I wanted it to.


"Tis the season" was cut from County Life (my favorite for fonts at the moment!) at .75.


The stamp shape behind the words came from Sentimentals and was cut @ 2x 3.75.


Thanks Bobbi Jo for having me as a design team member again!

Thanks for looking!

October 30, 2011

Holiday Note Pad!


This Holiday Note Pad was made using the Imagine and the Imagine Snow Angel cartridge.


I started by printing a full sheet of the snow flake paper on page 39.
This is then cut down to 10 3/8” x 12 “
Score and cut  according to the following diagram:
Fold the bottom flap up to the inside and attach the sides with a good adhesive. Attach the memo pad to the right inside with strong adhesive. Fold the top along bith score lines and attach with adhesive.


Using the shapes that come loaded on the Imagine, choose the square and fill with the bonus content found on page 28. Size at 8.5 inches and print on white card stock. Cut to 8" x5 1/16" and cover the front. I put Crystal Stickles on the snowflakes.


The house on page 26 is cut at 3.5" with all the layers. Liquid Pearl and glitter gel pens were used to add accents to the house. It was attached with dimensionals.


The snowflakes on pages 18 and 19 were cut at 1.6" with all the layers. Red Stickles were added and they are attached with dimensionals.


The closure is cut at 3.5" x 1.25 " from the same paper. The corners were rounded with a corner chomper. The clasp is a magnet from Basic Grey. I added some cotton for smoke from the chimney, red twiner and red seam binding along the edge. I sponged all edges with Stampin Up Bashful Blue.


On the inside, I used white gel pen to add stitching lines.


Supplies needed:
Imagine
Imagine Snow Angel cartridge
White 12 x 12 paper
5 x 8 note pad
Strong adhesive - I used red line tape
Basic Grey magnet
Twine
Seam binding
Stickles
Liquid Pearl
Gel pens
Cotton ball


I had so much fun making this project. I hope you like it.


As always, thanks for stopping by :)

- Mindy

October 29, 2011

Happy Fall!


Wait did I mention how much I love my Imagine. Here is another project from Misty over at The Daily Scrapper.
I made this card using the cuts from a cricut Lite cartridge Celebrate with Flourish and the patterns from Imagine More.

October 28, 2011

Count Spatula Scary Face Pancake


We decided to make some Count Spatula Scary Face Pancakes with the kids to celebrate Fall and Halloween.


We used candy corn for the toothy smile, mini Oreos for the dark ominous eyes and a cherry for the nose.

Here is another rendition with the teeth going another direction.


The best part is that the cooking and clean up was at IHOP! :) ok and it was free today for the kids! The kids loved decorating their own with the candies.

Can you believe that sweet boy ate more than one!?

You can go snag one for your kids too!

Celebrate IHOP's "No Tricks - Just Treats"! bring your 12-and-under kids to IHOP, Friday, October 28 from 7 a.m. - 10 p.m., for our free Count Spatula Scary Face Pancake Giveaway.

For more details,

http://www.ihop.com/countspatula/index.html


October 27, 2011

Fall Banner!

Fall is in the air or on my wall !
For this theme, I chose to make a simple banner using some of my favorite (but almost gone) Stampin Up designer paper.
The banner is cut from Country Life at 7.75". I attached the layers to the ribbon using some copper brads.
The letters are from Birthday Bash cut at 2.5". I inked the edges of the shadow layer with Marina Mist and used dimensionals to attach the top layer. I tied some brown bakers twine to buttons that came from one of my husbands old shirts and randomly placed on each letter.
 The rosette is made from 2 strips of 1.5" x 11" paper that is scored every 1/2" and accordion folded. I wish I could show how you to actually finish making these, but there are lots of tutorials out there to help you better than I can :) I can tell you that I have found the only way to hold them together is to dig out the hot glue gun !
I added a brown corduroy button to the center while the glue was still hot... it won't be going anyhwere :)
I apologize for the pictures taken on my well used crafting paper... as you can see, I don't use a new one for each project. Some day I will be better at adding the photo taking into my project plans ... yea , right.... that would mean I actually plan my projects instead of winging it ... hehehe
Recipe is as follows:
Cricut Country Life -  Banner cut at 7.75"
Cricut Birthday Bash -  Letters cut at 2.5"
Papers from Stampin Up
Ribbon from Stampin Up
Button From Stampin Up

- Mindy

October 25, 2011

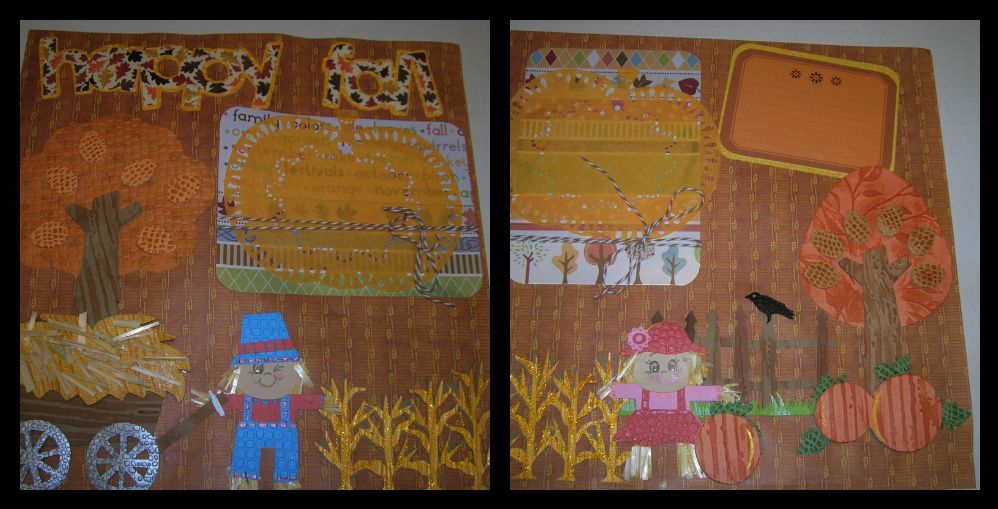
Happy Fall Layout!

I am so excited to show you my double page layout today for the Fall is in the
Air Challenge.  I had so much fun making this layout.  I started out
with the scarecrow couple from Simply Charmed.  I also used  Happy
Hauntings and Pop Up Neighborhood to complete the cuts.  The recipe is at
the bottom of the pictures.
Here is the left side. 
Here is the right side. 
Pages side by side.
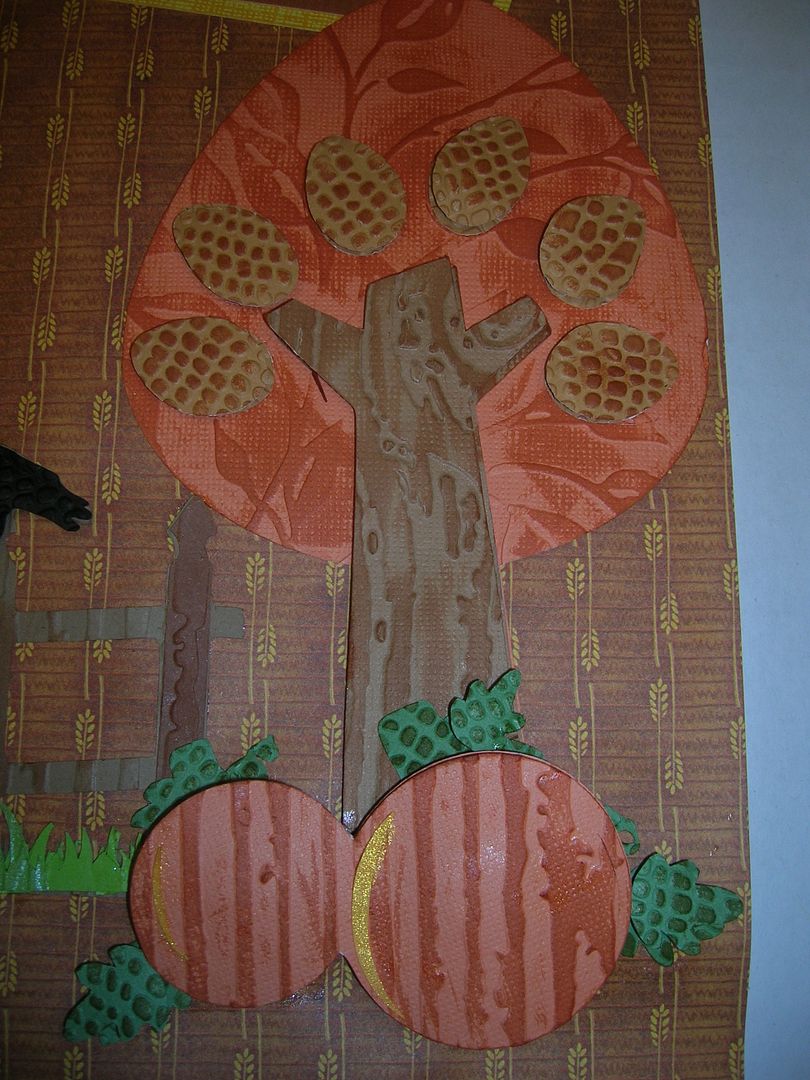
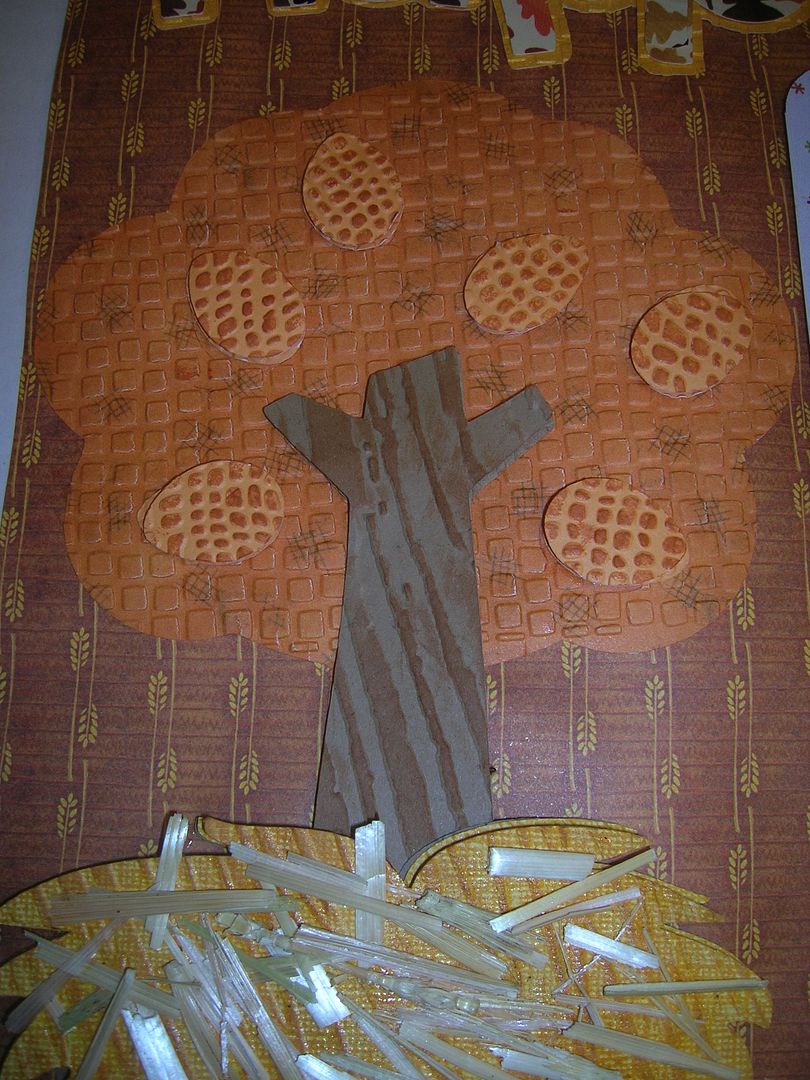
I used two trees.  I embossed the trunk, the leaves and the tree base. The
leaves are cut twice and pop dotted.  I also used Tim Holtz Ink to
highlight the embossing.
Pumpkins- removed faces using Gypsy, embossed, double cut and pop
dotted.
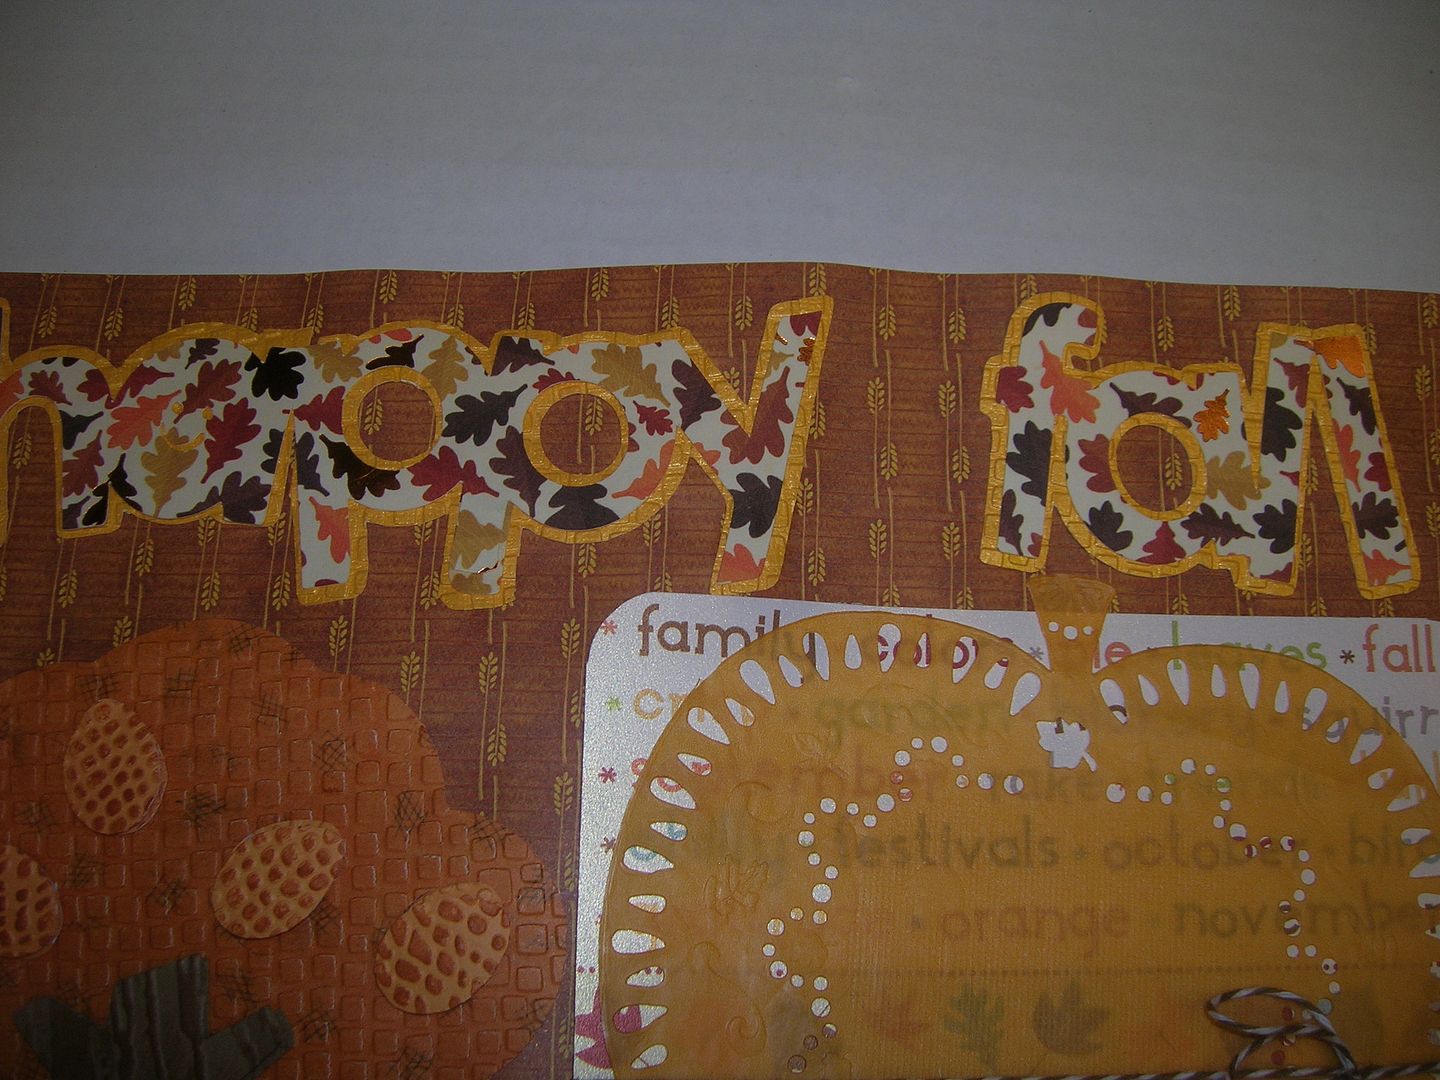
The doilies are from the Dollar Tree.  They had leaves and pumpkins.
 Aren't they pretty?
Close up of title
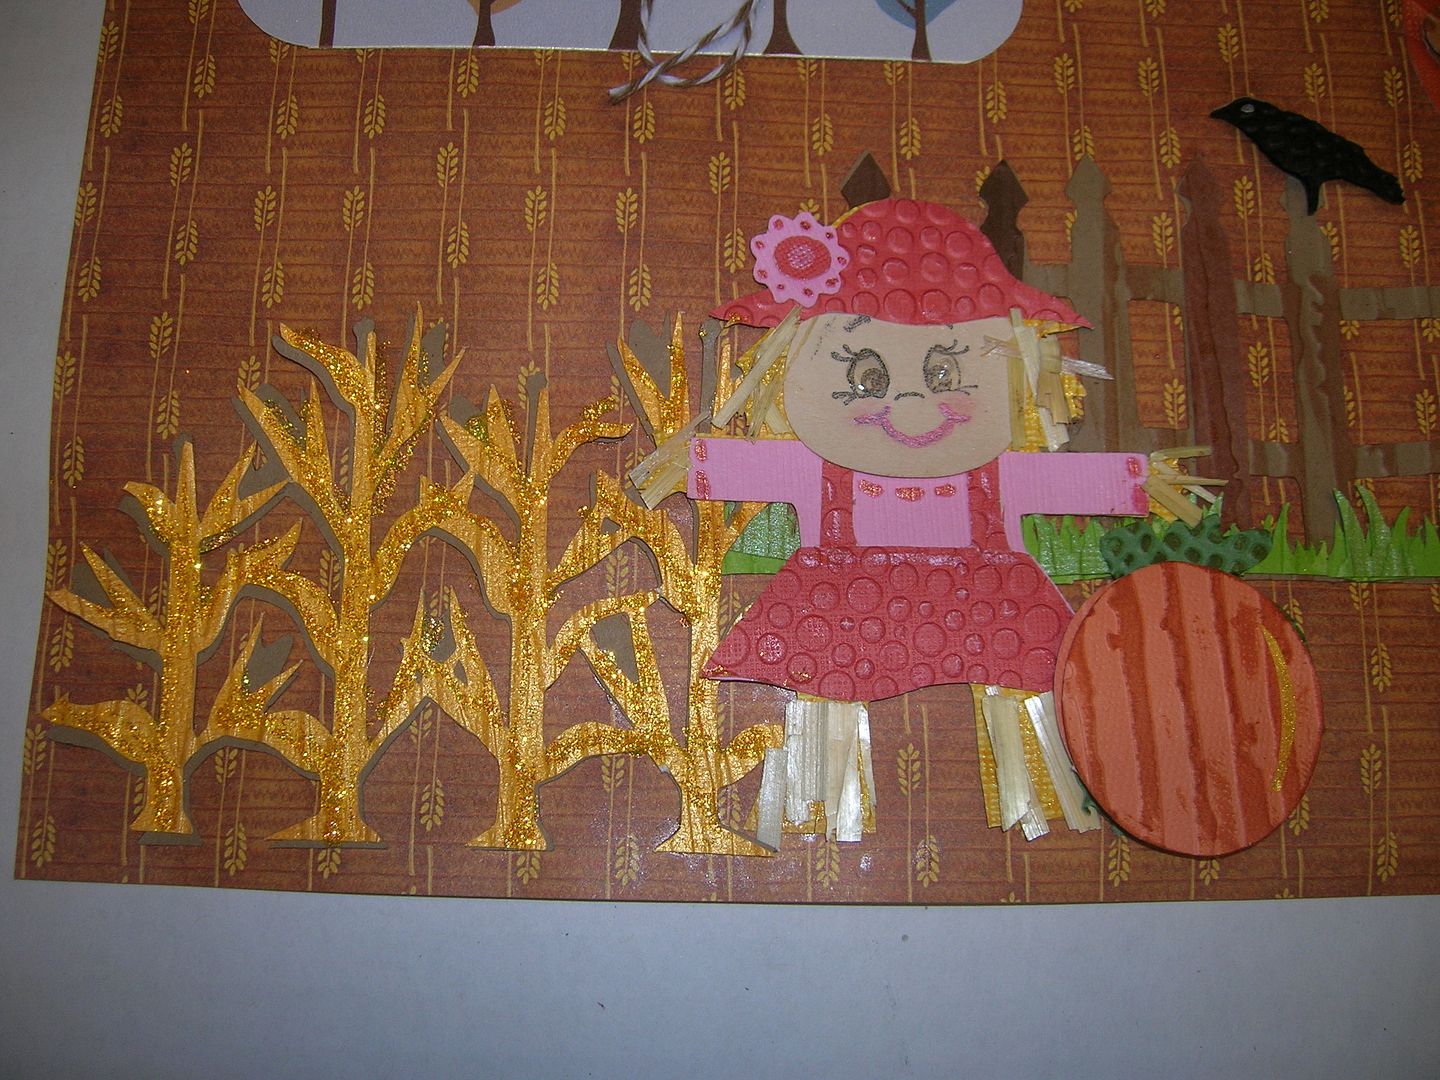
I used Peachy Keen stamps for faces, used chalk on face and added straw to
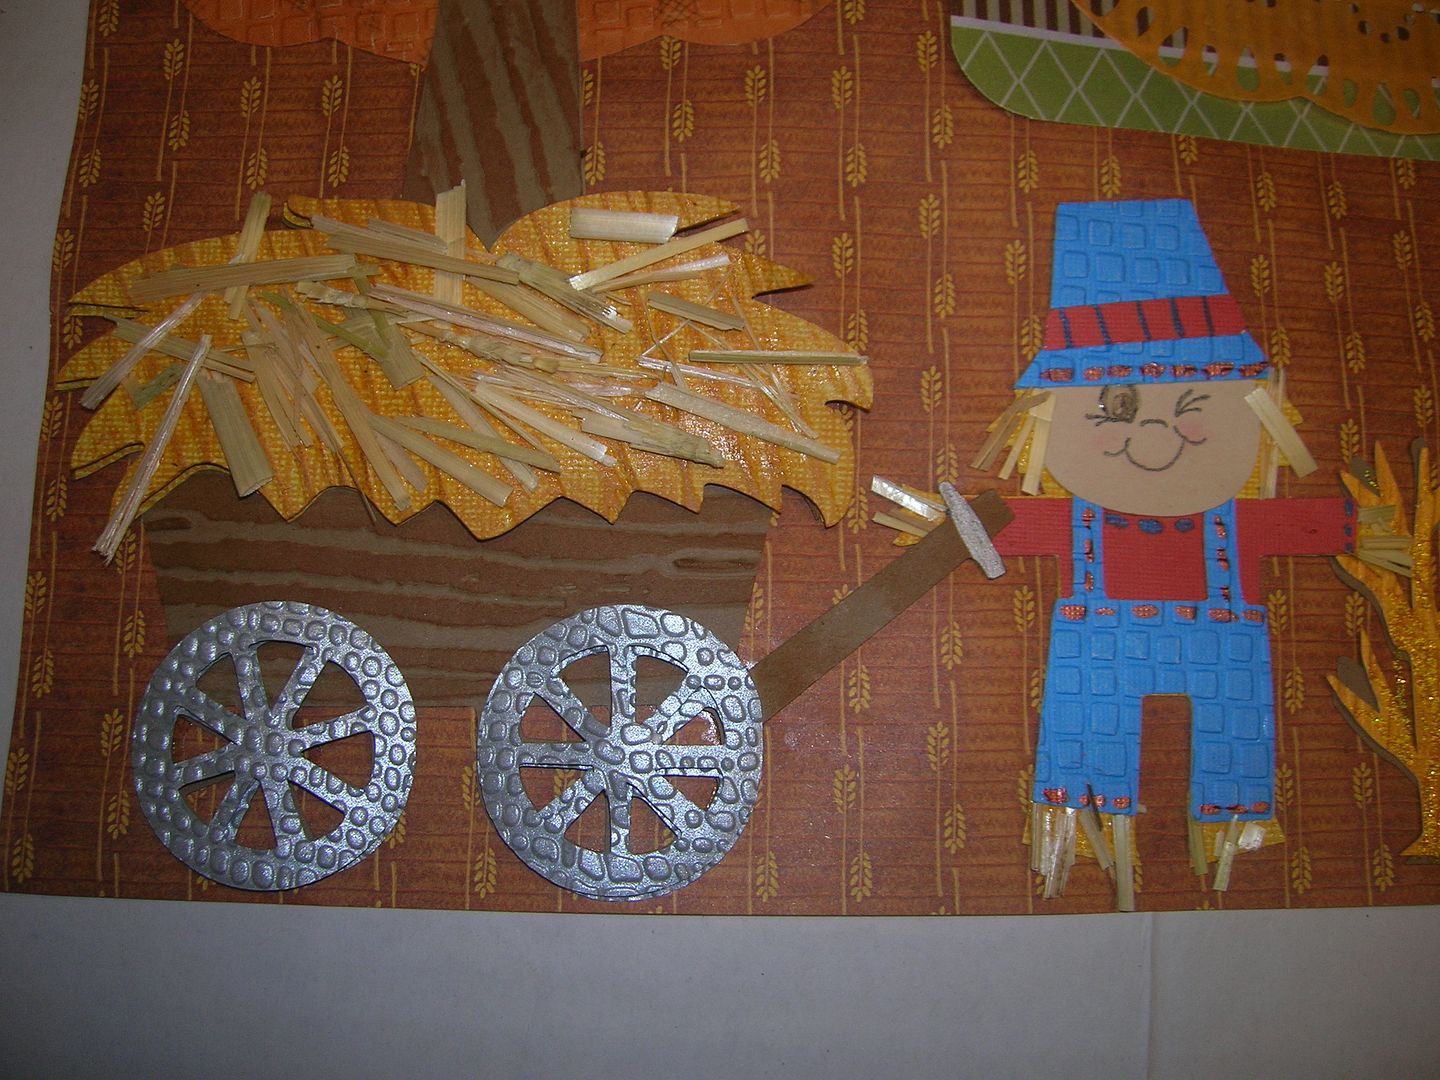
scarecrows.  Clothes are embossed and I added Smooch ink for details.

Hay wagon I used several embossing folders and added straw.  
Corn stalks embossed and used Smooch ink and a little bit of Stickles.
Recipe for Cuts;
Simply Charmed
Trees page 55 and 56 cut at 6 inches
Girl and boy scarecrow page 57 cut at 4 inches 
Happy Fall p. 57 4 inches 
Pumpkins page 60 cut at 2.5 
Happy Hauntings 
Fence with crow cut at  3  inches 
Pop Up Neighborhood
Wagon with hay page 58 cut at 4 inches
Corn stalk page 67 cut at  3 inches
Embossing folders used :
Cuttlebug
mosaic, leaf, Distresssed stripe, Bubbles, branches and Uneven bumps
Tim Holtz Bark 
I love the way it all came together.  Hope you enjoyed seeing my layout.
 Thanks for your comments and Happy Craftin.  Don't forget to come
back all week and see what everyone else on the DT has made.

- Suzanne

October 24, 2011

All around Fall!

I absolutely love fall colors. I could decorate my entire house in these colors for year round. They are so warm and inviting to me. So I really enjoyed making this wreath for my fall decorations.
All of my paper came from DCWV (mainly the new fall cardstock stack) and some from the neutral stack. I cut the paper into strips that were 4x8 pieces. I pinched the bottom sides together and glued them (could have stapled them but didn't try that one).
After I had them all glued and dried I inked the edges so there were no white ends on the larger end.
Then I glued the ends together to make a circle. This took a while because of letting it dry as I went. (patience was much needed and I lack it greatly)
Once I completed the circle and it was dry, I cut a 6' circle for the center of my wreath. I lined it with leaves cut from doodlecharms at 1' in red, orange and green. I then tied a bow (still a skill in developement) used floral wire to attach it thru the center of the circle and there it is my fall wreath.
*recipe*
dcwv cardstock
cricut cartridges doodlecharms, george and basic shapes
ribbon
lots of glue
TONS of PATIENCE
I have a few others that I made in the past week or so, and I thought I would add them as well. If you happened to see my birthday banner you saw all of the fairy princesses and butterflies that I had cut out for my daughter's birthday. I kept some for scrapbooking and still had some left over. I didn't want to just throw them away so I made a "memory wreath" for her. This is a great project for kids (considering the first time I made one I was in elementary school) Christmas is coming so this would be a fun indoor cold yucky day project....
I used a wire hanger, bent into a circle shape, the table cloth that I bought for the birthday party (cheap plastic one) and her decorations with some of the ribbon from the gifts. The good thing is nothing has to be cut straight just into strips. Tie the strips to the hanger, squish them together as tight as you would like until it is completely full and then glue on the rest....and there it is a simple wreath. (I used white trash bags in elementary school with plastic poinsettas)
Last bit and I'm gone....I've been busy ;) This one is the circle of friends that was made for my daughter's birthday party as well. I wanted something for each girl to be able to take with them, so it wasn't a "wreath" so to speak but could easily be made into one with wooden dows, or, styrofoam, anything you want. This is basically a 6' rosette with a fairy in the center (cut from once upon a princess) the banner (cut from blackletter) is upside down and the girls names were glittered in them. The birthday girl takes center stage. I asked for favorite colors before the party, or room colors, so that each one was tailored for each guest. I hope you enjoy.

Angie

October 23, 2011

Fall Card

It's great to be back for another week and another challenge at sweetsassydiva. This week our challenge was fall. I couldn't resist using the CTMH Art Philosophy cart and stamp set again. It has a fantastic oak leaf shape which is what I designed my card around.


Here are two of the stamp sets that you receive in the CTMH Art Philosophy package. The great thing is all the images have printed next to them the exact size you need to cut to match the stamp.


The leaf was cut at 2" and can be found on pg. 34. I cut 4 of them and then stamped with Olive, Barn Red, Sunset, and Autumn TerraCotta. These are beautiful autumn colors when used all together. Don't you just love Fall?!


The scalloped sentiment was cut at 2" and can be found on pg. 41. I cut it 3 times and stamped it in Olive, Creme Brulee, and Goldrush then cut apart to create layers.


The papers are from the Elemental line.


I hope you enjoyed my fall card and visit me at my blog tiggersscrapplace  I have many more projects made with the new CTMH project. If you need any CTMH products I'd love to be your consultant. Just stop by my blog and click the shop now button or you can go to myscrappyideas.myctmh.com
Hugz
Tina Gale

If you would like to order the cricut cartridge or this stamp set, please send an email to Click Here! and I will send you an invite to my CTMH party.

October 22, 2011

Hallo...Scream!

Hi There! Its Kim from Ricketts Cricuts! This week the Sweet Sassy Diva Design Team is creating different treat containers! One of my favorite treat containers are the sour cream containers. I make them for every holiday, party, or just because occasion! They are very fast and simple to make! To watch the tutorial click here;!

Here is my Halloween Sour Cream Container!

Recipe:

4inch by 6 inch Halloween Pattern DCWV paper
Black tag cut at 3inches from Art Philosophy
Orange tag cut at 2.75 inches from Art Philosophy
Black spider from Doodlecharms
Black tulle

I hope you enjoyed my post today! Be sure to check back each day for more creative treat box ideas! 

Kim :)

October 21, 2011

Lollipops!

This week we were asked to come up with something to give away...or for giving for trick or treating...something along that line. I decided to go for something sweet, since I'm not a big Halloween person. I do love fall though, and don't deprive the kids of trick or treating....I'm just not into the spooky side of things. So for my giving I'm making cupcakes for a marriage group that I attend, and am going to top them with these cute "lollipops" as my 3 year old insists that they are. These are easy to make, and turned out really cute. I am finding however that the things that I like the most end up taking more time then I thought that they would because of the smaller details.


These are the basics of what I used to make my toppers. The green strips were cut at 2 inches, and then edged on one side with my friskar punch. I then scored each of them at 1/2 in intervals, made the accordian fold. These will make the rosettes. I cut out 1 1/2 in circles in black cardstock (geoge and basic shapes) and 1 1/4 in jack-o-lanterns (gypsy wanderings)

I glittered the pumpkins and let them dry for a couple of days...the last thing I want is glitter on my cupcakes. I then glued them to the black circles. I made the rosettes out of the green strips, however I took the lollipop stick and glued it at the meeting point of the rosette. I then glued the cicle in the center and let it dry. After it dried I glittered the edge of the rosette with green glitter glue to add a bit more shine.

There ya have it, a sweet topper for a sweet cupcake.

*recipe*
cricut cartridges gypsy wanderings and george
cardstock in green, orange, black
orange glitter
green glitter glue
lollipop sticks

October 20, 2011

R.I.P.


This is Misty over at The Daily Scrapper
I love the way this super cute treat box came out. I am going to make 20 for my son's class. :) Using the Cricut cartridge Happy Hauntings, the skull is Layer 1 shift on page 39 cut at 2 "  and the box is page 101 cut at 10" I used a black coredinations sheet and cut it using fit to page on a 12 x 12 which ended up cutting at 10 inches. Then I cut mats starting at 3 X 2 1/4 and going down by 1/4 each time. The skeleton is a part from a different cut on real dial size and 2 inches. The patterned paper comes from Doodlebugs design pack. I have no idea where there the ribbon came from. :) Add in a white gel pen and lots of pop dots and you have a cute scary treat box!!!

October 19, 2011

Happy Halloween!

This week at Sweetsassydiva, we are making something for giving or receiving for Halloween. This is definately a challenge for me as Halloween is not my favorite holiday. But that being said, I had fun making these treat holders and matching cards for my grandkids.
I tried to take pictures all along the process starting with laying out the cuts on the Gypsy  I used Happy Hauntings and cut out 2 images at 2" and one at 3". for the really small layers I try to cut extras... seems like some of the pieces go missing when I have just one....


and putting the paper on the mat.


Next are the steps to put the layers together...


Now for the treat holder,  here are the sizes and where to score for the fold.


I used the 2" image for the treat holders and and the inside of the card and the 3" image for the card front.


My Supply list:
Card stock is all Stampin Up - Black, Whisper White, Pear Pizzaz, Pumpkin Pie, Old Olive, Basic Gray


The purple is from my scrap box as is the patterned paper.


The stamps and punches are Stampin Up


All of the other supplies are from my supply stash that has long since lost the exact names.


I hope you will check out Sweetsassydiva everyday to see what my fellow design team has to inspire you.


As always, thanks for stopping by :)


Mindy