This comes with the machine and in the video you can see the images on the screen. You can also blow the images apart to create layers rather than a flat image. It is your choice on how you want to create the image. You can also change the colors in each layer and still print it flat or as individual elements to layer.
Here is a picture of the 'owl grown up' image in three versions. Now, these are flat for comparison.
The middle image is printed as it was created by the designer. The top image and the bottom image have been altered on the imagine. To the right you can see a shadow of the owl was printed and the flat layer of the owl. Also, for this image you can chose to print his yellow wings separately too. There are a lot of possibilities and this is only a brief sample.
You could also cut out the images on your traditional cardstock if you have that beloved paper that you want to use instead. Or if you have some really ugly paper, you could flip over your cardstock now and print on the backside. This eliminates the wasted and lonely ugly paper stash you have. Although I am sure your local school would appreciate even the ugly paper! :)
I hope you enjoy the video and there is a lot of information packed in it as well. Grab your popcorn and drink of choice while you enjoy the show!
If you are on email subscription, you will have to go to the blog to view. The video shows the steps on the Cricut Imagine.
There is still a lot more information and other pictures and projects using the Cricut Imagine in my blog archives.
I have some more information, pictures and projects that I will be sharing with you this week. Please become a follower of my blog if you have not done so already. Be sure to check back for new projects and posts.
The information on my blog is from my own experiences and observations. Like other content on my blog, please feel free to link back to the blog. However, please do not take the pictures, ideas, content or such to your blog, messageboard, contest or such. Please share the url or link back to this site. You can also use the buttons below this post to share on your facebook, twitter account or to blog about it on your own blog.
As always, positive feedback is VERY welcome! I hope you enjoy my blog and your visit to my virtual home if you will. I hope that you will be a gracious guest and leave positive comments. It helps to encourage the efforts that go into extending an invitation for another visit.


1 comment:
Hi Bobbi Jo,
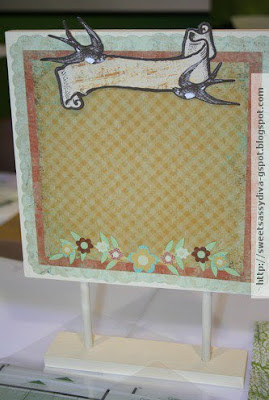
I stumbled upon your blog while doing my imagine research. You have a wonderful blog. I love this stand up sign project. I could see using this in so many ways. These signs would be great on my table at a craft fair. I am looking forward to purchasing an imagine and seeing what provo will add to the cutter. I am hoping they will add a software package and an ability to import graphics. Thanks so much for the info. I will watch for more of your great ideas.
Thanks,
Lysa
www.lysaandhueyink.blogspot.com
Post a Comment