MyFreeCopyright.com Registered & Protected

August 31, 2011

SweetSassyDiva Design Team Call!

Want to join the SweetSassyDiva Design team? Now through September 30th, submit your entry to join!

Please include 3 layouts, cards or projects that best reflect your design style. (Your favorites...these do not need to be new.) 

Also, submit one layout, card, gift idea or project using the theme "Tis the Season" that has not been posted anywhere before. Do not post it anywhere until after the design team call has been completed and announced.

This can be all about Winter Celebration, How you celebrate the Holiday Season, or other Winter holiday celebrations! It can be an altered item, handmade card, 12x12 layout, mini album, Christmas Card...surprise gift idea to wow us!

Please provide step by step instructional pictorial or video along with the recipe for the item. Be sure to use a Cricut Cartridge based project as after all most of the projects here you will be asked to use your cricut and cartridges so, that readers can get inspiration and possibly duplicate and play along with the challenges.

Please email including the recipe, directions and any other project details such as a cut file, tutorial and/or video. Email your entry to:  Click here!   In the subject heading, please label as "sweetsassydiva design team entry".

• Include your name, email address, the link to your blog, links to any photo galleries, and links to any other Design Teams you are currently on. (You do not need to have a photo gallery or be on another design team to be considered.) Also, if you are from a messageboard, which one and your screen name there. Are you a member of the cricut mb or cricut circle? (This is not a requirement.) Please include a brief bio/introduction of yourself.

Please indicate what die cutting machines [cricut, imagine, e2 expression 2 anniversary edition, expression, etc.] that you own as well as if you own the gypsy and what cricut cartridges. Or any other items of note or interest.  Also, how many cricut cartridges do you own?  Are you able to make a few go to cartridges sing and create your own cut files from george and basic shapes?  Do you jump on the first release and have to be the first one to have the latest cartridge?  Tell me a bit about your creative space.

The term will be for 6 months and the frequency of posting will be every other week miniminum with projects due on the Sunday before.

• Also, put in three sentences why you think you will be an asset to the SweetSassyDiva Design Team.
Please submit your application by 11:59pm EST September 30th.

Actually, you can submit older projects and only 1 is theme based and new. Do-able to whip up.

SweetSassyDiva Designers will be contacted by October 15th by email. The Design Team will be announced on the blog shortly thereafter.

Note: this is not a paid position nor do you receive any free product.  Although you never know but, I do not guarantee anything other than friendship and camaraderie among the design team and myself. 

Good luck!!

On a separate note, I am also looking for sponsors and affiliation submissions as well.

Photobucket

Candy Corn Galore!

Fall is in the air...the trees are turning gold, and nights are getting cooler. I love this time of year...I wish it lasted longer. Here fall comes and goes as fast as a bag of candy corn. Which brings me to our project of the week....Halloween banners. It's time to start preparing for all of the decorations needed throughout the season. I've never been much for the spooky, scary, part of Halloween so I went with something a little sweeter.
Yep you guessed it...candy corn. I cut the banner pieces from the Country life cartridge, then layered smaller banner pieces (triangles basically) to make the base of my banner.
I tore the very top edges of the white and orange triangles so that it wasn't a straight cut....candy corn isn't straight afterall. (I know because I think I went thru 2 bags while creating this one....only for inspiration of course.) I then placed an accordian rosette in the center so that I could attach my letters. I cut the letters from Blackletter at 2 in.
I also cut 2 jack-o-lanterns from gypsy wanderings at 2 in. To give them a little shine I used my heat embosser with some black embossing powder with a tiny bit of gold powder mixed in to it.
Then all that was left was attaching the letters, running the ribbon and hanging the banner. I used pop dots so that the letters would stand up a bit.
*recipe*
2 bags of candy corn (for inspiration)
yellow, orange, white and black cardstock
Gypsy and Cricut cartridges Gyspy wanderings, country life, black letter
ribbon
pop dots
heat embosser and embossing powder
possibly another bag of candy corn if the kids are around....Happy Halloween!

August 30, 2011

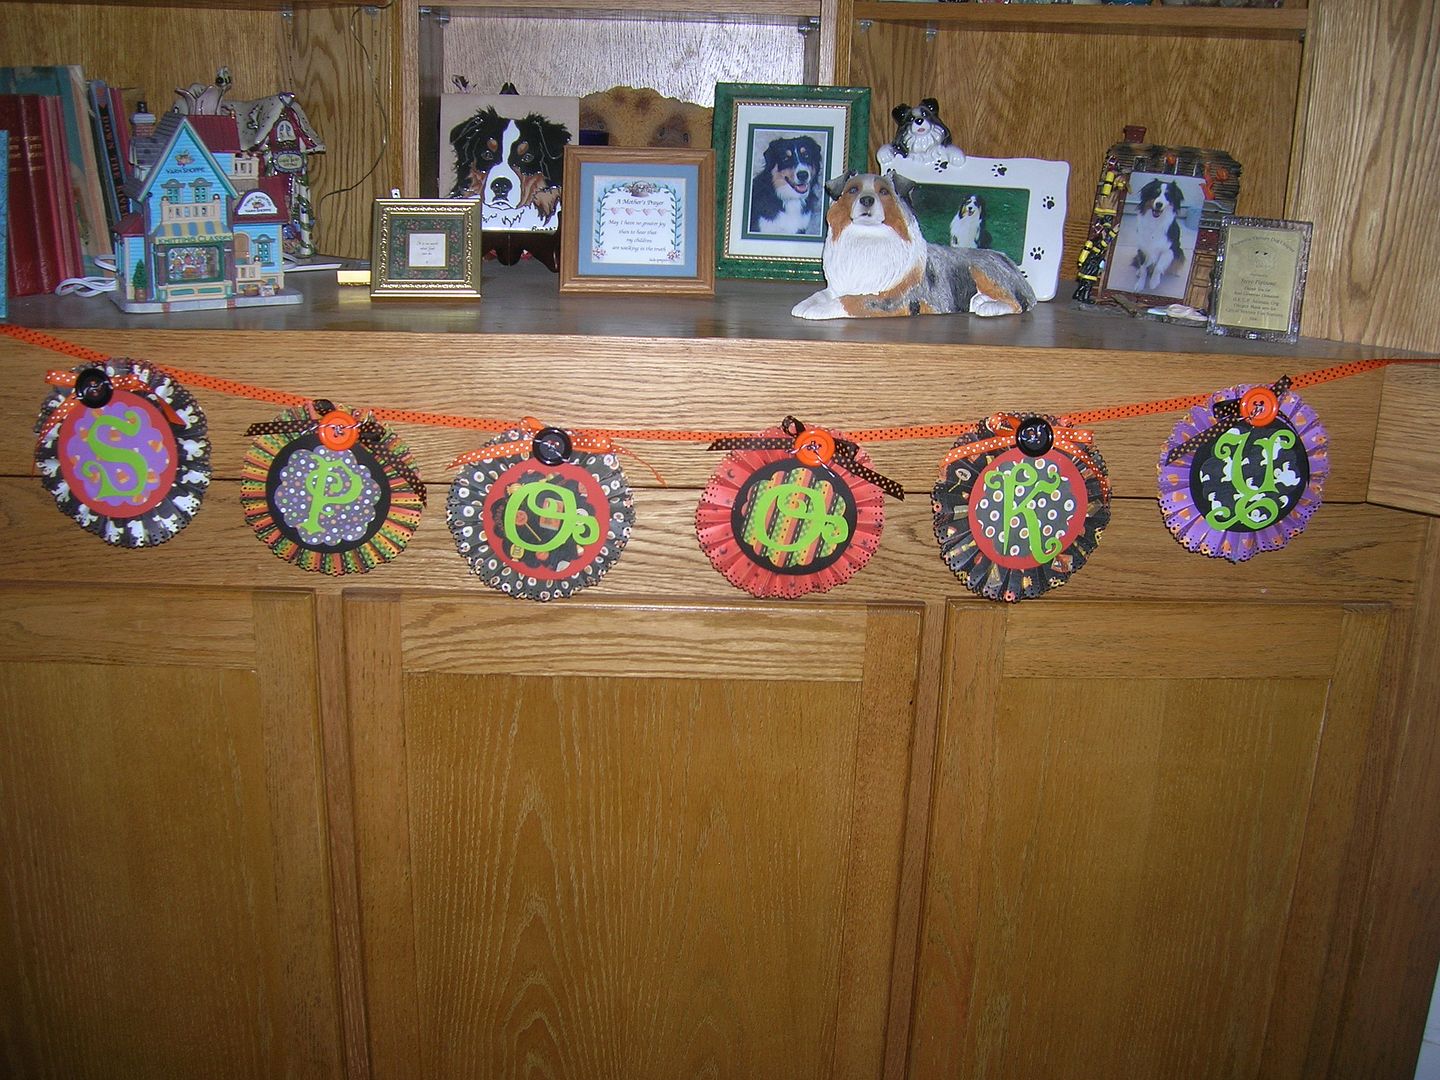
Spooky!

The challenge this week at Sweet Sassy Diva is to make a Halloween Banner. Now
is a great time to start on Halloween so you can get all your home decorating
ready for October. All week the Design Team will be sharing their Halloween
Banners so this should give you lots of idea to get started.
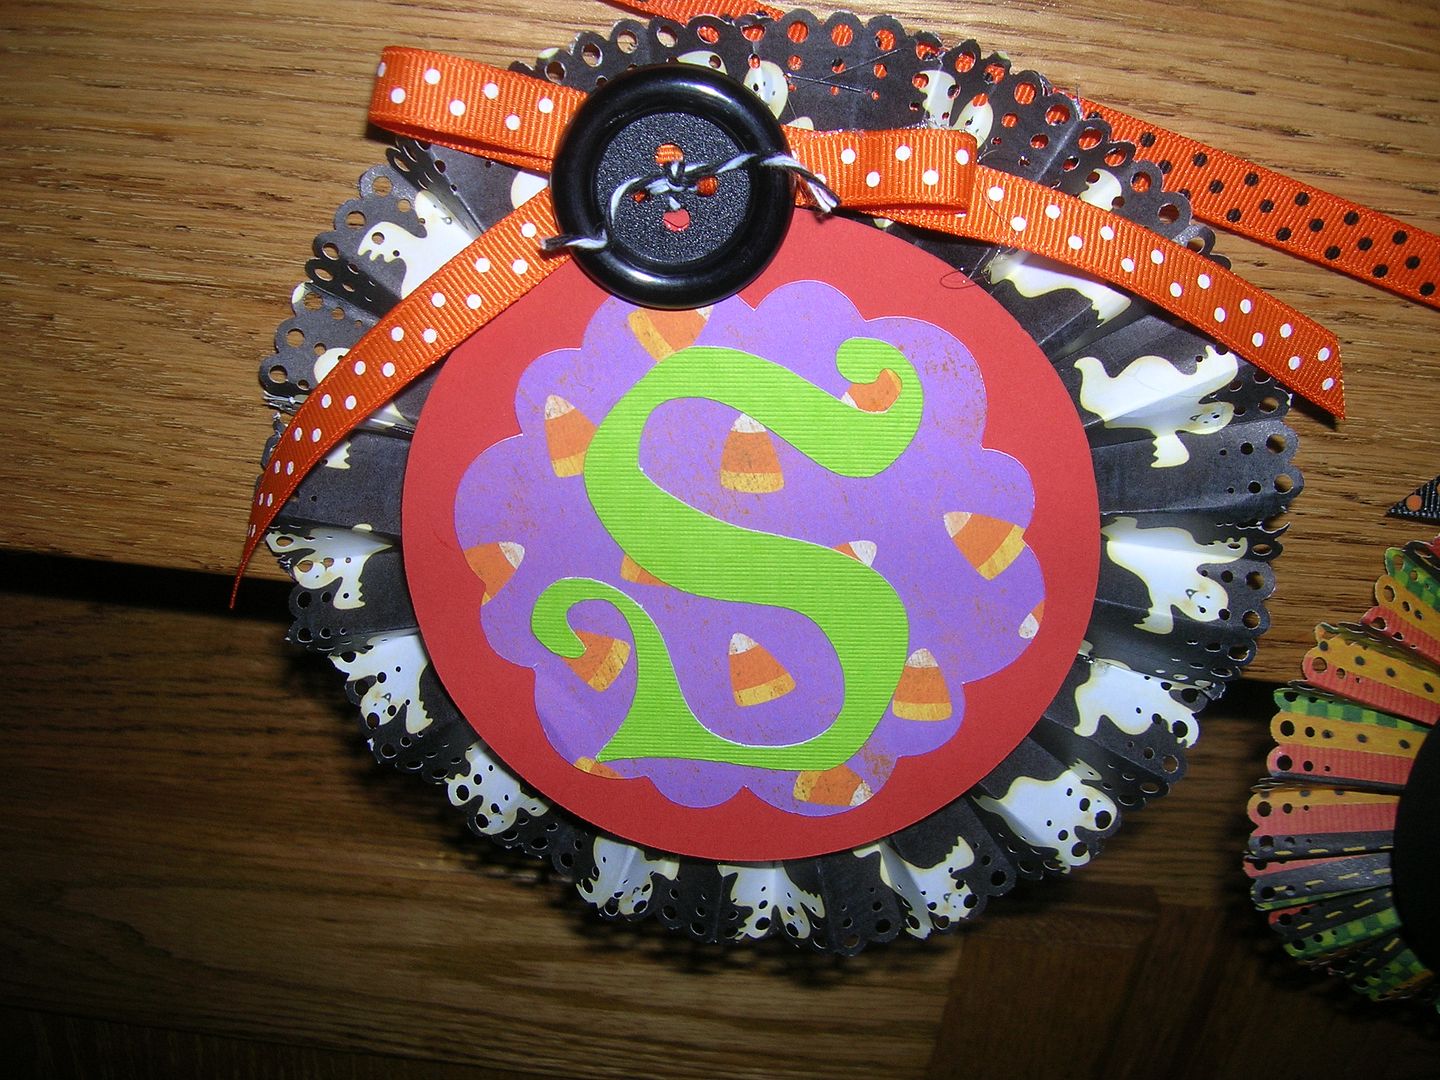
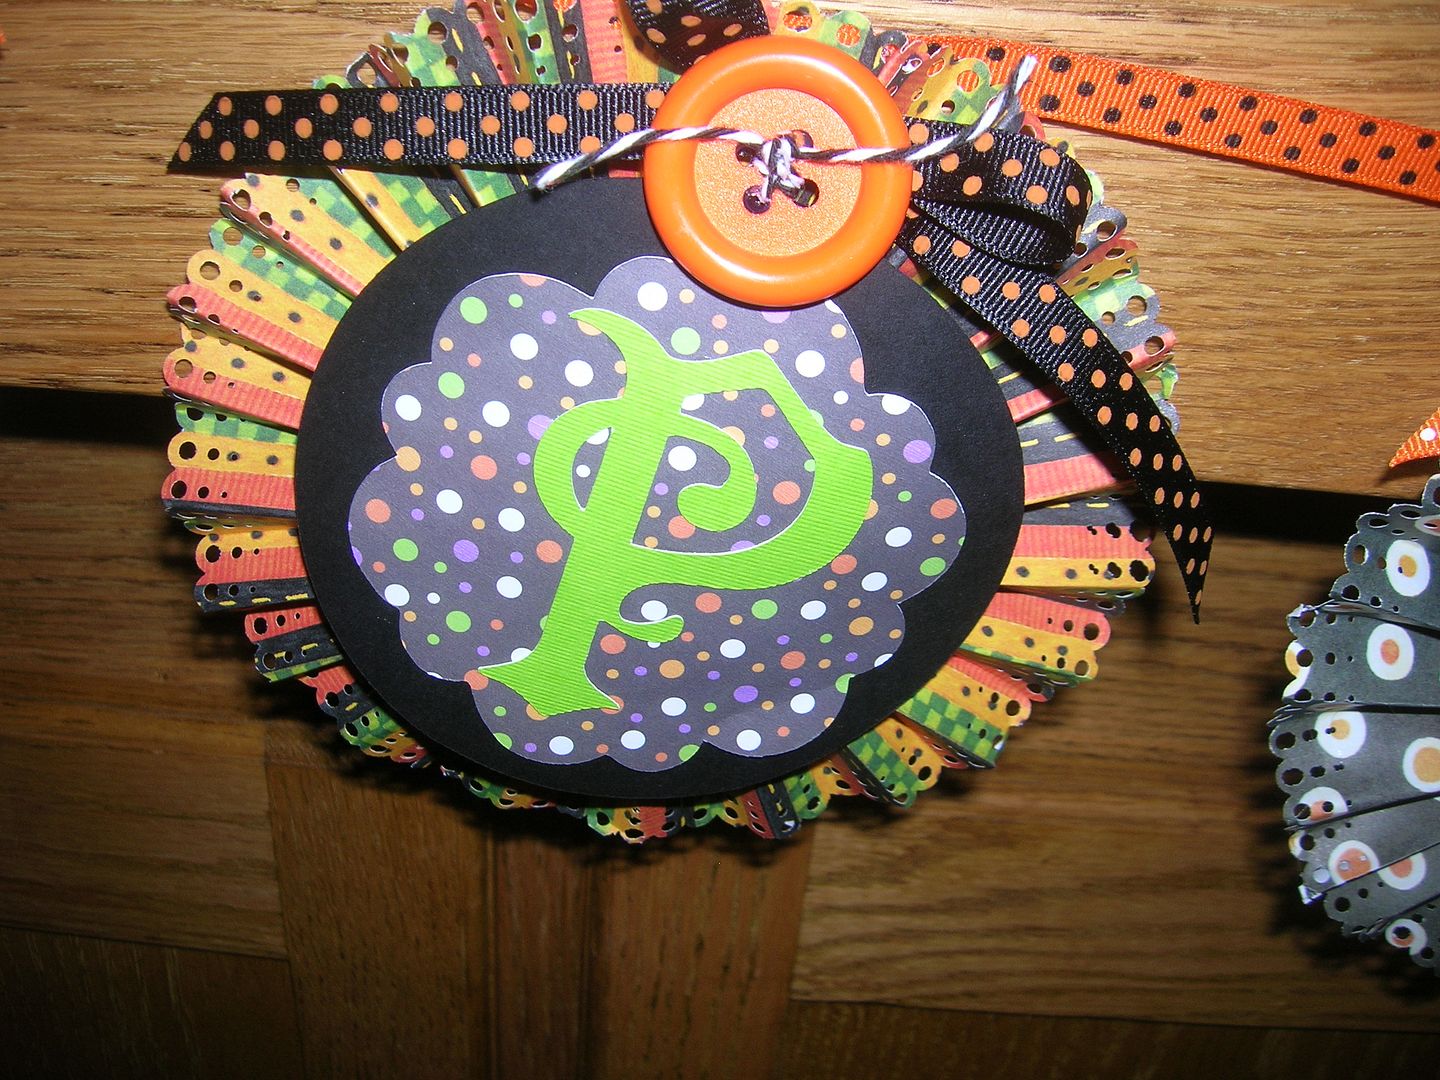
 Here is a picture of my finished banner hanging up.  
    
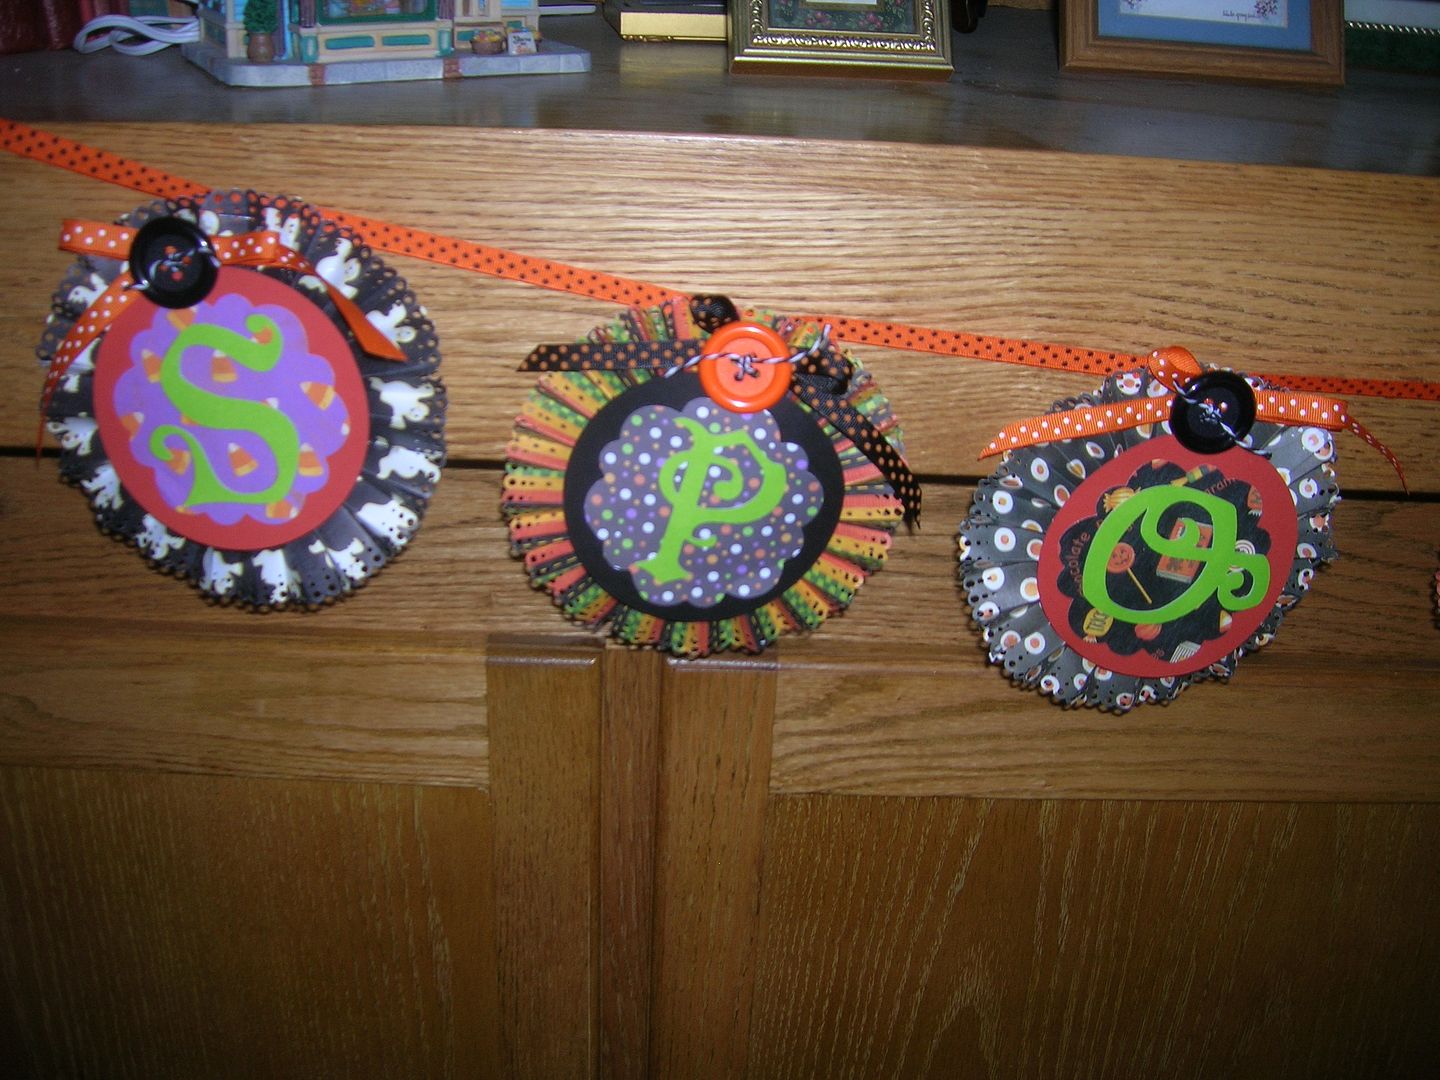
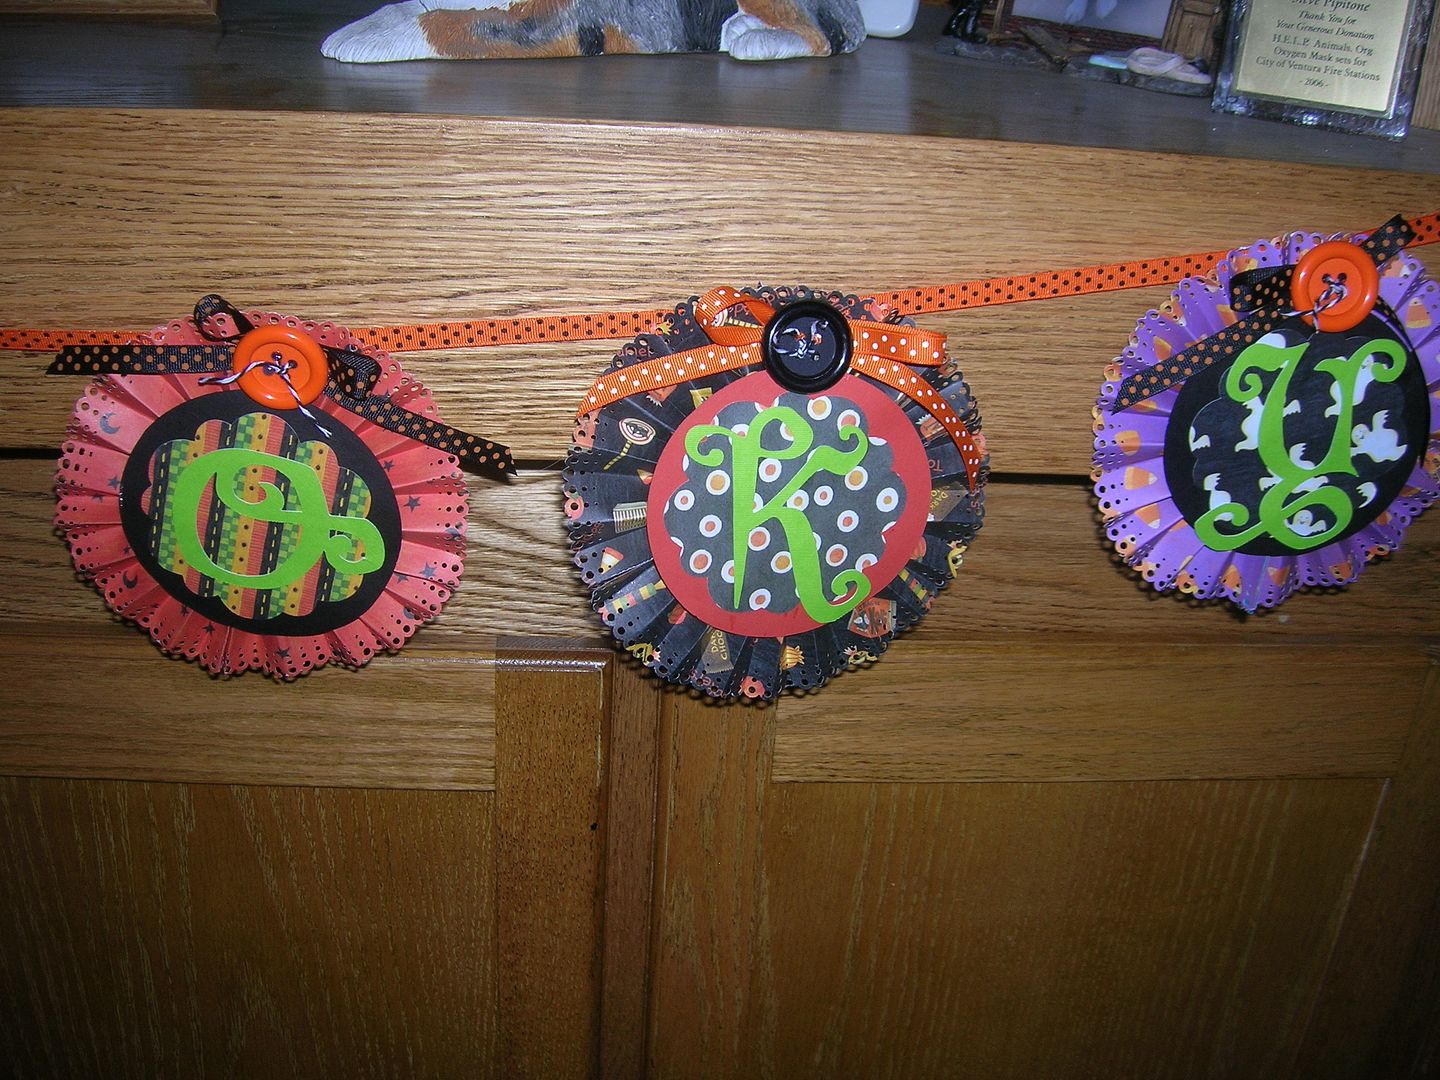
Here are some closeups.  
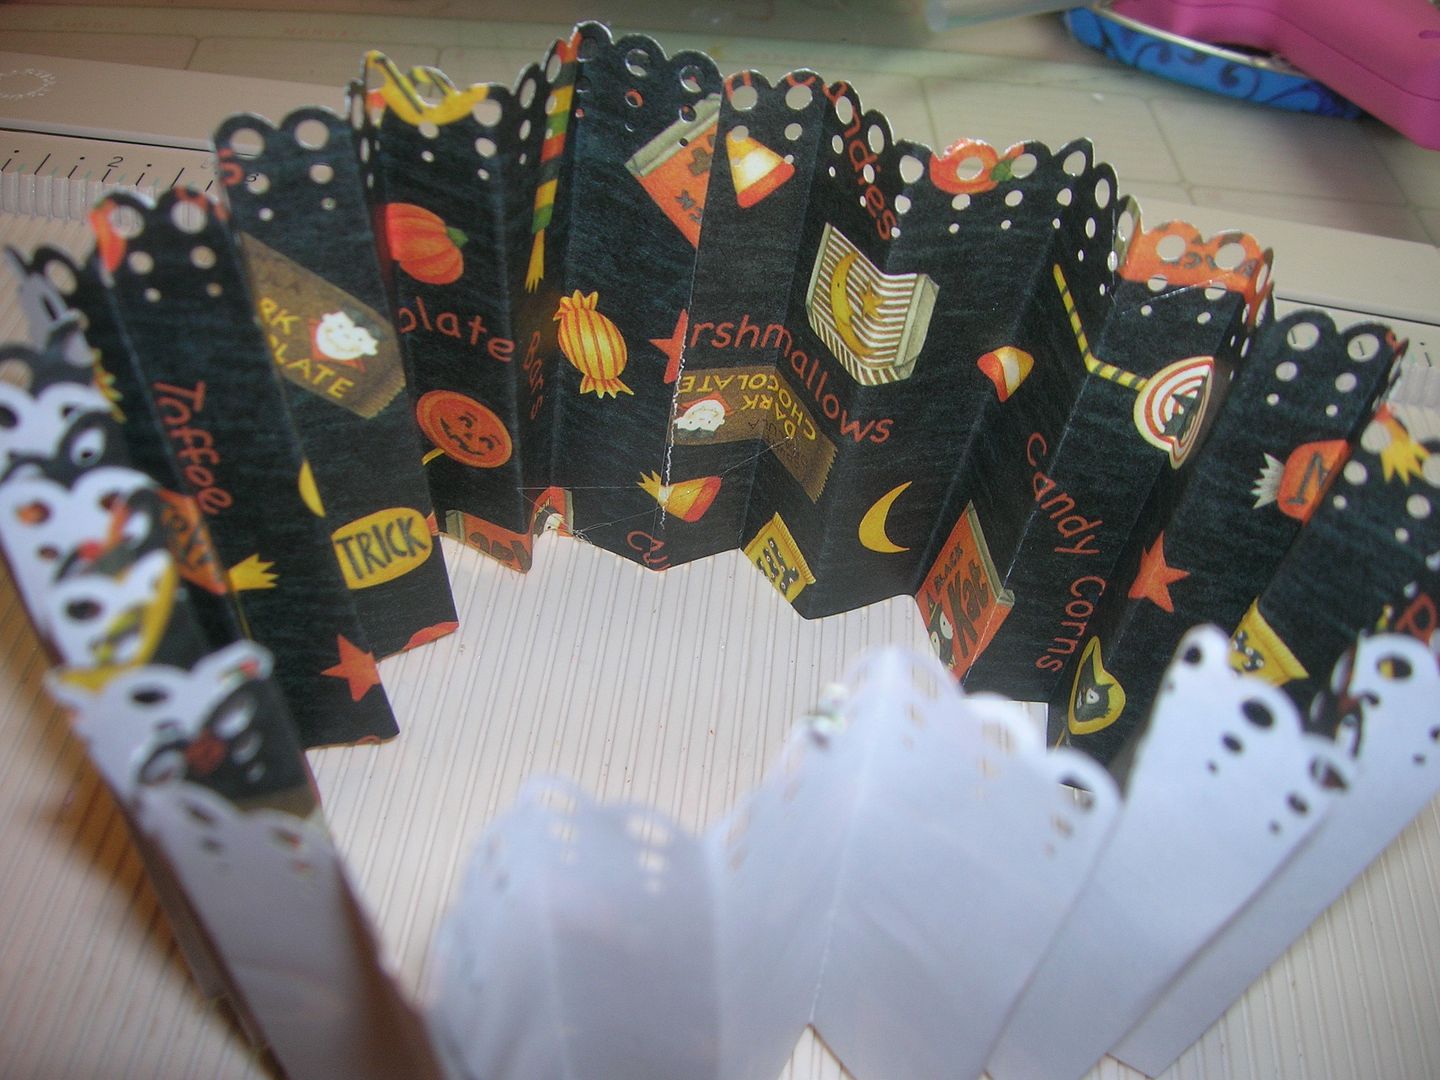
To make the banner I started out with two 3 inch x 12 inch strips of paper.
 I chose 6 different prints since there were 6 letters in Spooky.
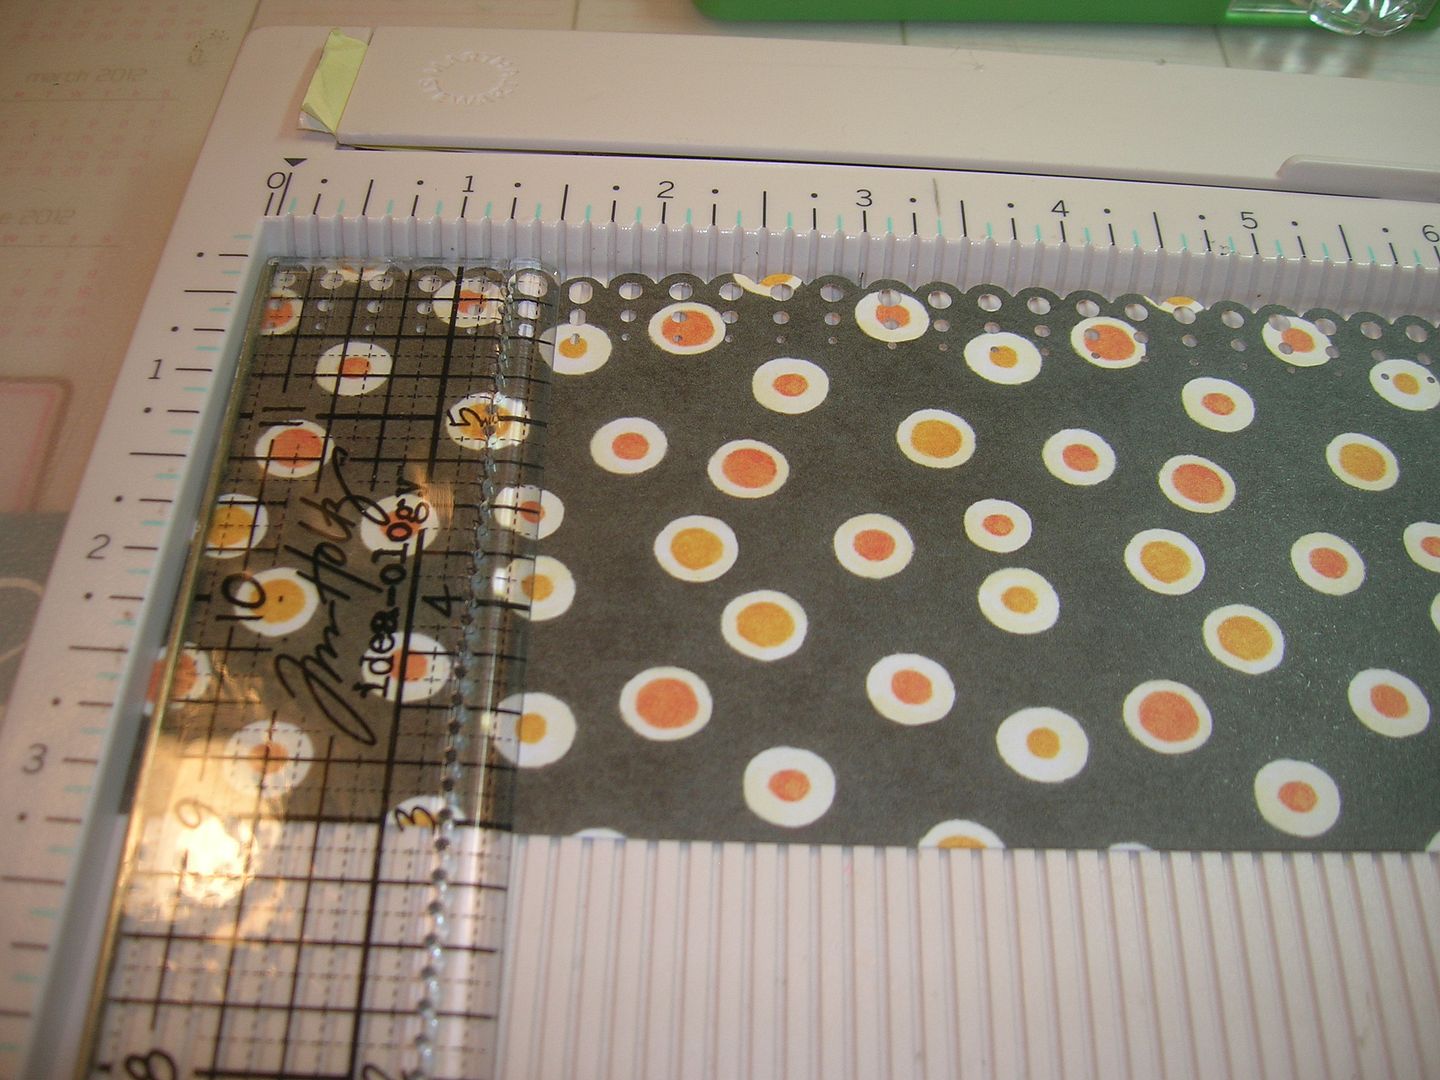
 Smaller prints or stripes work the best.  I then took a MS Punch and
punched all the edges.  I will tell you a secret if you do mess up on one
side you can do the other side and use the messed up side in the center.

Next I score using the punch as a guide.  So for this one I scored after
two designs which is about 1/2 an inch.
I then accordian fold the paper and glue the ends together with hot glue.

Cut two circles with a punch or Cricut.  Push the circle of paper down and
glue a circle to the top and a circle to the bottom to hold in place.

I then cut orange and black circles from George at 4 1/2 inches and scalloped
circles from Lacy Labels at 3 1/2 inches from leftover rosette paper.   I
added some ribbon and large buttons I had in my stash which I threaded with
twine.  The letters were cut from Happy Hauntings at 3 inches in Cricut
green so they would stand out.
Thanks for looking and hope you like my "Spooky" Banner.  Please stop by my blogspot to see what
else I have been up to.  Happy craftin everyone!

August 29, 2011

Spooooooky!

I hope you guys are all having a wonderful week out there. I know I have been! I was in helping with Allis class a few times this last week and filled an order for cards. I dont think I have ever told you guys before but I sell my cards I make. Its been alot of fun! So with all that going on I really had to focus myself to get my project done for this week. Our fall is here. The trees are turning yellow. The grass is going dormant and just this morning it was 37 degrees out at 8am. We were also lucky because my dad got a caribou last Saturday and I always help process the meat. For my hard work I get a share of the meat so I was able to put a little in the freezer, YAY! This coming weekend my son and husband go up to hunt for our caribou. Oh oops kinda got off subject there. So anyways yah for this project I was excited to get a start on my Halloween decorating...


I picked out some fun but spooooooky colors

Cut out my banner pieces. Went with the triangle.

Got out my wonderful Martha Stewart score board and made some rosettes

Got out silver and black glitter and added some sparkle


*super secret here* I will pick up sample paint cards at the store when I know I need a small piece of a color that I am sure I dont have. So for the letters I picked up these samples :D

The letters all cut out to say 'SPOOKY'

Started putting it all together. The wisker looking things are pieces of tissue paper that I added that, when it gets a slight breeze, flutter. I put up my banner near a heater vent and when the heat comes on it gives the banner some silent movement, almost like a floating ghost :D

I ran the black through my Sizzix. cant really see it in the other pics

Finished banner hung up :D
~*Recipe*~
~*Black and purple cardstock
~*Orange, green and yellow paint sample cards
~*Polka-dot paper from K&Co
~*Newsprint from an old book
~*Silver and black glitter from Martha Stewart
~*Blackletter Cricut Cartridge for the letters

So here is some of the cards that I sold this week. I usually make them on a request basis. So they will say..... baby shower card done in purple and grey......

This was Hawaiian themed birthday card for a girl...(notice the surf board)

This was Coffee themed birthday card for a girl....

This was fishing themed brithday card for a guy (bet this looks familiar if you remember my Fathers Day post ;)

Well I hope you all have a great week! I know I will! My sister is having her 3rd child this week and I am making her a mini album. Always trying to keep busy!!
~*Jen*~
http://mymentalinstability.blogspot.com/
;

August 28, 2011

Happy Halloween!

This week at SweetSassyDiva's; the design team was asked to make Halloween banners. I've made a few banners in the past, so I decided to do more of a mobile type wall hanging/banner. I started out with 4 sets of 3 scalloped ovals in orange @ 7.17, black @ 6.825 and purple @ 6.5.


Because the black was going to be hidden except for the edges anyway, I saved some paper and cut some of my images out of the black ovals. (I didn't do that on the orange because I wouldn't want that seen on the back side)


The easy part was gluing all three pieces together using my pink ATG tape.


For the top piece that my ovals would attach to, I used Lacy Labels. I cut all three layers at 4.5 and glued them down. Happy Halloween was cut from MS Seasonal @ 2.25. (the picture is missing the orange piece I hadn't added yet)


Using Design Studio I picked out all the images I wanted to use on my ovals. To save typing and time, I'll just list a recipe of them.


From PDDU, the skelton was cut @ 5, the bat @ .75, the bag @ 1.5 and the cat @ 2.15. I used pop dots on the cat and bat.


The Wizzard was cut @ 4, also from Paper Doll Dress Up. I used stickels on the beard and a black marker.


The Magician was cut @ 5. I used a white gel pen, a black marker and a pink marker. (NOTE: I added the eyes and "buttons" after I attached them to the ovals on all 3 "dolls", after these pictures were taken.)


The ballerina was cut @ 5. I used gold stickles on her headpiece. I used my Viva Decor violet pen on the floral belt and shoes.


I used some craft ribbon to make a double bow, which I used glue dots to attach to the top piece of the banner. I then cut 2 strips of 35 inch ribbon and attached to the back of the top banner.


I used my pink ATG tape to attach each oval at intervals.


I love how this turned out! A major bonus was the fun I had making it. PDDU has so many great cuts on it.


Thanks for looking!


August 27, 2011

Farm Time!


Hey there, this is Misty from The Daily Scrapper.
This is what I wanted to do this summer. Instead our summer was eaten alive by sports camps but if you really want to chill, some farm time is just the ticket. Fresh foods, fresh air, and loads of fun!!!
I had a great tutorial all about how to crackle you diamond glaze but due to computer issues I will have to share that part later. The down and dirty is you heat set the diamon glaze and let it bubble up. I love the crackle look it gives you.

This paper line is Reminese At the Farm. I used the Country Life Cartridge and Create a critter. Lots of ink for the edges and some white gel pen work finishes off the look.

Have a fabulous Day!!!!

August 26, 2011

Wonderful Freebie!

here's something interesting...wonder if it works with the gypsy and expression? hmmm http://conserve.ecoproduct.org/

oh and be sure to check out the extra freebies if you place a ctmh order with me before the 31st! just email me your email address and i'll send you an invite! :)  seems the direct link to order doesn't work. :(

more details here!

Hilton Head!

Hi this is Bekah from shalomcrafts.blogspot.com!  This week's challenge was
a 'how i spent my summer vacation' project.  Being that school just started
back up and I'm a busy mom on a budget; I decided that the only whole sheet of
paper I would use would be my background.  The rest of this layout was made
using my scraps.

In my mom needs to get this scrapbook caught up frenzy, I made this entire page
in 20 minutes.  From layout to cut-out to glued down, 20 minutes.  You
moms know how it is.  So now all I need to do is print up my photo, and add
some journaling and done!


We love Hilton Head.  It's a relaxing, quiet vacation spot.  


I made the sand dunes by tearing the light tan colored paper along one edge.
 Super quick!


To save time piecing together the lighthouse.  I cut it twice, once in
maroon on 'blackout' function and then the regular cut in white, layered and
done.

Recipe:

DCWV paper stacks, Brights and Neutrals.  (Green is the only one from the
brights stack)
The photo mat is cut at 4"by 5 1/2" to fit a 3 1/2 x 5" photo.
Grass was cut using the Everyday Paper Dolls cartridge;  cut at  2",
cut 2.
The lighthouse was cut from Life's a Beach cartridge, cut at  11 1/2" once
in blackout (maroon) and once main cut (white).
The lettering was cut at 2".  

Thanks for revisiting my all to quick summer vacation.  Shalom!


August 25, 2011

Moments!

Hi everyone, it's Angie again. This week we were asked to design something from what we did this summer. My summer was filled with farming with a few adventures here and there. This particular layout is special to me because I don't have many pictures of me and my hubby. Even after almost 20 years those pictures come few and far between. This was in June, we had went exploring in Hatcher's Pass (Alaska)....there was still snow on the ground and the actual pass was still closed. As you can see we are still in jackets and sweatshirts. For this layout I started with a sketch....
As you can see I have notes all over it on different ideas that I had. My 3 yr old had picked out 3 buttons for me to use so I chose the paper to match it. It comes from DCWV Latte stack, and another DCWV for the stripes, and DCWB Pastels for the light green.
I used my accent essentials cartridge and my george cartridges for the wingdings, scallops and flowers...also the rectangle and square for journaling boxes. The title was cut from Gypsy wandernings...it seemed appropriate for the occasion.
Then it took time to get it all just right. In the end I have a great page to remember a great day.
*recipe*
DCWV cardstock from Latte, Neutrals (and one other can't remember)
Cricut cartridges accent essentials, george and basic shapes, gypsy wanderings
buttons
ribbon