


Starring 7 of your creative crafty clowns from the Sweet Sassy Diva Design Team-
Jennifer, Martha, Kim, Tina, Misty, Jennifer and Suzanne. (Also
pictured our talented leader Bobbi Jo.)
For the challenge this week Bobbi Jo asked us to Mix It Up. The 14
Designers for Sweet Sassy Diva divided up into two teams. Our group
decided on the them "Circus". We all thought this would be a lot of fun for
the designers and the blog followers alike.
Before I begin with my project, I would like to give you a little history of the
circus. The Circus which has it origins in Rome with the Circus Maximus
began as an open air competition. This was the first event that women and
men could participate together in a public place. The first circus in the
USA was in Philadelphia in 1792 and the first use of a circus tent was 1825.
When Barnum and Coup started the animal and human oddities sideshows the
circus began using trains to travel, three rings for performers and the circus
became more of what we know today.
So on with the show!
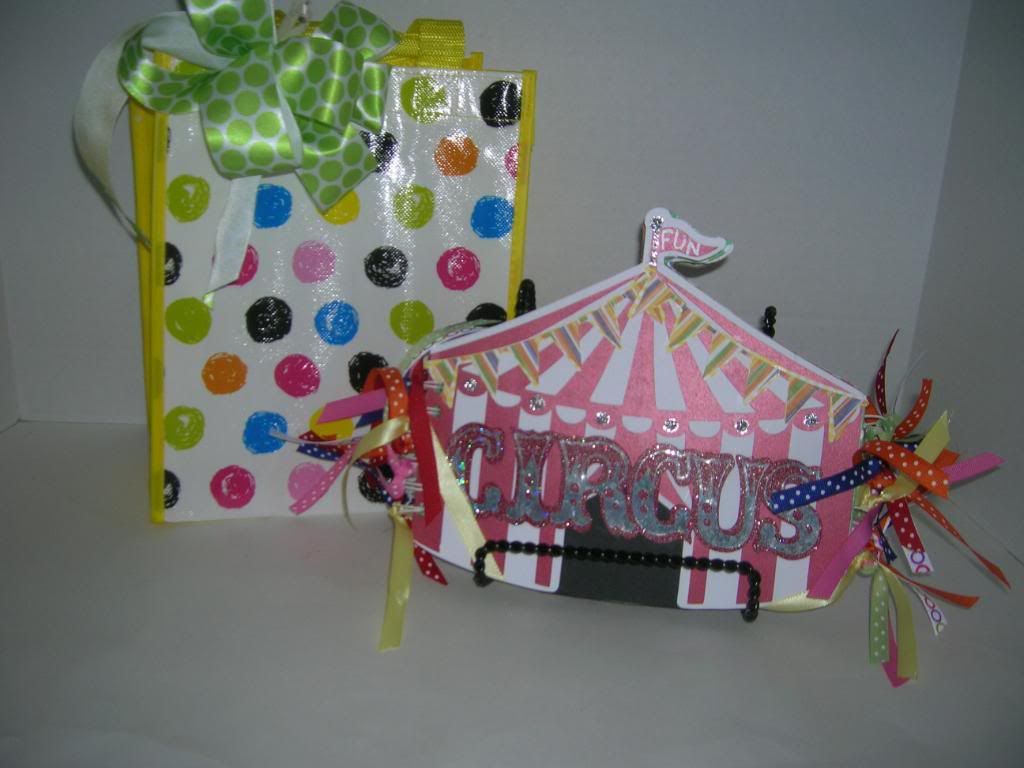
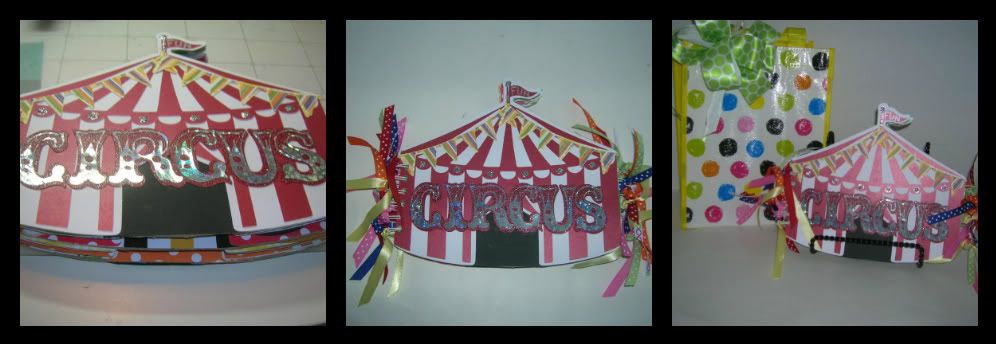
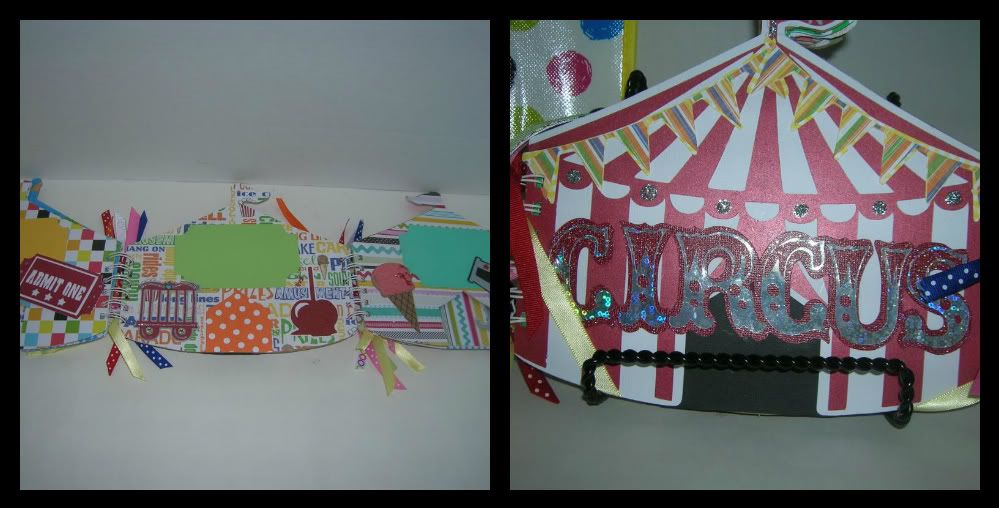
Greetings today from Suzanne at cricutcraftingrammy. I
had so much fun making this Circus mini book for the challenge. First is a
picture of my completed book and the bag I found at Michaels in the $1 section
to put it in. We are going to the Ringling Brothers Barnum and Bailey
Circus this summer with our dear family friends so I am gifting this to them to
put their pictures in.
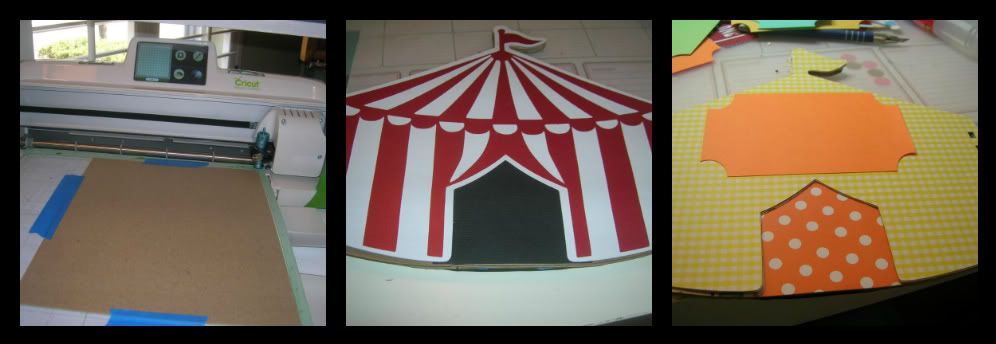
This is the first time I have made a chipboard die cut shape book with my
Cricut. I designed the tent on my Gypsy at 7.5 x 9. Got out my deep
cut blade for the first time and multi cut the shadow 5 times. As you can
see in the first picture I used painter's tape to secure chipboard to my mat.
I then trimmed or sanded the rough edges with an emery board.
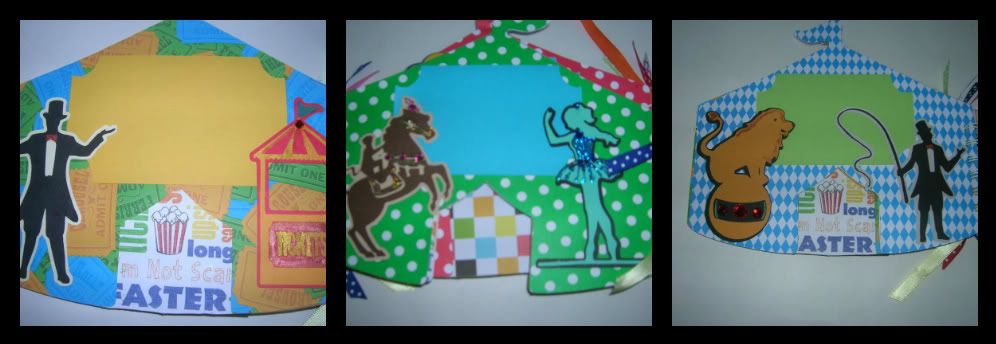
For this book I made three chipboard pages. I then cutout 6
shadows cuts at the same size using craft paper from Michael's.
Next I cut 2 of the shadow in white and two of the detail tent in red. I
glued a piece of black paper in tent door holes before gluing together. I
use my ATG gun and Beacons 3 in one Glue. Make sure all corners are glued
well. Then I began cutting the same shadow cut for all my pages.
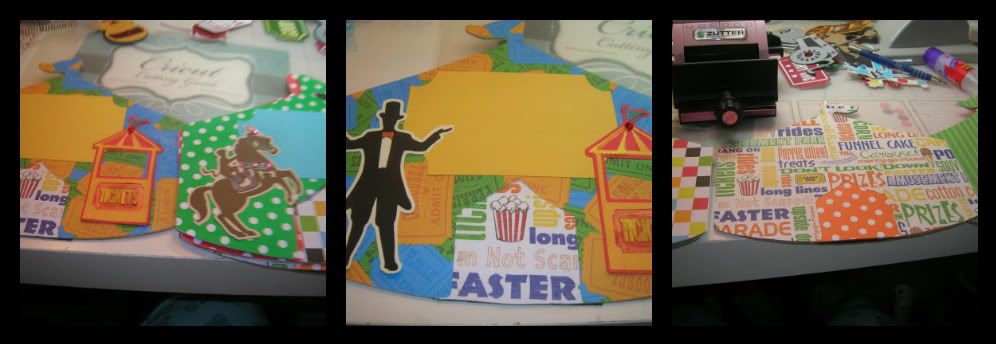
I used striped, dots and other cheerful paper. Right now you can
get a great polka dot pack of Recollections paper at Michaels. Cut 6 with
flag pointing to right and then flip design on Gypsy or your machine so the next
6 are cut with flag pointing to left. I left all the doors open
except on three chipboard pieces. The front and back black and then the
one in the middle a scrap of decorator paper. I then cut the ticket shadow
for my picture mats.
Remember you can click on the pictures to make them bigger at anytime.
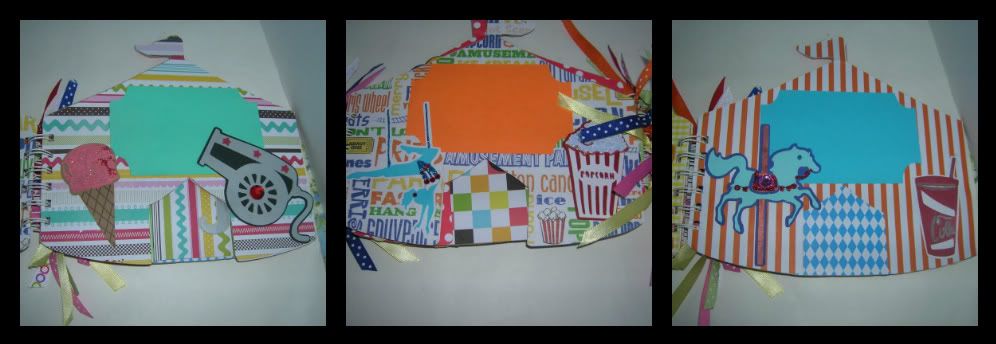
Next I cut out a large variety of cuts. They are pretty quick to cut out
as there are only two cuts per item. However some of the cuts are very difficult
to get off the mat and glue under 4 inches. So be careful of thin pieces.
I then decorated my pieces with Smooch Ink, Stickles and gems.
DO NOT GLUE PIECES IN UNTIL YOU HAVE BOUND BOOK!!!!!
Some of my pictures were blurry so I had to substitute for directions.
Next I laid out my pages. This book when completely open is 3
across. So on the left is the cover face down and three pages flags all
pointed to left, then the back cover back down flag pointing to right ,
and then the middle chipboard to the right and lay the other 3 pages on top flag
facing to right.
I then trim a 1/2 inch off the far right side of the right side chipboard and
pages so they will lay flat after binding. Follow directions and bind
cover and three pages to the left side of the back not catching the right
pages. Then bind the right chipboard piece and pages to right side of
back cover.
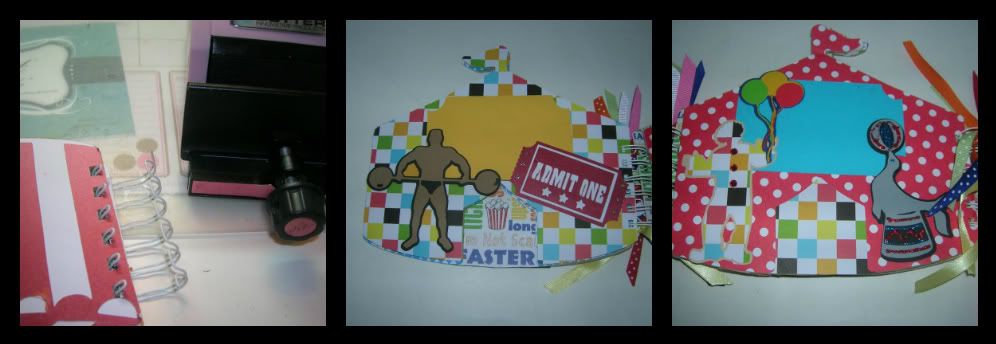
After binding I had ribbon cut at 8 inches to decorate. If you do not have
a binding machine you can punch holes and use office rings. Many office
stores have these in beautiful bright colors now. Now the fun begins and
you can decorate your pages and cover. I cut all pieces from Carousel.
cut sizes are at the bottom of the post.
I used prism paper for the Circus title from Target. I did not plan to
make the title this big but again the letters have very thin lines and I made
them larger to keep the cuts correct.
Here are 12 individual pages including two you saw earlier and the back center
page. If you want more you can add more pages.
Cut Sizes
4 inch cuts- ringmaster, ticket for pic layout , horse with monkey,
tightrope, lion, lion tamer, trapeze, strong man, clown, seal, bear, corn
dog
3.5 bottles
3 inch popcorn, canon, soda, elephant. candy apple, balloons
2.5 train car
2.0 flags, pretzel, good times and admit ticket
1.5 Circus title
Hope you enjoyed the Circus and the mini tutorial. If you have any
questions please ask and come back this next week for more "Circus Fun."
Be sure to check the daily deals at Group On! You can save a lot of money and get local deals!
Groupon negotiates huge discounts—usually 50-90% off—with popular businesses. We send the deals to thousands of subscribers in our free daily email, and we send the businesses a ton of new customers. That's the Groupon magic.
Be sure to Click Here! For more information and join today! It does not cost anything to join and why not save on Group On!


4 comments:
Love, love your circus mini Suzanne!! It is just adorable and what a perfect gift to place pics in after a nice evening/day at the circus! I wish I had a circus to go to just so I could make one! LOL
This mini circus album is just so fun and exciting, I feel like a kid looking at it and so want to make one and go to the circus with my little one. Amazing work
This is AMAZING!!! I never really thought I needed that cart but you have shown me different... They come here every year and I still have pictures I have not scrapped this is a fantastic idea.. thanks for sharing...
Brooke.D
What cartridge or cartrigges did you use. I must have missed where you mosted the name of it. What a wonderful gift you will be giving your friends. TFS!!!
cowbelleru@sbcglobal.net
Post a Comment