MyFreeCopyright.com Registered & Protected

July 31, 2011

Picnic in the Park!

Hi Everyone!
It's Becka with http://www.creationswithbecka.blogspot.com/http://www.creationswithbecka.blogspot.com/ here today. Are you all enjoying your Summer? The kids are out of school and I have reduced my hours at work, so I have Fridays off now, and let me tell you I wish I always could work a 4 day work week because it is so nice to have that extra day. Lately, I have been trying to spend it in my craft room. But my craftroom is upstairs in my house and I don't have air conditioning so it gets really hot up there. Especially because it has been 100 degrees here. Yikes! But the swamp cooler works well and I just wear lots of tank tops and shorts LOL!
When I think of Summer, I always think about talking long walks down by the Truckee River and having a pinic in the park. But with a pinic always comes ants, so I made this cute little card.
Can you believe that I could not find ants on a Cricut cartridge anywhere, every time I searched my Gypsy it brought up pants- How funny is that? So I used these old CM stickers I had.
I used this watermelon on page 46 from the Simply Charmed cartridge. I used the watermelon on the shift, then I deleted the face on the watermelon, so I could stamp a face with a Peachy King stamp. This is how I set it up on the Gypsy
Next, I used K.Andrew Amazing You stamp set for the sentiment. And Peachy Keen Snowman faces for the stamped face.
Hope you all enjoyed my post today and make sure you stop by tomorrow to see what the other design team members make.

July 30, 2011

Art Philosophy!


Graphic 45 An ABC Primer 12x12 paper pad


Have you seen the new Cricut Cartridge Art Philosophy?

If you are on email subscription, you can view it at http://sweetsassydiva.com


Isn't that just an amazing cartridge with some great accessories?!

If you would like more information on purchasing this cartridge, pleave leave me a message with your email address on this post. I will send you an online invite to shop for your CTMH “Art Philosophy” Cricut Cartridge this Monday Aug. 1st. No purchase is necessary to view the invite. I decided to host a party online and would love if you would attend.


Order your CTMH Cricut Art Philosophy cart today! Click here!

If the link doesn't work, please send me a message on this thread with your email and I will send a personal invite. I will not publish your email address on this thread.

The item number is Z1686. You can also get the stamp of the month for $5 more and a few other goodies depending on your order date. You can comment on this post or email me for more details.

You can order today and the order will process immediately.

You can view more details and a video on the new cartridge.... Click Here!

I can't wait to see the exciting things that you create with the new cartridge.

Sweetsassydiva

July 29, 2011

Happy Summer!

Happy Summer! This week for SweetSassyDiva we are designing picnic projects! Well when I think of a picnic I automatically look for the watermelon! I LOVE watermelon! Here is a quick card! I forgot to take pictures while making the card but the recipe and directions are below the card in case you want to know how I made it! :)


Card Recipe:
Black A2 card
Green paper from DCWV Safari Matstack cut at 5.25 by 4 inches and mounted
white cardstock cut at 1.5 inches by 5.25 inches layered on lower portion of green paper
Red ribbon with white polka dots glued down where the green and white meet
Watermelon from Simply Charmed cut at 3.99 by 2.18 and popped up
Happy Summer Sentiment by Pink By Designs Summer Vacation stamp set

If you want to see more of my creations check out my facebook page or blog here

Happy Crafting! 
Kim

July 28, 2011

BBQ Memory!

Hello!   It's Liza from Hoo's
Crafty!
   This week on SweetSassyDiva the Design Team split up
into two groups to create projects.  We are working on BBQ themed projects
with the use of bright colors and three or more cartridges.   I
decided to make something very useful for all of our family BBQ's that we
attend.

The older kids seem to be out running around having fun, playing on swings and
such while my youngest hangs out with the adults.   She's still a
little too young to go running off, and then with all the adult conversation,
she gets very whiny and bored quick.  So....I have the solution!!


BBQ MEMORY


This can keep her busy for hours!

To make this game, I simply cut out rounded squares from George Basic Shapes
{2.25" and 2"} and layered the two squares


Then I searched MyCutSearch.com to find
all picnic and bbq related images from the cartridges I had.

I found an ANT on Nate's ABC's {1.75"}
From Block Party I cut the pie {1.75"}, place setting {1.75"}, hot dog
{1."}, watermelon {1.5"} and the soda {2"}
since some of the cuts were small, I had to draw in some of the
accents.
  I also decided to change the soda to lemonade simply by
using yellow rather than brown.


For the fronts of each card, I used "BBQ" from Block Party. I was unsure
how big I was going to make it.   By using my FIT TO LENGTH button I
can figure out what size will fit best.  Remember the Cricut measures
height, not length.  It's very simple to do:

-- select the image you would like to cut
--press the FIT TO LENGTH button
--  select the size that would like it to calculate
{how long do you want it to be or not
exceed
}
-- press OK under the LCD screen
The machine will take just a second to calculate this for you.   Using
the BBQ cut, I told the machine I wanted the length to be 1.75" and it
calculated that it would cut at 1" in
height.


At this point, I usually press the button again to "undo" the function and
change my dial to the calculated size, in this case 1".   This way if
I do have other layers to cut, and I forgot to write it down, I won't screw
up.   I was very happy that the size was a perfect fit!


I added some faux stitching in black around the white and a few accent dots on
the letters.

I can toss these into a snack size ziplock bag and keep them in my car for the
next family BBQ!

Thanks for stopping by SweetSassyDiva today, I hope you are enjoying all the DT
projects.


July 27, 2011

BBQ!

It's that time again. It's time for a new week of challenges. This is part 2 of the mix it up challenge. The idea was to come up with a single theme, and see what we could come up with. Our group came up with a BBQ theme, since it's summer. We also added that we needed to use bright/bold colors, and at least 3 cricut cartridges. So make sure to check back daily to see how many cartridges we can use this week. It only gets better from here.
I created a simple layout for my project.
This isn't the typical backyard bbq. We had been camping and had actually cooked the majority of our meals over the open campfire. We had such a good time. It doesn't matter where you are at, and how you are cooking when the food is good and the friends are even better. It was an amazing weekend, we even got to scare away a brown bear. (He thought the food would be good to.)
So for the details of my layout. The papers are expressions bright papers in yellow, red and orange....the apron is coordinations red.
I made all of my cuts at 4 inches.
"BBQ" come from the cricut lite, block party
the frames come from accent essentials
"Get cooking & apron" come from country life
"Family and Friends" come from Gypsy wanderings
The stickers are K Marcella Dimensional stickers, and a few self stick gems.
I used the frames for my journaling and left it simple since it was a camping trip. If you wanted to jazz it up a bit you could always pop the words off the page, frame the pictures in more than one frame, or add glitter ;)
So that's it for my layout....please come back tomorrow to see what is next on , and see how many cartridges we can use this week.

Free $20 Credit for Groupon!

Be sure to check the daily deals at Group On! You can save a lot of money and get local deals! 

Groupon negotiates huge discounts—usually 50-90% off—with popular businesses. We send the deals to thousands of subscribers in our free daily email, and we send the businesses a ton of new customers. That's the Groupon magic.

Be sure to Click Here! For more information and join today!  It does not cost anything to join and why not save on Group On!


Hurry if you want this free credit! Log in or sign up for Groupon. Click on My Gifts and click Redeem Gift Card. Paste code: 73GR9CO9. I have read many people getting this. The site is running very slow right now. Let me know if you get this. I saw this on facebook and I heard the last time they offered this, it didn't last long. I cannot guarantee how long it will be up and am not responsible for the deals. Deals like these don't stay up long.

Good luck!

July 26, 2011

Guess what carts were used to make this BBQ layout!

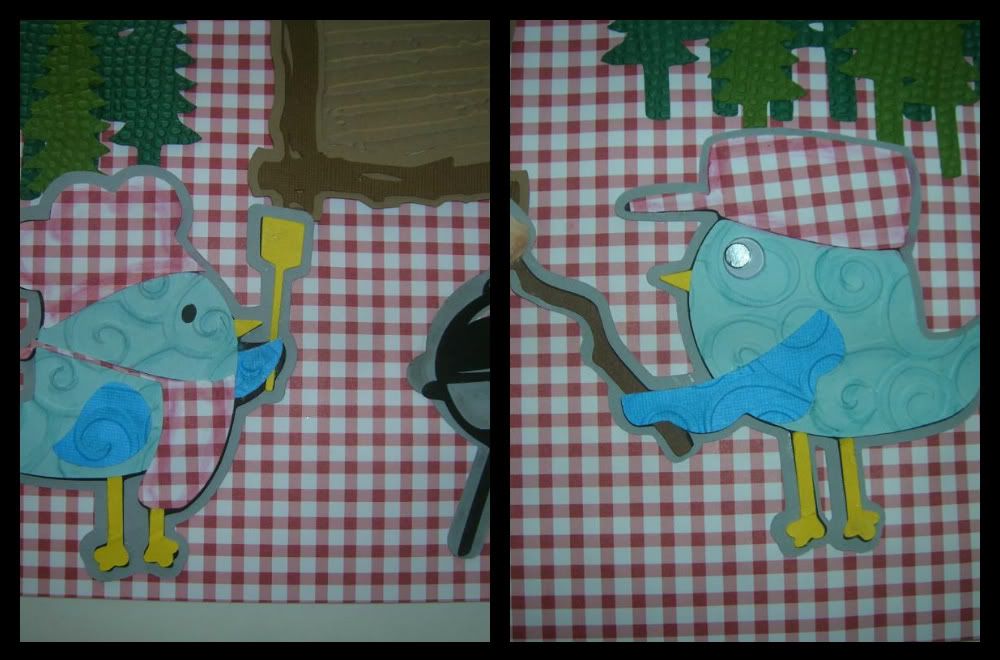
Lori here from ScrappinMyStressAway with this week's Mix-It-Up project for SweetSassyDiva.  Our theme was to use several cartridges (check) BBQ theme (check) and a Bold Color (check).  I do not have either of the BBQ themed cricut cartridges, so my Gypsy and I got to work!

The tree is from Just Because Cards sized to 6.23w x 14.93h (real size is 5.78 x 6.92).  The sun is from H20 sized at 2.56w x 2.54h.  The grill shape is from Creative Memories Cheerful Seasons ~ it is the watermelon at 3.79w x 1.59h (minus the slice) and the oval is from George 0.99w x 2.68h rotated 90 degrees.


For the legs of the grill, I used 2 "A"s from Cherry Limeade at 1.52w x 1.94h.  I put another oval on my mat for the grill top.  Again I used George and sized the oval to 0.99w x 2.68h, rotated 90 degrees.  I cut these out in black.

On the 3rd Layer, I put some grass from Everyday Paper Dolls at 12.0w x 2.73h.  I copied a second grass on the mat.  I put the banner from Birthday Bash on the mat at 6.01w x 4.06h.  I put BBQ from Cherry Limeade at .80 inches and the watermelon from Creative Memories at .73 inches.  I copied the watermelon and layer and then hid the watermelon half from each as I only needed the slice. 

I put four skinny balloons (aka hotdogs) on my mat from George and Basic Shapes sized at 0.21w x 0.57h.  I put four circles (hamburgers) on my mat from George at 0.36w x 0.33h.  I put three clouds from Create A Critter on my mat at 2.49w x 2.06, 1.92w x 1.59h and 2.63w x 2.18h.  I hid the inner cut on all three.

Here are the pieces all cut out.

Here is my grill all assembled.

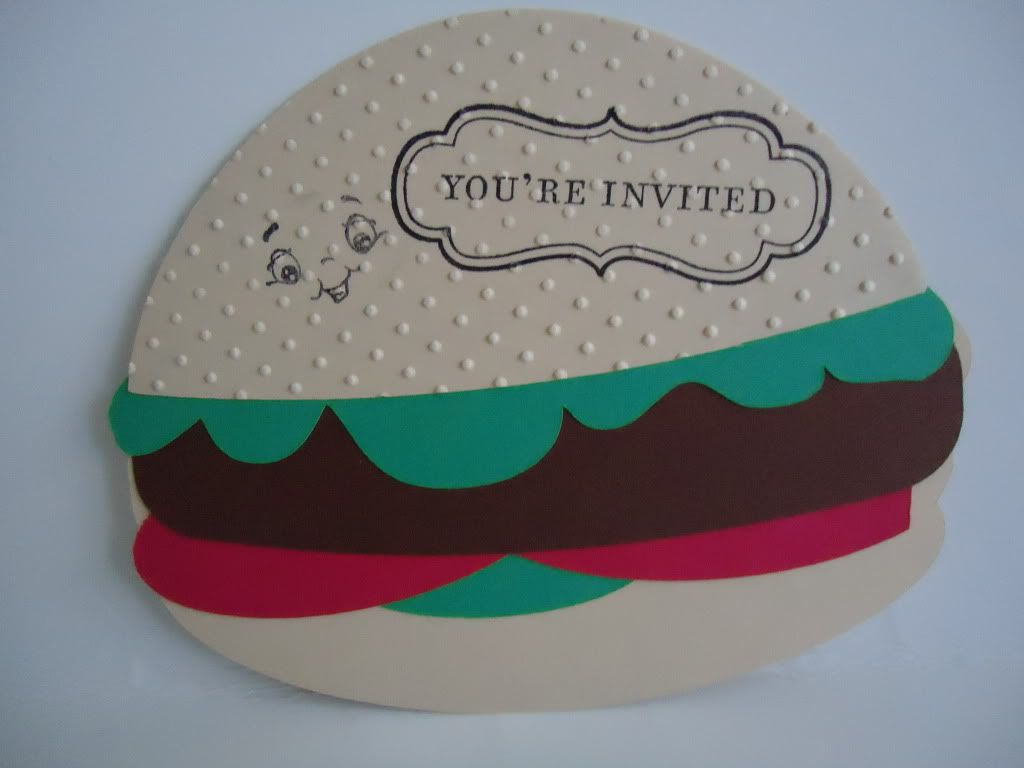
Some hamburgers complete with grill marks! 
Some hot dogs with grill marks!

 
I used some stickles to create the grill top and the smoke.

I put orange stickles on the bottom layer of the sun (under the swirl) and some waterfall stickles on the cloud.

I added some journaling and twine to my layout.

I cut the bird off my banner and added BBQ and the watermelon slice.  I did change my paper for the banner to match the photo mats.

I put some gold stickles on the swing rope.

Here are a couple of photos from our 4th of July BBQ.  I can almost smell the grill!!

July 25, 2011

S'mores!

Hello everyone from Suzanne at Cricutcraftingrammy and
thanks for joining us.  I am so happy to be here sharing on Bobbi Jo's
Design Team at Sweet Sassy
Diva
again.   This week  we are making  a BBQ project using 3
different cartridges and bright colors.  I used Camping Out, Three Birds
and Block Party.  When our family and neighbor friends BBQ in the summer we
almost always make smores.  In the back of my mind I remember seeing a
project in one of my scrapbook magazines that chalked the Smores letters to look
like smores and to used cotton balls for the marshmellows.  So I did my
best to lift this idea for my layout.  If I had been true to some of my
family I would have made the marshmellows black but I like them toasty and it
looks more appetizing.  I embossed the trees. the photo mats and the birds
with my Cuttlebug.  I chalked the edges and used googly eyes.  
Recipe for Layout
Cut from Three Birds
BBQ bird  5 inches 
Smore bird 4 inches
Smores title I used Smore Great Moments cut at 6.5 and used s to make
Smores
Smore branch cut 2 times at 10.25
Cut from Block Party
BBQ word 4 inches
Frame 5.75 inches
Sign (top only)  9.25 inches
Cut from Campout
Campfire 3 inches 
trees 4 inches 
Thanks again for joining us at Sweet Sassy Diva and please come back each day to
join us.  


July 24, 2011

You're Invited to a BBQ!

Hi everyone
Becka here with http://www.creationswithbecka.blogspot.com/ . This week for our SSD DT challenge we were asked to make something with a BBQ in it. So I decided to make this BBQ invitiation for an upcoming BBQ we are having.
I used Simply Charmed cartridge.
Here is the cut I used from Simply Charmed:
Here is how I set the hamburger up on the Gypsy
Set up for paper on the mat
I used Peachy Keen Wide Eye Kids stamp and CTMH "Invited" stamp for the top bun
Then I used the small dots Cuttlebog embossing folder to make little seeds on the top bun.
Then I put all the BBQ info on the inside of the card. Hope you all enjoyed my post and please check back tomorrow.

July 23, 2011

Where is Mr. & Mrs. Clause?

Hi there! Do you ever wonder what Mr. and Mrs. Clause do during the summer? Well here is what I think they do! ;)
I placed my images on my Gypsy according to how I want them to cut.
I placed all the color pieces for the correct images. (I was able to use all scraps too)


Mr. and Mrs. Clause love to relax on their own tropical island! Who wouldn't want to? I hope you enjoyed the card!

Card Recipe:
Green cardstock from Joanns
Blue patterned paper from Sizzix Mat Stack
Island and tree is from Life is a Beach cartridge
Bikini is from Life is a Beach
Santa Hat is from Christmas Cheer
Sentiment is from Pink By Design

To see my other projects visit me on Facebook; or my blog;!

Happy Crafting!

Kim

July 22, 2011

Summer Blooms!

This week at Sweet Sassy Diva the design team was asked to use a Christmas cart and put a summer spin on it. I was so excited about this challenge but for some reason it just wouldn't pull together for me. I think I just had brain overload the last couple of weeks and couldn't focus. In the end I did use the flowers that was part of the original idea but the whole layout to a life of it's own and is nothing like what I set out to do. LOL I hope you enjoy my Summer Blooms layout!

 My original idea was to do a card with these flowers made from the snowflake cut on Christmas Cheer. I loved the little flowers but the card cut just wouldn't happen. I started with snowflakes cut from 1/2" to 1 1/4" in two different colors of blue. I stacked them on top of each other and then curled up the edges with a button in the middle to create a flower.

 Here's a side view so you can see the dimension. Aren't they the cutest?
 For the bottom I used a Martha Stewart punch to trim a couple of borders then added a piece of ribbon.

 For the birdhouse I used a great little birdhouse from Winter Frolic. I added a piece of black card stock behind the opening and cut a blue piece for the roof to create different layers. Of course I inked it all up with my cat eye inks. You know I love them! I added more of my snowflake flowers over the branches and a couple more dew drops to create some buds on the branch help balance the whole design out.
I hope you enjoyed my layout this week and all of the other designers. I'd love for you to come visit me at my blog for more great layouts!
Hugz

Details:
Winter Frolic - Birdhouse cut at 4 1/2"  Pg 63
Christmas Cheer - Flowers cut at 1/2" - 1 1/2" Pg. 106
Ribbon - Karen Foster
Martha Stewart punch
DCWV paper stacks
Buttons
Dew Drops

July 21, 2011

Look who I caught!

Can you guess who this is?


Maybe this helps!


Yes, it's Sarah Pinkcricut and Mr. Pink cricut!

There were a number of people here at CHA Summer 2011 trade show. It was great meeting people and Reconnecting with others.

Posted from my iPhone