

Hello all you crafty bloggers, this is Suzanne from Cricutcraftingrammy. Thanks
for joining me on the Sweet
Sassy Design Team today. Hoping you are all have a great Summer
Sassy Design Team today. Hoping you are all have a great Summer
and some 4th of July festivities to celebrate the USA. The challenge for
this project was to use stars not stripes. This was a good challenge
as it is not easy finding paper with stars and no stripes but I managed. I
decided to make an Explosion box with a cute surprise inside. I learned to make
these at an LSS class a couple years ago. Much of the papers
used were from K and Company stacks found at Michael's.
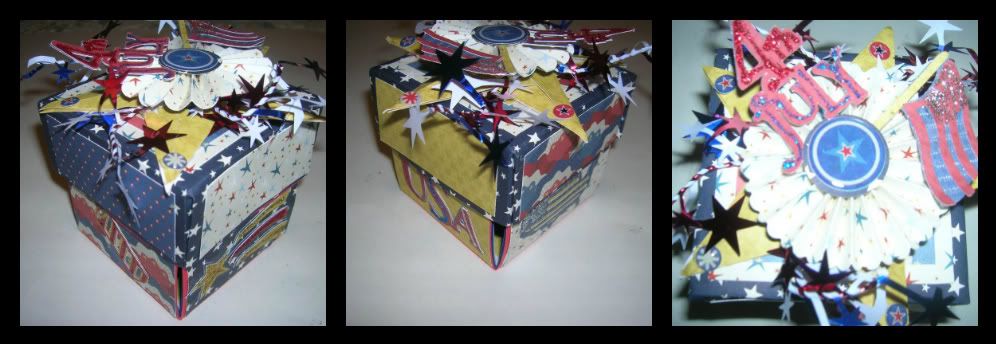
This is three views of the finished product. Remember you can click on
pictures to enlarge.
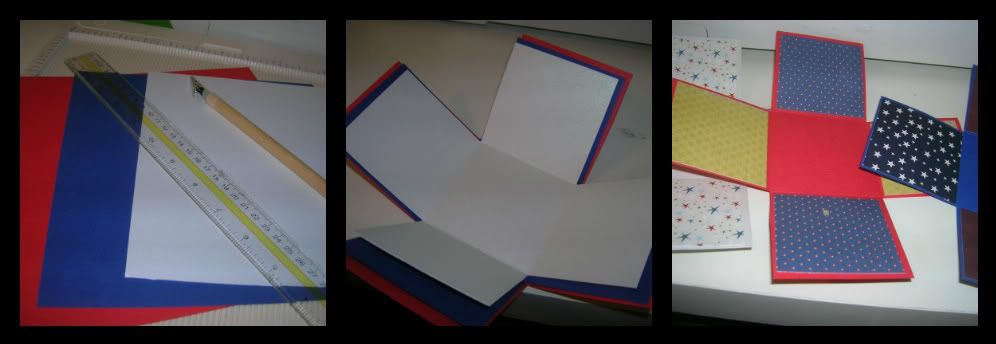
Start out with 3- 12 x 12 pieces of cardstock- I used red, white and blue.
Next you cut them down and score.
Cut one piece for bottom 9 x 9 and score at 6 inches all sides.
Second piece for center cut to 8 5/8 x 8 5/8and score at 5 3/4 inches all
sides.
The third and top piece cut to 8 1/4 x 8 1/4 and at 5 1/2 inches all
sides.
You will end up with 9 squares. Fold to firm scores and then cutout the 4
corner squares.
I then use decorated papers in this case stars to decorate the
cardstock pages. Cut the pieces a quarter inch smaller than square so the
cardstock color shows through for example the bottom you would cut the pieces 2
3/4" for 3 " square, 2 5/8 for middle and 2 1/4 for top.
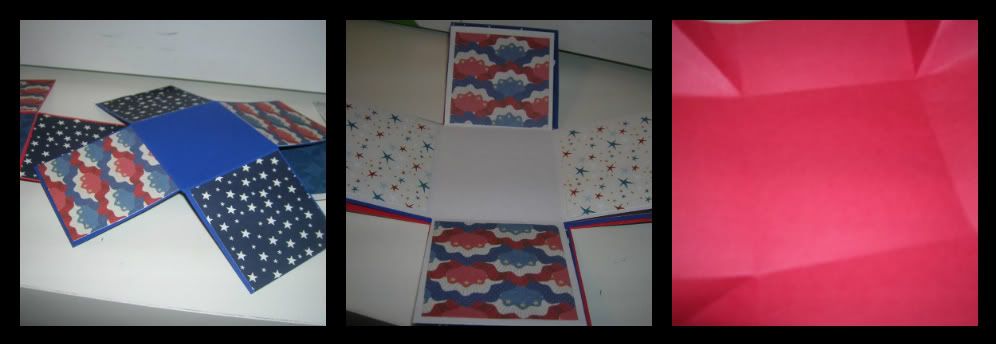
You must decorate the bottom side too but I usually decorate both sides of all 3
pages. Next you glue the three on top remember to put them in size order.
Glue only the center piece. I use my ATG gun here.
Next we start with the lid. The lid is 6 1/4 " x 6 1/4 " and is
scored at 4 3/4 ". The diagonally score the corners and fold them in and
glue with a good firm glue. I use Beacons 3 in 1 and once they are glued
flat to sides I clip with bull clips or clothespins till they dry.
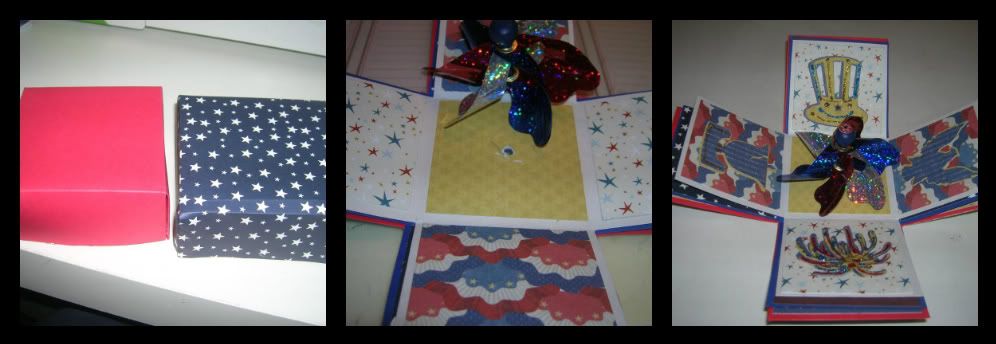
For embellishments and the surprise inside I decorated the lid making
another lid and scoring at 4 5/8" to cover first lid. The side strips on lid
were cut at 3 x 1 /4 ". I also decorated the top inside of the box lid so when
it is opened it looks more finished. I then punched a hole in center and
added the top part of a small pinwheel I found at Michael's. I glued this
tight and then covered bottom of box with paper so it didn't show. I
then got out my Stand and Salute and cut out a variety of cuts I liked at 2
inches or smaller to fit on fold outs, sides and top of box. If you want
you can also add stamps and or pictures to these.
For the top I added the dimensional star cut page 32 from Stand and
Salute. I cut it twice at 4 1/2 inches and glued it so it stayed
dimensional. I added a rosette I made with Tim Holtz rosette maker and my
Cuttlebug and then a couple more cuts, some stars on wire from Michaels, and an
embellishment from a K and Company kit at Michaels.
These boxes are a lot of fun to make for any occasion.
I hope you enjoyed the project and would love to hear your comments.


1 comment:
I LOVE your explosion box Suzanne!!! Its amazing! I can't wait to try and make one!
~ Kim
Post a Comment