Hello all!! This is Carissa!! My favorite cartridge right now is Nursery Tales!! I love to use pop dots on the layers!! Super easy!! I cannot wait until more Imagine cartridges are released!
My project is a card set for my neighbor. She is due to have her baby this week!! I love how everything matches! Card, envelope and tags!
Recipe:
Imagine Art Cartridge Nursery Tales
3 sheets of white cardstock
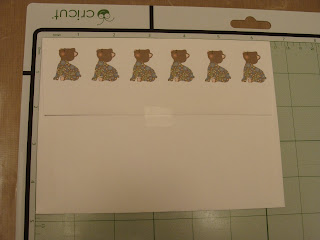
Envelope - 4 3/4 x 6 1/2
3-D Dots
Adhesive
Ribbon
Stamp: Pink by Design Scripted Year
Chestnut Roan Colorbox Chalk Ink
Scoring tool or scoreboard
The envelope was lightly taped closed just in case.
The bear is a layer from the main card image using the print only feature at 1.0
Love how it turned out!! I will definitely be doing this more often!!
For the card base start of with a piece of cardstock 9 x 6 1/4. Then score at 4 1/2.
The main image was cut at 4.0, added the layers plus another bear for the inside of the card. I didn't use the grass layer but had to print it because I wanted the clouds. The two squares are the mats for the sentiment. I used the square from the stock images and flood filled with a solid and a pattern. The light green cut at 2.5 and the light blue cut at 2.8. The tag was also cut at 4.0 and a bear layer added.
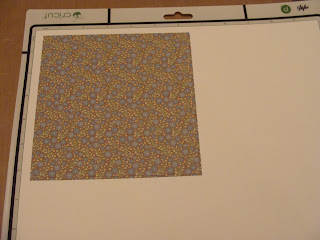
This is the background for the front of the card. Square from the stock images flood filled with pattern cut at 6.0. I trimmed it down to 6 x 4 3/8 to fit on the card.
This square is from the stock images flood filled with pattern cut at 5.0 for the inside of the card. Trimmed down to 5 x 4 to fit. I also cut a scrap of white cardstock to 4 1/2 x 3 3/4 to write your message.
Here is the inside of the card.
I used adhesive on the ribbon to attach to the front of the card and then added a piece of tape to both ends of the ribbon to keep in place.
The sentiment was stamped on the light green mat and then cut to 1 x 1 3/4. The light blue mat was cut to 1 1/4 x 2 1/8. 3D dots were used on the sentiment and the layers.
The tag for the gift bag was cut at 4.0 along with the layer of the bear. I had another piece of dark patterned cardstock and cut it out to use as a mat. Just to see how it would look. You can see both in the picture at the top of the post.
Enjoy!! Have a great week!!
January 13, 2011
Bundle of Joy!
Subscribe to:
Post Comments (Atom)


6 comments:
These are just adorable!!! :) You did such a fantastic job on everything and your neighbor is most definitley going to love them :)
Love it.... Sooo pretty
Adorable!!! May have to scraplift the envelope idea!! TFS!
how adorable
I love this! It is super cute!!
this is so beautiful! I'm definitely going to be trying this. I love how you printed on the envelope.
Thanks for sharing!
Post a Comment