MyFreeCopyright.com Registered & Protected
Showing posts with label Angie. Show all posts

September 12, 2012

Pinterest Challenge!

Hi everyone...it's Angie...long time no see. I've been hiding in my own little world here on the farm. We are busy getting things ready for winter. There is already snow on them hills. This morning the sun is coming up through the trees, a fire is going in the wood stove and I'm watching the roof thaw as the frost melts and drips like rain. It's going to be another beautiful sunny day. I'm hanging on to every last bit of summer/fall that I can. So onto my Pinterest project. I've become a pinterest addict lately. I get so many great ideas from there from crafting to well everything. So this challenge is perfect it made me actually go back through the boards and pick one to do. I chose a pin from Smallbitsofpaper.blogspot.com. I love the colors...so cheery and bright. I used papers from recollections, ribbon, my gypsy, the paisley cartridge and cricut craftroom basics.
See what I mean about the bright colors. They are so pretty. One of the biggest things that I love about my gypsy is that I can see how the pieces and parts are laid out and I can use scraps of paper that I would normally just have thrown away, that and I don't have to keep changing cartridges.
Here are the pieces all cut out...not much wasted paper at all.
And here is the card. Isn't it cheery?! The frames were cut using the cricut craftroom basics The lady bug was cut cut from Paisley...as well as the rectangles. I used some pink ribbon that I had, and a stamp for the sentiment in pink. I hope you enjoyed. If you are a pinner I strongly suggest picking just one and getting started...I know that I will be.

June 26, 2012

Lollipops!

Hey again....how's your summer going? Ours is just starting here in Alaska. This week at sweetsassydiva we are celebrating National Candy Month....for me that's 12 months out of the year. (Must be why I'm so sweet ;)) I have the perfect idea in mind for this week as soon as it came out. It took me a while to make it...and for it to come together in my brain...too much sugar I guess... but I finished it. My Mama sends her grandbabies these huge lollipops...that we were never allowed to have as kids...must be a grandma thing.
My girls love it when they get a box in the mail from her because they know that they have all flavors of lollipops. So I decided a layout would be good to do with this one. I even had help putting this one together....starting them early ;)


So here is the layout we came up with....
The paper is from DCWV pastel stack and sweet stack...and Colorblok textured cardstock. I used the plantin schoolbook cartridge for the letters. I welded thhe "I'm a SUCKER 4 a" on my gypsy. I found a lollipop cut on my Mickey and Friends however I wanted something a bit more so I decided to make my lollipops.

I used dmc thread, 2 or 3 colors and twisted them together...and then wound them onto just a scrap sheet of paper. I used my glue runner to make a sticky surface...and then cut out around the edges. I cut a toothpick in half, colored it with a white marker....cut out a small square of saran wrap and there you have it...my own handmade lollipop. I cut out 3 (4.25x6.25) rectangles for pictures and a 4.25x4.25 square for either a 4x4 picture or a journal box. I added ribbon corners on each to add a little more color. Now all I need is to add the pictures of my sticky little girls. I hope that you are all enjoying summer!!!!

Angie

June 14, 2012

Dad!

This week at Sweetsassydiva we are celebrating Dads. I'm very blessed to have such a wonderful man to be the "Dad" of my kids. He is amazing and I literally thank God for him every day. Making cards, layouts, or anything basically with a masculine feel is a challenge for me. It may have something to do with the fact that I have 5 daughters, and 1 poor boy surrounded by us. Pink and flowery just comes more natural. So for this card I started scouring magazines, websites and so on looking for something to scraplift. I mainly lifted the colors more so than anything. I chose blues, and stripes. They seemed "manly" enough ;) I layed everything out with my gypsy and got it all cut at one time. I used the calligraphy collection cartridge for my tags and for the "Happy Father's Day" and I used George and Basic Shapes for the "DAD" I used DCWV neutral stack (gray) for the card base, and the smaller tags (1 1/2 in), Latte stack for the striped frame,and white and black misc. scraps for the larger tag (1 3/4 in) I inked all edges of the base, striped paper and tags in dark blue. I layered my tags and centered the letters on them. I used small brads at the top for some extra color. (I don't have a paper piercing tool so I used my cricut tools...they work great) I used foam dots to raise the tags just a bit for added dimension. Then to finish the card I added my greeting on the inside. and the finished project looks like.............

Thanks for stopping by. Make sure that you give all of the "Dad's" in your life a huge hug. They deserve them!

Angie

May 2, 2012

Rainbow of Diamonds!

Hi, it's Angie. This week on Sweetsassydiva we were challenged with using diamonds in our projects. (It's April's birthstone.) I chose to do another layout since I've been trying to catch up my scrapbooking. I will get there eventually.
I started with a rainbow of diamonds. I cut them at 1 in from George and Basic shapes. I also used the Once Upon a Princess cartridge and cut out 2 of the princess dolls, her outfit (including crown and royal sceptor), 2 diamond gem shapes (all at 3 in) I then cut out the title "Look at you SHINE" from George at 1 and 1.5 in. I made a rainbow banner across my pages using the diamond shapes.
I then took the dolls and glitzed them up with green and gold stickles and self stick gems.
I then used my heat embosser and shined up the letters. I embossed them with gold embossing powder. I also embossed the edges of my gem shape as well. Then it was just a matter of putting it altogether.
I added mats for 2 4x6 pics and 2 4x4 pics or journals. Now all I need to do is add my pics of my many princesses. I hope you enjoy.

April 23, 2012

Busy Bee!

Angie here, This week at Sweetsassydiva we were given a wild card week. I chose to do a layout. I really need to work on my scrapbooking and this gives me a reason to do so. My inspiration was my 2 little girls who have been non stop all day everyday since they were born. My busy little bees.... As always I have one idea in mind, and then end up with something completely different. I started with using George and Basic shapes cutting out 3 in octogons. I cut them in a tannish and white cardstock. I really don't like such stark colors so I used my Ranger Ink (antique ivory) and distressed them just a bit. I then used Create-a-Critter to make the cutest little bumblebees and bee hive. I cut them at 2.5 in.
Again I decided to distress a bit on the beehive.
I cut out the title using Plantin schoolhouse at 1.75 in. Then it was assembly time. I think it took me longer to play with how I wanted it to come together then it did to cut out all of the pieces. The one that stayed the same is the part that says "BEE"
I cut out 4 (4.5x6.5) mats for photographs. Or can be divided for a smaller picture and a journaling box. This will be cute filled with pictures of my busy bees. It was really simple to make and turned out better than my first thoughts. I hope you enjoy.

*recipe* cardstock...black, white, tan, black, yellow, blues cricut cartridges....george, create a critter, plantin schoolbook markers, ink (a napping baby is good as well)

April 20, 2012

Happy Birthday!

This week for the Sweetsassydiva design team we were given a sketch to follow for our design. I'm usually not very good following sketches but this one I really liked and had an idea right away....and then it changed.

I chose colors that reminded me of the beach. (I'm homesick for warmth.) I made the base a 4 1/2 x 6 1/4 card out of a light green cardstock. I then cut another rectangle out of "sandy" beige that was 4 1/4 x 6. On top of that I layered a "sky" blue strip. A small yellowish strip, and a green strip that can be my beach towel. I inked all of the edges in a blue to make them stand out just a bit. Using the cricut and my gypsy I cut out a scallop cicle at 3 1/4 in (gypsy wanderings) a 3 in circle (also gypsy wanderings) 2 rounded rectangles to form the tag one at 3 in the other at 2 3/4 (from george and basic shapes) a 1 1/2 in flower (paisley) and "leaves" which were paisleys at 1 in (also from paisley)
I inked the edges of the "sun" in orange and the flower in orange as well. I stamped the happy birthday and beach ball on the tag. I colored in the beach ball using le plume markers. I then stamped the umbrellas on the beach towel/ribbon strip and colored them in. I affixed them all into place and added a center self stick dot to the flower...and called it beachy!!
I hope that this finds you with a warm and sunny week ahead.

*recipe* green, yellows, beige, and blues...misc. cardstock cricut cartridges: gypsy wanderings, paisely, george and basic shapes blue ink pad le plume markers self stick gem stamps: beach ball, umbrellas, happy birthday

February 26, 2012

Happy Birthday!

This week we were asked to use buttons....I love buttons!!!!! I used this as a reason to finish a couple of birthday cards that I've needed to make. They are going to be late...I'm horrible at getting things out on time...but they are now made. (Only one more to go.) This one I made for my niece. She is such a sweet girl. I laid everything out on my gypsy. (I found my inspiration from a Just Cards magazine.)
Then I used my paper from DCWV Sweet Stack to cut out all of the layers.
Then it was time to layer it all up...add thread and buttons...a stamped sentiment and call it "Happy Birthday"
(The other 2 cards are for her twin sisters who turn 3....also sweet sweet girls. I used Nana's Kids paper, celebrations cartridge for the candles and made it simple...after all they are 3. ) I used the "Make a Wish" stamp on both cards. The sprinkles on the cupcakes are tiny buttons...and then the buttons going down the side are threaded with golden thread. The colors remind me of neapolitan ice cream...so ice cream and cake for a bithday....can't be beat.

Angie

February 22, 2012

You're Invited!

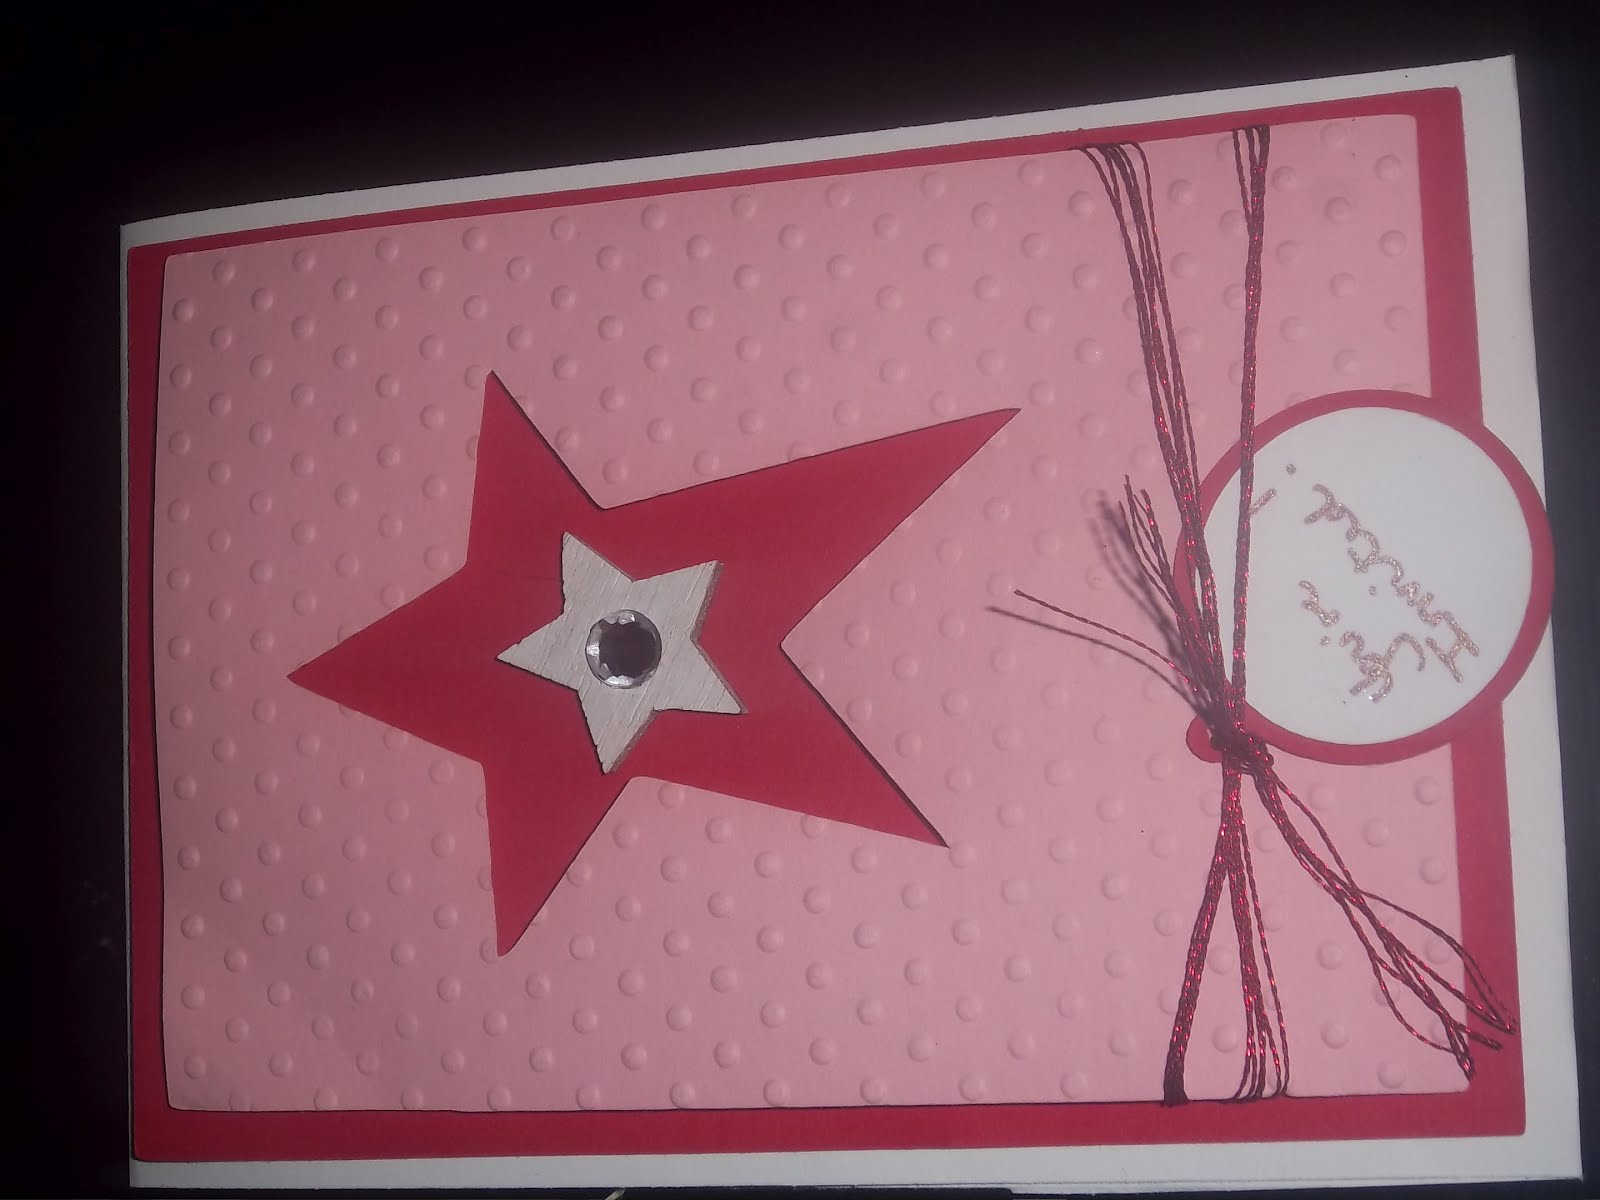
This week on Sweetsassydiva we were asked to make invitations of some sort. It just so happened we were having a birthday party for my daughter....lucky us. My girls really love the 18' dolls. So that was the theme of our party. The chosen colors are pink, red and white with a star. You can figure out which one they like the most. I also wanted to make a simple design since I had to make a few....so this is what I came up with.

Let's get started!

One of the things I love most about being able to use my gypsy is that I can place everything on the mat, just as it is on the screen, and use as many scraps as possible. I used white, pink and red for this card. The card base is a 4 1/4 x 5 1/2....I cut the red rectangle from George & Basic Shapes at 4 x 5 1/4....then I used my gypsy to fit the pink rectangle. I made it just a bit smaller, and then placed a star from George centered left to right but placed off center to the top. I also cut out a 2 inch tag in red, with a smaller circle in white.
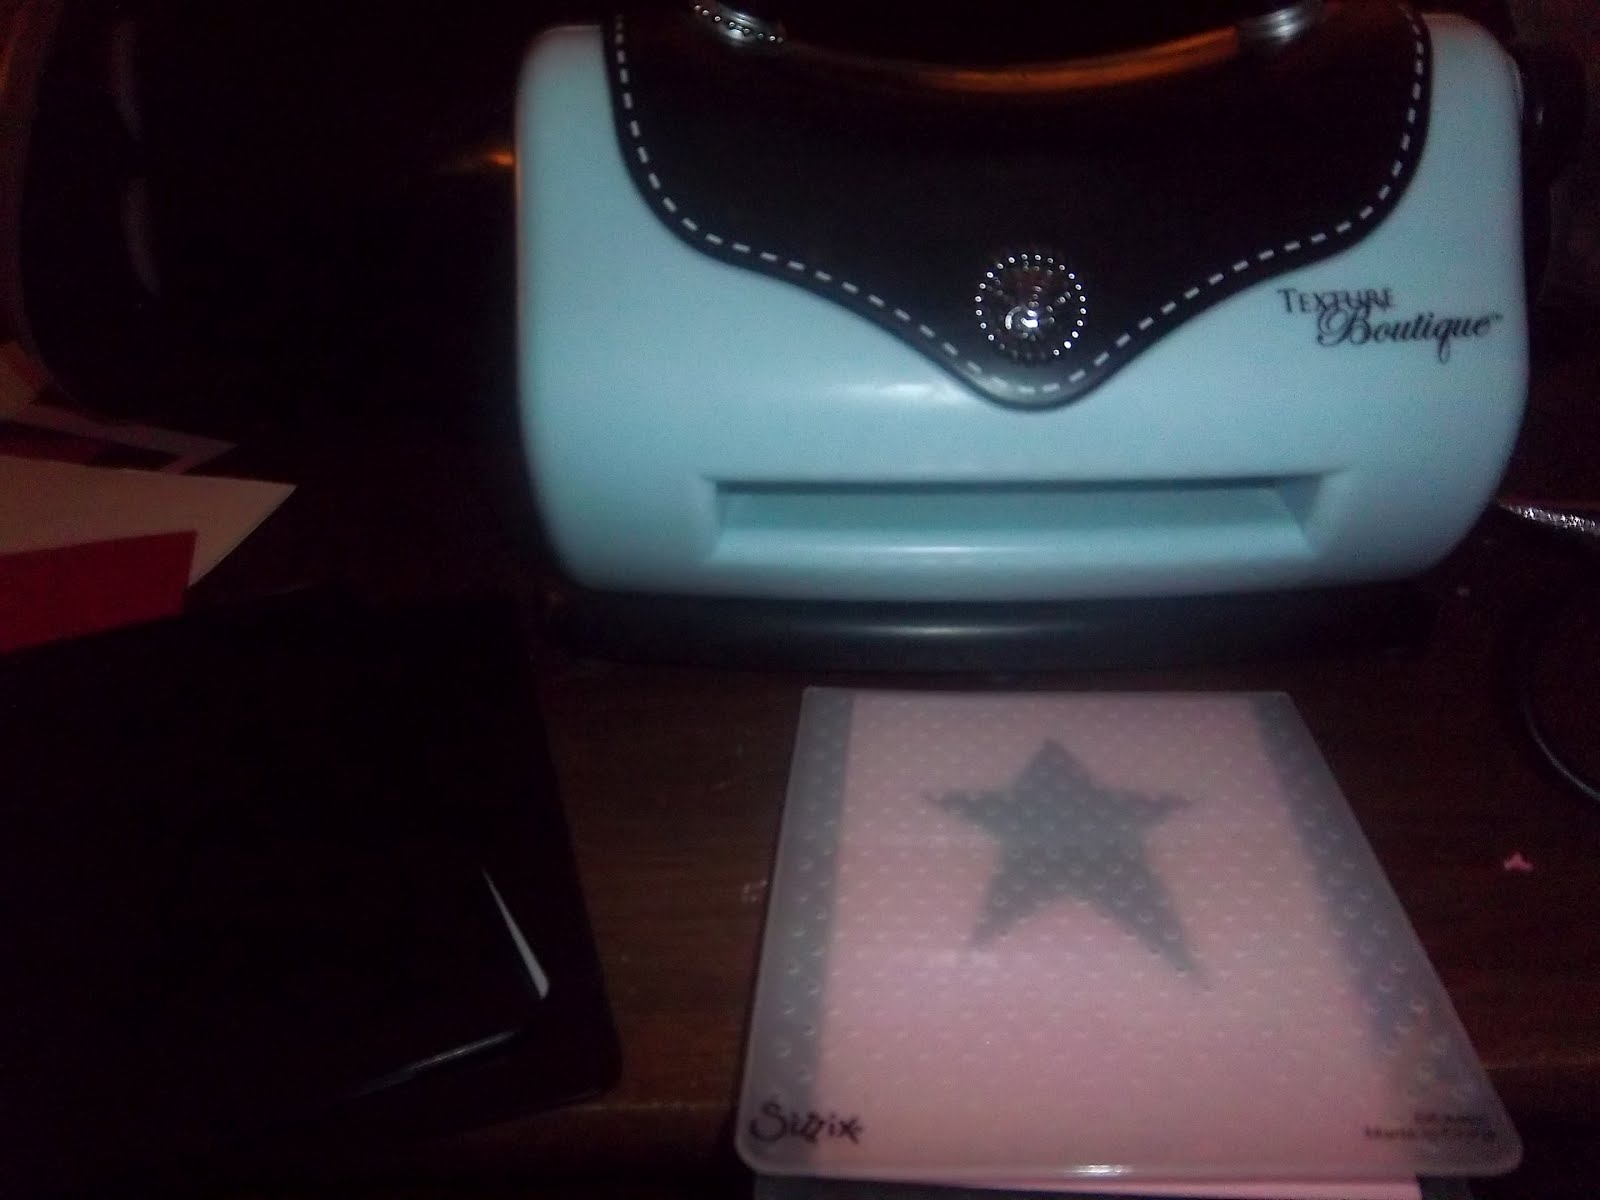
I then embossed the pink star cut with my cuttlebug dots folder, using my sizzix embosser. I then started layering them up. Red first onto the white card base. I added thread around the bottom of the pink and then attached it with 3d pop dots.
I added the you're invited tag to the thread...and still wanted more. I found a wooden star button and altered it.
I placed it in the center of the cut...added a bit of bling and called it done.
(Sorry it's sideways...I tried 3 times turning it.) So there is my simple invitations. I used recollections paper in pink, red and white cricut embossing folder, dots sizzix texture embosser George and basic shapes cartridge a wooden star with a white paint pen self stick gem

February 11, 2012

With Love!

This week we were asked to make a Vintage type valentine. I love the vintage look, and am working on trying to make it more often. I still have trouble with the layers at times...but will only get better with practice.
I started with a 5 1/2 by 6 in base for my card...in natural (looks like cardboard) paper. I used paper from color bok that looked like old fashioned wall paper. The first layer is a basic rectangle cut from George & Basic shapes. The second layer is a square also cut with George, then I used scalloped scissors to go around the edges. There is also tags this way on different cartridges...I was just in a mood to play with my "toys". The third layer is a large scallopped flower cut from Paisley...then a lace doily on top of that. On top of the doily is another flower cut from Paisley with a cardboard center cut from my 1 in. punch. I topped off the card with corrogated cardboard and a wooden button with some shiny thread...used a "With Love" stamp...and called it a Valentine. Some of the details of the layers....I used a light brown ink to distress the doily so that it aged the appearance. I also used a dark brown ink on the edges of the large scallop flower, the small flower and on the creases of the cardboard. I stamped the sentiment in black. I love the look of all of the papers together. I am a creature of habit that uses a plain with a matching print...so to mix and match this way is always a challenge. I hope that you like this one.

*ingredients* plain cardboard brown cardstock, colorbock paper paper lace doily cardboard wooden button embordiery thread a With Love stamp distress ink, rich cocoa brown ink, black ink George and Paisley cartridges

Angie

February 4, 2012

Thank you!

This week on Sweetsassydiva we were asked to create a card or a layout using a hidden sentiment. This is my first craft back in over a month it seems. I have chosen a "Thank You" card to start...I have a ton of them that need to be made and sent. I do want to thank all of you who had us in thoughts and prayers this month as we went through hubby's surgery and now starting recovery. He still has a long road ahead of him, but he's getting there, he wants to plow the driveway...NOT HAPPENING!!!! So here I go....
First I used my gypsy to weld a coffee mug from Gypsy Wanderings to it's shadow. Then cut it out on cardstock from DCWV Old World stack. I folded it in half and used small pieces of velcro to hold the top down.
I used my cuttlebug swirls embossing folder to emboss the purple layer of the card which the cup sits.
I added some self stick gems, and stamped a sentiment on the inside of the cup as well as inside the card. (I used a coffee cup because everyone I know except me drinks coffee.) It's simple and to the point...but filled with a heartfelt thanks. I couldn't have made it through this time without everyone. *recipe* jewel toned cardstock except for the coffee cup (because my friends have been real gems...in the best way lately) cuttlebug embossing folder and sizzix boutique embosser self stick gems studio g sentiment

Angie

January 21, 2012

Love!

This week we were given a sketch to follow. I made two different cards, and neither one turned out looking like the sketch itself...however it is sketch inspired.
I sat and played for hours moving things around and trying to just get an idea. I divided it into different sheets of paper and so on. I finally decided that I was going to go with plain and simple...a good one for me right now. I also figured that we have Valentines coming up I would get a head start on getting a few of those cards made.
I chose a neutral grey background for the card. I divided the card using red ribbon that says I love you on it. The ribbon had a shiny surface to it that didn't go with style of card so I used my distress ink and dulled it out. I used the lacy labels cartridge to cut out the squares, love, and heart for the focal point of the card. The love section was cut at 2 in, and the heart and square was cut at 3in. I added the flower with a self stick gem, stamped the x's and o's. I outlined the LOVE with a gray marker to help it stand up off of the paper a bit....arranged and attached them and there is my card. *ingredients* DCWV neutral textured gray cardstock, old world stack, and a burgandy cricut cartridge...lacy labels self stick gems in red studio g flowers ribbon inks If you haven't checked out the Blitsy site, you are missing some great crafting deals! It's free to take a peek and never a fee! :D Click here! New items added three times a week.

January 16, 2012

Skate, Spin, Soar!

Hey, it's Angie. I hope everyone had a wonderful holiday season. Ours was wonderful....filled with my kiddo's and some amazing friends. Now it's time for cabin fever to kick in....and that being chased with spring fever. So our challenge is something pertaining to winter blues. I have a friend who's daughter has fallen in love with ice skating. So I thought that I would make her a wall hanging for her room. I got excited because I used my "celebrate with flourish" for the first time. (Even more exciting Jen didn't have to help me with the little details!)
This is the first of 2 skates cut. I cut them at 3 in...in misc. blues and white. I didn't like how plain they looked so I "glammed" them up.
I used my heat embosser and powders to make them sparkle...add a sparkly gem and there you have it. For the saying I talked to her Mama and we came up with "Skate, Spin, Soar" I used the storybook font on my gypsy and welded them together.
I started to put the sign together and it needed something more. I used plain white doilies and some alcohol inks as a mat for my skates.
Now for the assembly. I used a dark piece of blue cardstock. I inked the edges white to give it a frosted look. I also went against the normal and set it at a diamond instead of a square. When I started putting the pieces together I realized the words needed a bit more so I embossed them with a light blue powder and used a silver alcohol ink to give it a bit of a pop. I placed them all and then put them into a white frame.
I didn't like the plain white frame so I again pulled out alcohol inks in blue and silver and spruced it up a bit....so here is the finished project.
So there it is....my wall plaque. Get out and do something keep to fight those blues. recipe cricut cartridges...celebrate with flourish, story book Tim Holtz alcohol inks....blues and silver misc. papers in blue and white. heat embossing powders....blues and white 12 x 12 scrapbook frame