MyFreeCopyright.com Registered & Protected
Showing posts with label Jolly Holidays. Show all posts

January 23, 2012

Warming by the Fireplace!

Hi Crafty friends!  Brenda here from Friends Craftin with Friends.  I am thrilled to be guest designer today at Sweet Sassy Diva!  Thank you for having me Bobbi Jo! For our challlenge we were asked to make a scene.  My scene is from Christmas watching our DG open her presents from us.  I used my Gypsy to lay out my overall design and yes, I do falter a little from it. lol 
I also used my Gyspy along with my Imagine to print and cut out all my images.  Here is my Imagine printing and cutting.
I then inked all my images before assembling them.
 Here they are ready to go onto my lo now.
The carts that I used are: Country Life, Joys of the Season, Jolly Holidays, Imagine More, Imagine More Cards, Mr. Frosty and Kate's Kitchen. Here's my finished layout:
It was so much fun making this scene and I really love how it turned out.  I hope you enjoy it too! If you haven't checked out the Blitsy site, you are missing some great crafting deals! It's free to take a peek and never a fee! :D Click here!

July 20, 2011

Playtime!


Hello all you crafty ladies. This is Suzanne from http://cricutcraftingrammy.blogspot.com/ sharing
with you today a layout I did with Christmas Solutions and Jolly Holidays.
 I  had a hard time starting with this challenge that Bobbi Jo gave
us.  I do love trying to use Cricut cart cuts in a different way. This idea
came to me as I am trying to get a bunch of layouts done for pics of my
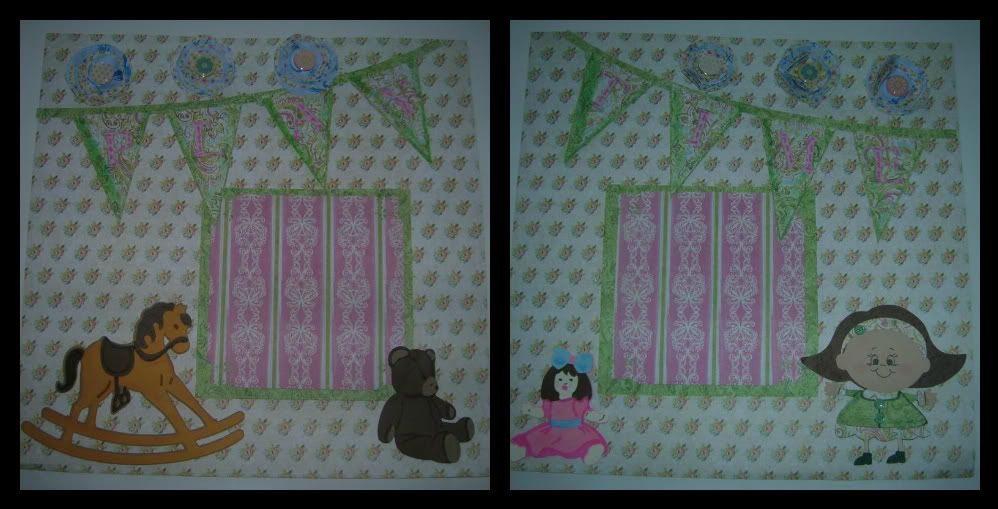
wonderful granddaughters.   Here is the pictures of the two page layout I
came up with starting with the toys.  The paper is from Water Colors by K
and company which is a double sided stack I recently bought at Michaels.

  
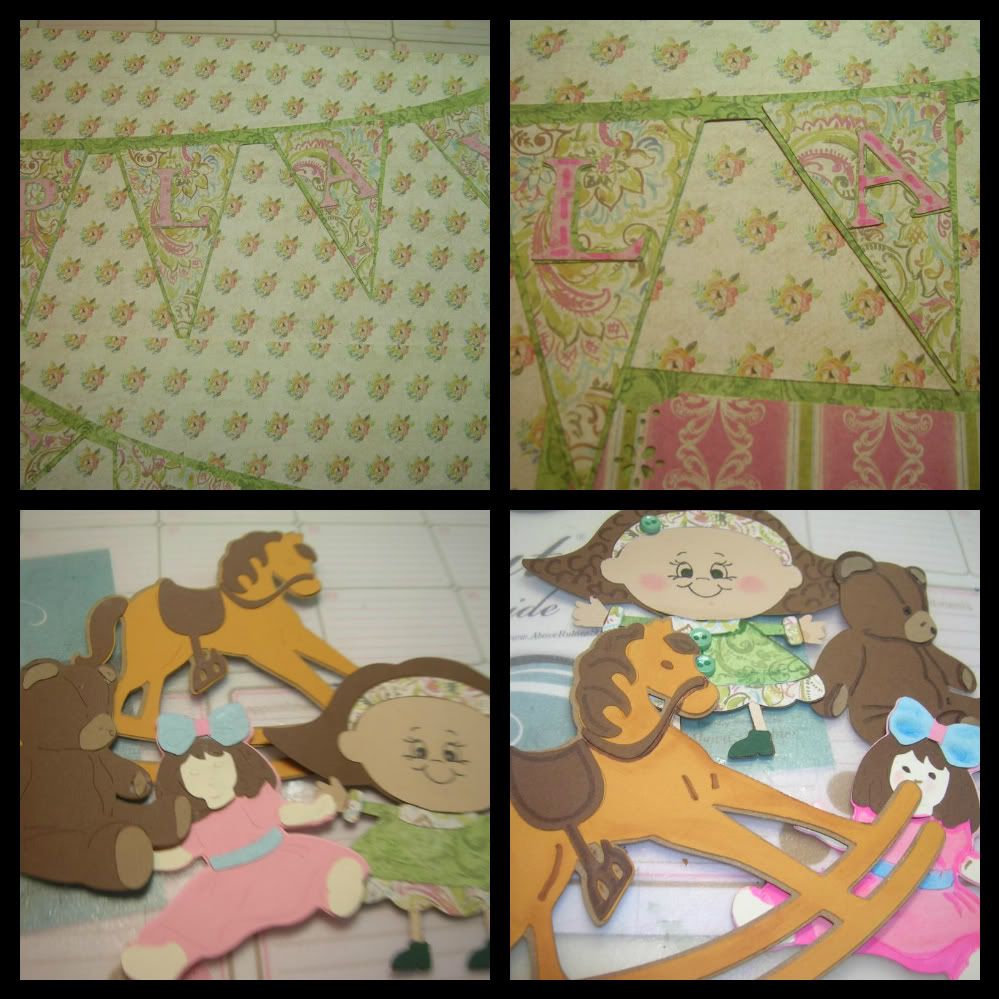
The banner is cut from Jolly Holidays at 5.24 on my Gypsy.  I then used my
Gypsy to hid the letters on the inside cuts which spelled NOEL.  I then
used font and shadow from Plantin cut at 1.25  to spell out PLAYTIME.
 The picture on the right is the plain cuts and the right side is with faux
stitches on letters.  
I then used the Christmas Solutions cart to cut out the bear and doll at 3
inches and the horse at 4 inches. The little girl is cut at 4 inches from Jolly
Holidays and I hid the face and used a Peachy Keen stamp for the face.  I
cut off the mittens and used the doll arms cut at 4 inches for her hands.

I showed the cuts plain and then with Sharpie accents.   
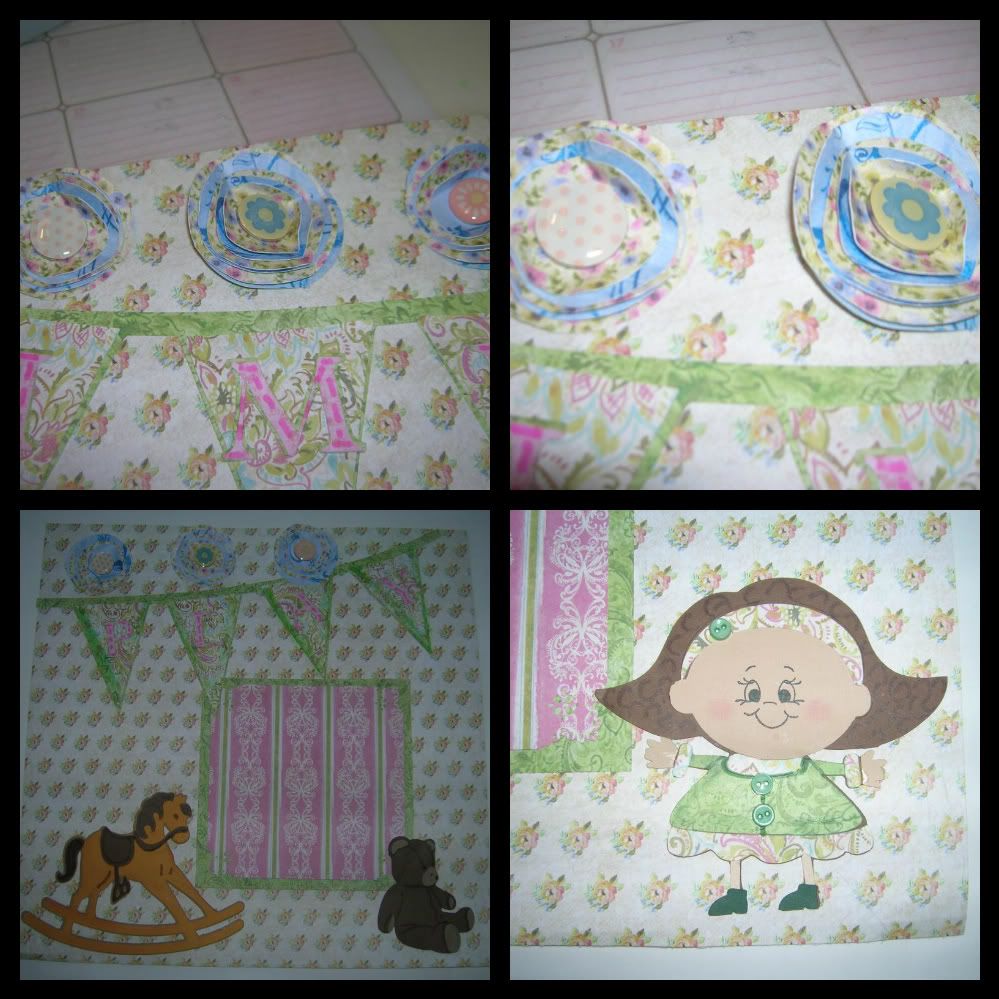
I then decided to make what I call Lollipop flowers which are made from various
size circles.  I cut out ornament shapes from the Christmas cart at 2.5,
2.0. 1.75, 1.5 and 1.0  and then trimmed to circles.  Next I layered
them alternating paper (double sided) and punched with my Crop-a-dile and added
brads for centers.  
I then added photo layout squares 5 x 5 and punched corners with a MS punch.

Here are some closeups.  
Thanks for stopping by and allowing me to share my layout. I can't wait to see
what the other design team members come up with for this challenge.   Thank
you again Bobbi Jo for having me on your blog.  

July 18, 2011

For you!

Hi!!  Lori here from ScrappinMyStressAway with a Christmas in July project for Sweet Sassy Diva!  I discovered this tag pocket from Going Places when I first got my Gypsy and did not have a ton of carts and figured out how to size it to fit a gift card.  Lucky for me I save everything!!  I still had the file from 18 months ago!
I sized the tag pocket at 7.03w x 3.53h.  I am able to fit four of them on a 12 x 12 mat.
I used this paper from the Deja Views Fair Isle Christmas Pad from 2010.  I like this paper because the pattern is subtle and doesn't take away from my little elf, and at the same time has some Christmas details in it.

I scored on the tic marks and used my ATG gun to glue it together.  The first time I made one, I glued the flaps to the outside ~ oops!
I found this cute little elf pulling a wagon from Jolly Holidays and sized him to 2 inches tall (2.70w x 2.0h).  I put him and his layers (copied 3 times) onto my mat.  It wasn't until later I realized that I cut out 4 tag pockets and only 3 elves!!
I loaded my paper (regular old cardstock)...
and cut them out.

I did not have skin colored paper so I cut out white paper and inked it with Stampin' Up Blush ink.

I put a PK face on!
I assembled all the pieces
I added some stickles to jazz him up a bit!

I cut out the "for you" from Doodletype at 2.29w x 2.05h.

Here is a cute little gift card holder for that special someone next Christmas!!


--


Lori~

Be sure to check the daily deals at Group On! You can save a lot of money and get local deals! 

Groupon negotiates huge discounts—usually 50-90% off—with popular businesses. We send the deals to thousands of subscribers in our free daily email, and we send the businesses a ton of new customers. That's the Groupon magic.

Be sure to Click Here! For more information and join today!  It does not cost anything to join and why not save on Group On!

December 9, 2010

Imagine Happy Holidays Mini Album!

This week at Sweet Sassy Diva we were asked to make a mini book using which ever binding system you have (BIA,Cinch,Your Story) and since I don't have one (yet, on my Christmas list:). I was able to use a mini book held together with a ring to make my project.


Recipe
1 mini ring book (1$ at Target)
Christmas card stock (Christmas combo DCWV)
Jolly Holidays Cricut Lite
Post It craft paper (white/printable)
Christmas ribbon (1$ 4 pack at Target
Mixed Buttons
Star Embellishment from The Girls Paperie
Distress Ink "Walnut Stain"
White gel Pen
This was a fun project and so easy with the Post It paper. I started by covering the blank mini book with Christmas prints and then inking the edges for a more antiqued look I alternated red and brown stickles and also added the faux stitching along the edges.


I then used Jolly Holidays to print out all the sayings a characters for this book on White Post It craft paper.
Happy Holidays was cut @ 2 inches
The Elf and Santa was cut @ 2.5 inches
The Noel banner and the tree was cut @ 3 inches
The wreath was cut at 3.5 inches


After I layered all the images I was able to place them on each page, I added embellishments like buttons and gems.


Lastly, I tied ribbon around the ring and I really like the way it made the book look in the end. The back sides of each page were left blank. I will be adding Christmas pictures of my girls with Santa from the years past and give this to my mom as one of her Christmas gifts!

Summer