MyFreeCopyright.com Registered & Protected
Showing posts with label Kristin. Show all posts

February 24, 2011

For my Friend!


As Sweet Sassy Diva is getting ready for her Cricut cruise, her DT was asked to make a project using the colors in the picture below.
What do you think? Do you think she is excited for her cruise or what? I am just plain jealous.
So for my project I made this card for my friend.
I used Accent Essentials for the flower cuts. Here is how I set it up on my gypsy.
The sizes are the flowers are as follows: 1 @ 3.64 x 3.5, 1 @ 3.12 x3, 1 @ 2.6x2.5, 1 @ 2.08 x 2, 1 @ 1.56x 1.5
Then after they cut out I curl the petals.
I just use a pen do curl with. Then you layer all the flowers together and apply a brad in the center to hold them together. I made the brad using the I-Top tool and a 16mm brad.
then I put the card together using yellow cardstock for the A2 size card and DCWV the Dots, Stipes &  Plaids cardstock pad for the patterned paper. I glued the flower on the upper left corner and then used CTMH True Friends stamp for the saying. I added buttons to the bottom of the card.


February 6, 2011

Movie Challenge: Moulin Rouge

Hey everyone! Kristin from The Crafty Kitchen (http://kristinscraftykitchen.blogspot.com) here. This week our task was to create a project around our favorite movie. One of my favorite movies of all time has to be Moulin Rouge. I love the music, the costumes, and of course, Ewan McGregor :)


There is one quote from that movie that I always remember and I love:


"The greatest thing you'll ever learn is just to love, and be loved in return".


I made a card around that quote, and I really love it! I tried to stick with reds and blacks, and a lot of distressing for a vintage look. Hope you enjoy!


Recipe:
*Hannah Montana Cricut Cartridge
*Martha Stewart Elegant Cake Art cartridge
*DCWV Black Currant Stack
*Cream Cardstock
*Tim Holtz Vintage Photo Distress Ink
*Martha Stewart Glitter in Kunzite and Tourmaline
*Felt flowers from Making Memories
*Top note punch by EK Success

January 27, 2011

Toilet Paper Roll Valentine Mini!

Hey everyone! Kristin from The Crafty Kitchen here. This week our project was to make something for Valentines Day BESIDES a card or layout using our Cricut. I made an adorable Valentines Day toilet paper roll mini album using both my Gypsy and my beautiful new blue Expression, plus my favorite new Martha Stewart punches.


Recipe:


*Toilet Paper Rolls (I used 4)
*Patterned Paper
*Cuttlebug or Big Shot (for flattening rolls)
*Martha Stewart Elegant Cake Art Cartridge
*Cricut Classic Font Cartridge
*Tags, Bags Boxes and More Cartridge
*Scalloped Flower Gypsy File
*Cinch or Bind It All
*Martha Stewart String Lace and Cherish Hearts Border Punches
*Martha Stewart Heart Lock and Key Punch
*Martha Stewart Flourish Heart Punch
*Pink By Design "All Girl" and "Scripted Year" stamp sets


I have more pictures and a video showing all the pages on my blog!


I wish I could claim ownership of the gorgeous flower file, but I got it from Jen from her awesome blog. It's just like the Sizzix 3D flower die, but you can cut it with your Cricut at whatever size you want!


January 20, 2011

Wrap up these favors!

Hey everyone! Kristin from The Crafty Kitchen here. This week at SSD our challenge was to create something for a Valentines Day Party. I love to make a little something for my friends every year around Valentines, and this year I've decided to do chocolate covered Oreos. I wanted to make a cute box and tag to package the cookies in, and the boxes on Wrap It Up are just too cute not to use. I used the blank box on the cartridge, and then used my new Valentines Day Martha Stewart Punch All Over the Page called Ruffled Heart to punch a window on every side. These punches are so easy to use and make a perfect window!


The tag is also from Wrap It Up, and I used clear Stickles on the flower. The "To" and "From" stamps are from Pink By Designs Christmas Wishes Stamp Set.

January 14, 2011

Nifty Fifties!

Hi, SweetSassyDiva here!  In honor, of the MPS blog hop, I am giving away a cricut cartridge from my own stash!  The cartridge will be Nursery Rhymes which also has a wonderful font. 

Please enter a comment on this post and a winner will be drawn.  I would be honored if you would also become a follower. 

To see the project I made for the MPS challenge.  Click Here! 

Now, on to another wonderful project....

Hey everyone! Kristin from The Crafty Kitchen here. This week our challenge for the SSD Design Team was to use one of our new cartridges. I don't own any of the new, NEW cartridges (Nate's ABCs, Mothers Day Bouquet, etc) YET, I'm hoping to snag them cheap on eBay :) However, I DID get Nifty Fifties during PCP's $13 cart sale, and I was dying to use it!


I used the dress form and the dress and cut everything at 4 3/4". My Gypsy was charging in the other room, so I made this card WITHOUT my Gypsy, and it was a totally weird feeling ;).


Recipe:

*Nifty Fifties Cartridge

*DCWV Black Currant Stack (for dress and pink mat)

*DCWV Latte cardstock stack (for dress form and grey card base)

*Jolees Swaroski Crystal Elements

*i-Rock

*Martha Stewart Pearl in Obsidian

*My Pink Stamper "Pinkalicious Puns" Stamp Set

January 8, 2011

Winter Fun!

Click Picture for blog hop and chance to win awesome prizes including cricut cartridges!
Photobucket
It is extended to Monday.  Be sure to enter for the drawing!


Hello everyone! Kristin from The Crafty Kitchen here. This week our challenge was to either recycle something into a project, or use something new we got for Christmas. I decided to do BOTH!


I got an i-Top for Christmas and thought this would be the perfect project to break it out on. I made a snowman using white paper scraps out of the three different sizes of Brad Daddies and gave him buttons and a face using black Stickles. The twine actually came off of a package a received for Christmas :) The sentiment is from Pink By Designs "Winter Fun" stamp set, and I punched it out using an EK Success Punch. The snowflakes are a Martha Stewart punch, and I used my i-Rock to put some bling in the center. The patterned paper is from DCWVs Winter Combo stack, and the craft cardstock is Recollections. I absolutely love my new i-Top, I can't wait to combine it with my Cricut for some stunning cards and projects!

December 24, 2010

Snowman Ornament!

Hey everyone, Kristin from the Crafty Kitchen here. This week our challenge was to make a last minute stocking stuffer. This wasn't so much a stocking stuffer, but a last minute gift for family and friends. I wanted to make something quick and easy to give to family at a holiday gathering, and thought these snowmen ornaments were just perfect. I originally saw these on Momo's blog, but the funny part is I saw these same ornaments at Target and thought "I could totally make those!"


Recipe:

*Large Glass Ornaments

*Pledge Floor Wax with Future Shine

*Martha Stewart Crystal Fine Glitter

*Martha Stewart Obsidian Pearls

*Red and White Pipe Cleaners

*Red Pom Poms

*Orange Glitter Paper

*Glue Gun

December 14, 2010

Perpetual Calendar with Bind-it-all!

Hey everyone! Kristin from The Crafty Kitchen here. This week for the SweetSassyDiva Design Team our challenge was to create something using a Cinch, BIA or Your Story. I had seen photos of a perpetual desktop calendar made with a Bind It All a few months back, but with no instructions, so I decided to make them up and give it a go using my Cinch. This is what I came up with!


All you need are three 12 x 12 sheets of chipboard, three sheets of cardstock in coordinating colors and month, week and day stamps. It did not take long at ALL to put together and it looks super cute! This whole project is actually Cricut-free, although I'm dying to go back through it now and add some Cricut embellishments :)


Congratulations, SandraMc said: Love the batman book! Please contact me by Dec 16th.  - Sweetsassydiva

December 6, 2010

Baby it's cold outside!

Hey everyone! Kristin from The Crafty Kitchen here. This week, we needed to use our AWESOME new Post-It Craft paper to make a Christmas card. I decided to make the mitten from Simply Charmed entirely out of the paper and put it through the ringer. Let me tell you how much I LOVE this paper. It cuts beautifully in the Cricut, embosses beautifully in the Cuttlebug, and is GREAT for flocking and glitter. For his cuff, I kepIt the paper on the backing sheet, ran it through my Xyron and added Martha Stewart white flocking. I used the Swiss Dots folder on the green and added MS pink glitter for his cheeks.


The adorable patterned paper is from DCWVs Christmas Combo stack. The green mat behind it is also Post it paper, which is AWESOME because I didn't have to break out my ATG and use my precious tape to adhere the big square!!


I used Pink By Design's "Christmas Wishes" stamp set for the cute sentiment, and then I topped it all off by popping the mitten up on an Action Wobble! He looks SO CUTE wobbling back and forth on the card. I have a video showing you exactly how to use the Action Wobbles below.  They are so easy and add such a nice touch to the card!


If you are on email subscription, you can click on the picture below, to view the video.


I hope you enjoyed Kristin's card and video.  I have to agree that Baby, it's cold outside!!! Phew! It is cold all the way down to Florida even tonight.  Stay warm inside and enjoy a warm beverage and hop along the blogs and archive posts. 

- SweetSassyDiva

November 15, 2010

Joy Home Decor!

Kristin from the Crafty Kitchen here! Our challenge for this Design Team project was to use the color green, use our Cuttlebug in some way, and to use felt.


I decided to make this "Joy" banner using chipboard coasters. I used lovely green damask patterned paper from DCWV's "Christmas Combo" stack and inked around the edges of the coasters with Peeled Paint Distress Ink. The word "Joy" is cut from the Blackletter Cartridge using the font and the shadow.


I ran the regular word through my Xyron and then used Martha Stewart Flocking in Ladybug to give the letters a "faux felt" effect. After I flocked the letters, I ran it through my Cuttlebug using the D'Vine Swirls folder. I love how you can emboss flocked letters!


The snowflake is from the Christmas Solutions cartridge, and I cut the regular snowflake and the shadow as well. I flocked the snowflake using MS Flocking in Swan.

I punched holes and set eyelets in all of the coasters using my Crop a Dile, and strung ribbon between the holes. I think it turned out great and I love the traditional Christmas look :)

- Kristin

These programs are available for free on the Gypsy for a limited time.  If you already own a gypsy, be sure to do an update before 12/31/2010.  Check back this week for some more Home Decor projects! 

- SweetSassyDiva

November 13, 2010

Smiley Card Take the Cake!

I cut both the card base and the cake from the Smiley Cards cartridge. I re-sized the base in my Gypsy to be approximately 5.5 x 5.5" and cut it from craft colored cardstock.


I couldn't find a patterned paper that I really liked for this card, so instead I took some pink Core'dinations paper and ran it through my Cuttlebug using the Paisley folder. I sanded the embossed image so the lighter pink color would show through.


I also cut the cake using the craft colored cardstock, and purple Core'dinations paper that I ran through my Cuttlebug with the D'Vine Swirls folder (a must have folder!) and sanded.

The sentiment is from Pink by Designs "Take the Cake" stamp set. There are so many wonderful birthday sentiments in this set i had a hard time choosing one!

- Kristin

November 7, 2010

Thankful!


Recipe:


Cricut Lite "Celebrate with Flourish" cartridge

DCWV Amber Autumn Stack

Recollections Spice Market Pack

KI Memories "Fall Icons" Stamp Set

Peeled Paint Distress Ink

Vintage Photo Distress Ink

Brown Braiding Cord


This is a 5 1/2 by 5 1/2 inch card. I cut the green and patterned mats in 1/4 inch increments and inked around the edges. I cut the Pilgrim hat (with shadow) at 4" and inked all the cuts with Vintage Photo Distress Ink. Before I applied the hat, I used braiding cord around the card, secured in the back with a glue dot. I heat embossed the "Thankful" sentiment using black ink and clear embossing powder.

- Kristin

October 30, 2010

Open...if you Dare!

I hope you enjoyed all of the pink projects but, it is not over yet..... there are still some SweetSassyDiva Designers that want to share some more wonderful projects in jewel-tones and fall colors!  Do you have your Halloween costume ready?  Whether you are handing candy out, going trick or treating or tripping the light fantastic....here are some ideas to get you ready to enjoy the weekend!

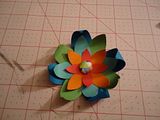
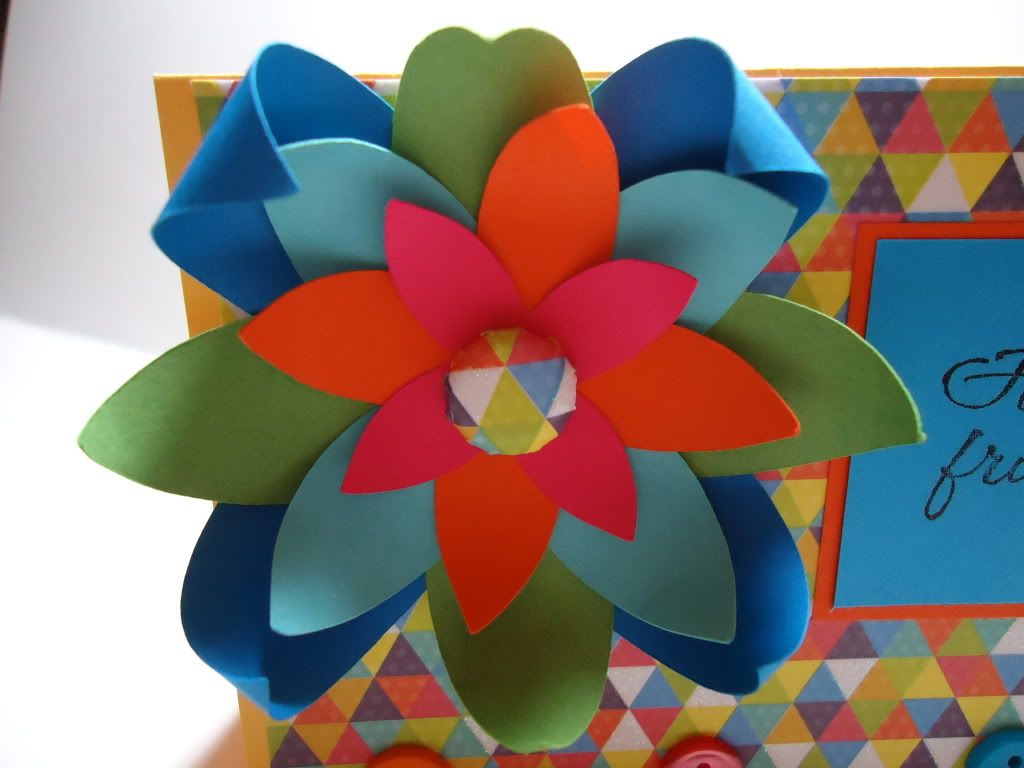
Halloween Waterfall Card and Introducing......

Kristin!  I'm 25 years old. I'm a music teacher by trade, and a cake decorator as a side job. I've been married for a little over then a year, and we have two babies (of the four legged variety), a Yorkie named Bella and a 6th month old adorable mutt we rescued named Dixie. I am actually fairly new to papercrafting. I bought the Cricut Cake for myself as soon as it came out to help with my small cake decorating business. I fell in love with my machine, and it made me think about what all of the papercrafting Cricuts could do. Last spring, my rural school district decided to eliminate their music program due to budget cuts, therefore leaving ME out of a job. I needed something to do with all of my newfound free time, so I bought a used Baby Bug from a friend, and my obsession with papercrafting was born.

I started my blog, The Crafty Kitchen, over the summer as a place to share my Cricut Cake and paper Cricut projects. I can't believe in this short amount of time I have almost 150 followers! I absolutely love my new found passion, and I can't wait to share some of my projects with you on SweetSassyDiva :)


Fright Night


Recipe:


*Waterfall Card .Gypsy File (available on my blog)
*DCWV Midnight Spell cardstock, glitter and pattern stacks
*Crop-A-Dile and large eyelets
*Mini Monsters Cartridge
*Happy Hauntings Cartridge
*Recollections Halloween Brads
*Purple Glitz Stickles
*Tim Holtz Dusty Concord Distress Ink