MyFreeCopyright.com Registered & Protected
Showing posts with label Batman. Show all posts

June 27, 2011

Patriotic Stamp!

Hi Everyone!  It's Liza from Hoo's
Crafty!
   Very excited to be back here on SweetSassyDiva for
another wonderful project week.   This week we are doing STRIPES for
the 4th of July.  When I decided to do this, I thought....sure, that's
easy!  Three colors, some stripes, some stars, tada!  Oh, but the
catch..... TRY NOT TO USE STARS!   My brain froze.  How do you do
4th of July without stars???

After some thinking and staring at the wall I knew exactly what I wanted to do!


I decided to make a new door hanger for the holiday

I used Recollection, DCWV and Core'dinations papers
Gypsy Wanderings for the postage stamp cut {11.25"}
I hand cut the white mat {9.75" x 9.75"} and layered that with the blue mat
{9.75" x 5"}
I did ink the edges of those mats with Tim Holtz distress ink before adhering
together.
I cut a border from the kraft paper with a Fiskars punch and placed it below the
blue mat.
Wrapped red bakers twine around the bottom of the white mat to add some color
and texture.
I added some faux stitching all the way around with a white marker.


The red and white stripes were cut {1" x 5"} and {1" x 9.75"}
I doubled up on the reds and placed 3D foam between to give those stripes more
dimension

For my medallion,  I made an accordion fold rosette from some patterned
paper.  I used two {1" x 12"} strips glued together. 
For the number I used Sweet Treats with REAL DIAL SIZE {2"} and did some faux
stitching in white.
The letters were welded together on the Gypsy using BATMAN font {1.25"}, faux
stitched and layered onto the number.


The rocket cuts are from Designers Calendar {2.25"} in varying colors.  I
popped up the center rocket for dimension and added some white dots with a Gelly
Roll pen.
I tucked those in behing the rosette and adhered down.


As you can see...I stayed away from the stars by using white buttons.
I added some polka dot grosgrain ribbon from SU! to the back and proudly hung on
my front door.

Hope you are all having a wonderful week and have been coming back to see some
of these great projects from the Design Team.   Visit me over at Hoo's Crafty! to see some more of
my projects.


You can get baker's twine by Clicking Here! be sure to tell them that sweetsassydiva.com sent you!

June 26, 2011

Stripes for 4th of July Challenge!

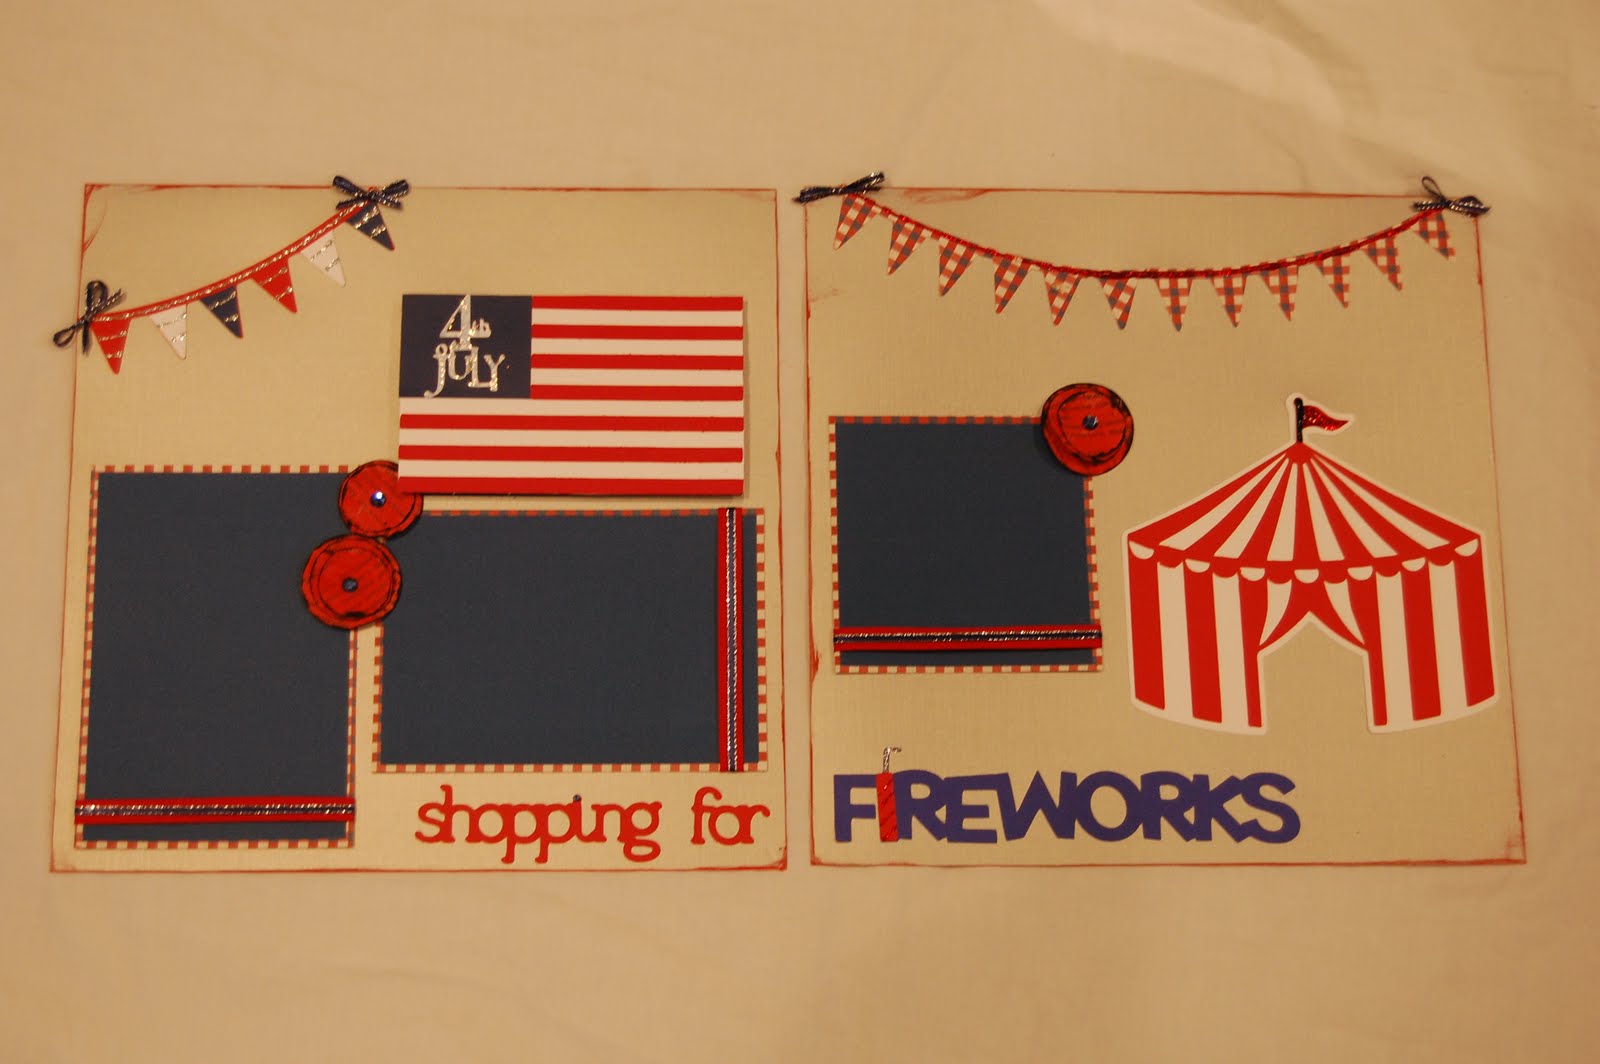
Hi!  Lori here from ScrappinMyStressAway!  My challenge for SweetSassyDiva was to create a 4th of July project using stripes but no stars.  This was not as easy as I thought it would be!!  I started out thinking about making a card and was thinking about the flag without using stars.  I thought it was too plain for a card, so I merged this idea with another one I started a while back ~ a layout about shopping for fireworks!

I found this flag on Independence Day and cut it out at 5.96w x 3.50h.  I cut out the flag in white and stripes in red.

I cut out 4th of July from Stand and Salute to fit in the square where the stars would go.  I wasn't sure if I was going to put white on blue or blue on white, so I cut out both.

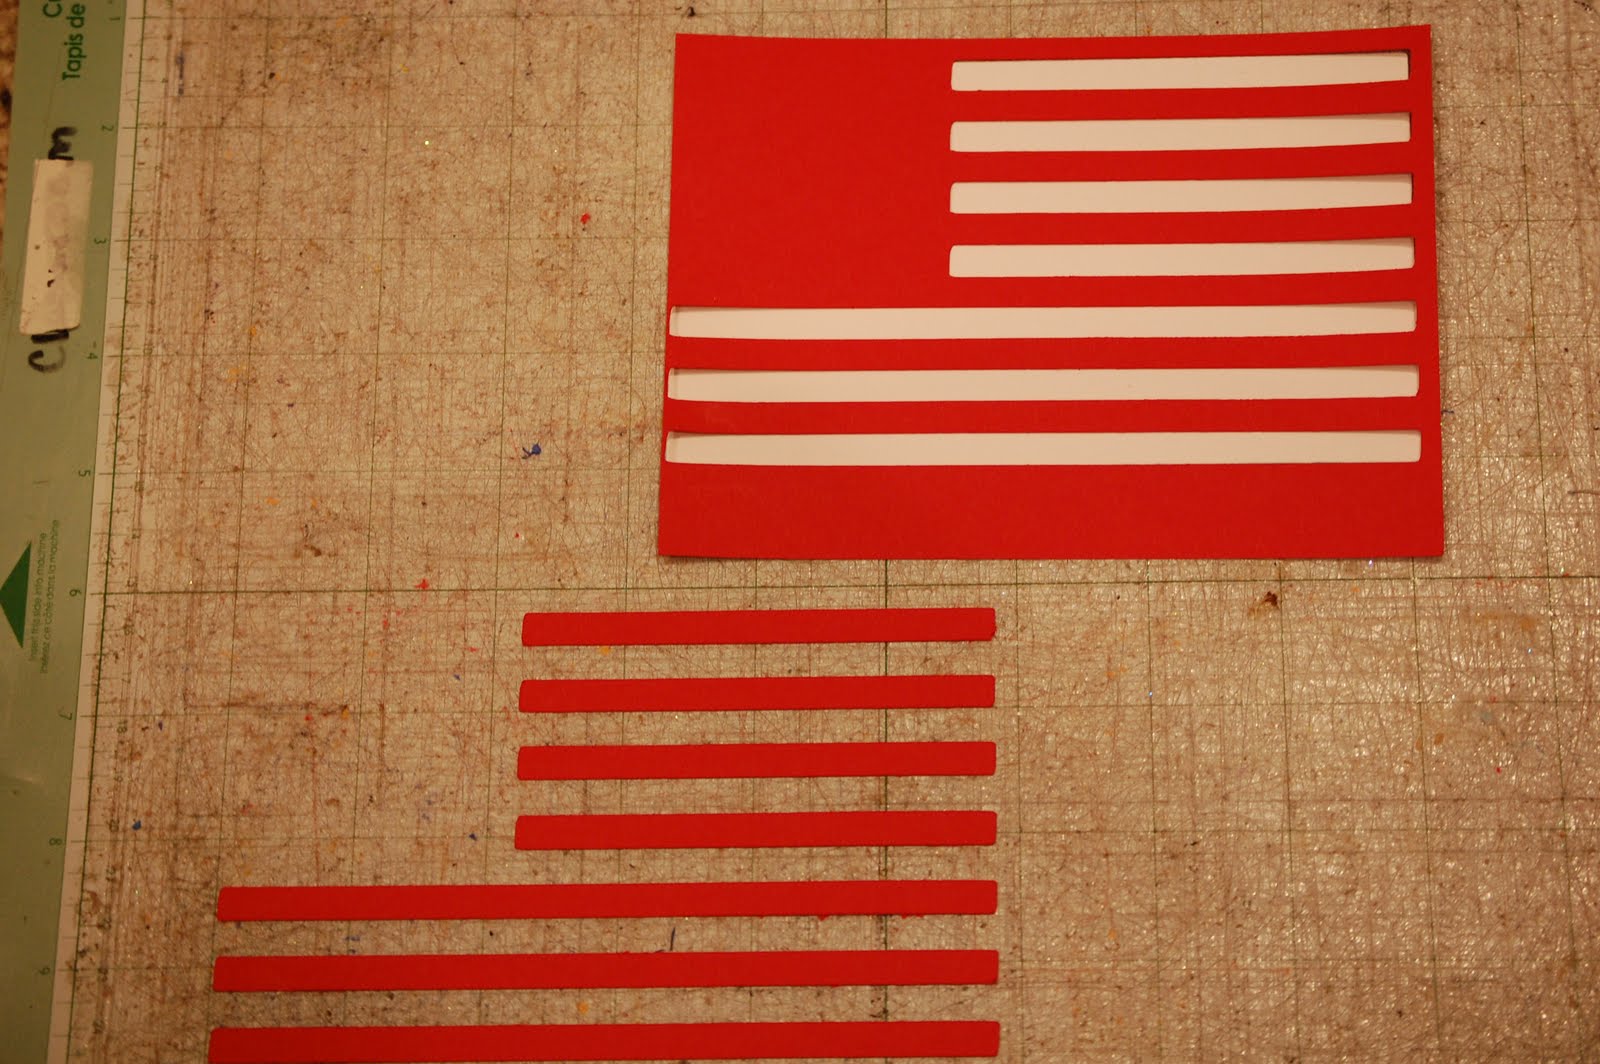
I ran the stripes through my Xyron.

I used the negative piece as a template to adhere the stripes to the flag.

I pulled off the negative piece.  As you can see, I leave the pieces on the mat until I am ready for them.  This way I don't lose anything!!

Nope....did not like this look!

Much better!  But the blue looked too long, so I looked it up online and realized the first long stripe is white.  I trimmed the blue and resized and recut the 4th of July.

Then I cut out the tent and banners from Carousel.  The tent is sized at 6.58w x 5.75h..  I cut out the banner at 5.67w x 2.23h.

I cut out the base of the tent and more banners on the next layer.

I used the font on Batman for the word FIREWORKS at 1.31h.  I cut an extra I in red and welded a fuse (a lower case L from Lyrical Letters) to the first L.  I welded the fuse to the L and welded the word together.  I welded and cut out the words shopping for (at 1"h) from Lyrical Letters

I cut apart the blue and white banners and glued them to the red one.


I took these circles (3 different sizes) that I punched out from a thesaurus.

I crinkled them up.

I painted them red with acrylic paint.  I used a little black paint to ink the edges.

I layered them into flowers with a blue crystal in the center.
I took my flag and made it into a secret journaling flap.  Or maybe I will have an extra picture to stick inside...

I like hidden photos and journaling!!

Here is my little firework.  I used stickles to stripe it and to cover the fuse.

I inked the edges of the paper with red paint.  I added stickles to the 4th of July.  I added stickle stripes to the banner.  I also added a stripe of ribbon (or two) to the photo mats.

Here is the other page.

In our family, shopping for fireworks is a big tradition!  My husband (biggest kid in the family) goes as often as I allow him to!!  We have a big party every 4th!

Now, what to do with my discards and scraps.....well make a card of course!!

  
I kept with the stripe theme and glued down some stripes.

I took this scrap and just cut out three circles.  I crinkled them and inked the edges with black paint.

I added some gems and the white 4th of July (the one that was too big for the flag)!

Thanks so much Bobbi Jo for having me on your blog for the 4th of July Stripes Challenge!!!
,

December 14, 2010

Crayon Treat Box!

Today I have for you something super cute and simple to do! This week we have to create something for a Holiday party, so I decided to do this little crayon box for treats to place around the table! 


What do you think??

I used SEI'>http://www.shopsei.com/main.cfm?heading=0&categoryoid=11">SEI Kris Kringle collection and stickers(they have two Christmas lines on clearance right now!!!)! Ribbon is from Joanns.... I think...

The box!! You are probably asking!! Where is that box from??! hehehe Well, if you have Make The Cut or Sure Cuts A Lot you can purchase cuts from MyScrapChic'>http://myscrapchick.com/">MyScrapChick, these are very affordable to buy and she has the cutests things! oh and they have a 70% off right now!!! They are very easy to use!

Thanks, as always my crafty friends, for taking a peek!!

Abby


There is also a crayon box cut on the Batman cartridge.

SweetSassyDiva

December 11, 2010

YourStory Blog Hop!

Welcome to the YourStory Blog Hop!  If you arrived here from Sarah then, you are on track!  If you arrived here first, please go check out Sarah's site, after you are finished entering here, and be sure to check out all the other wonderful projects and a chance at all the delicious blog candy! 
If you get lost along the way, here is a list of the wonderful participants.

Sarah
madebymomo
sweetsassydiva  YOU ARE HERE
morethanfavors  Next
twoscraptasticgals
craftingwithkatie
caramiller
heartinthedetails
kathyand3kids
cricutchick

I am honored to be a part of this blog hop and a special thank you to Sarah for putting this together. I have to say that Sarah's wonderful recipes are making me hungry. I have been looking at those yummy creations all week! I am so glad that she is sharing the recipes with us although a care package with the goodies already done would be even better!


There is a larger YourStory that laminates and binds but, they came out with a cute little one that is so easy to take along with you.  It does not laminate but, OH MY you can bind smaller minis on the RUN!  It comes with some folders that you can emboss and embelish your heart away.  You can also make your own books too because they came out with some amazing glue strips!  They sold them on HSN as well as the new Yourstory at launch.  I made sure to snatch those babies up as well. 

So, I decided to do a mini for my son.  He has the fortune to having a December birthday so, imagine how much he loves December!  All those presents and parties galore!  Anyway, he has been wanting to have a Batman party this year so.....as luck has it I have the Cricut Batman cartridge.  Lucky little boy isn't he?   So, he looked through the handbook and placed his order for what his ideal birthday party would include even cricut related.

He decided among other things that he would like to have the invites on page 58.  I thought I could expand his request and felt that a mini using this as well would be really great to use the Yourstory.  So, I grabbed some cardstock, Post-it paper and sat down by the Imagine to make a mini for my son.  My challenge was started and I think he will be so excited when he sees his birthday mini.  With the Yourstory and the new glue strips, you can create any custom book that you or your little one can dream up. 

If you did not order the YourStory during the launch, be sure to check it out on HSN.  YourStory Photo will be airing on HSN Dec 13 at 2am EST (that’s 1am CST and 12:00 MST).


On the Imagine, you can Print, Cut or Print & cut.  For my mini, I used all three options!  You can change the mode by going to settings and selecting which option from the drop down menu. 


I took a golden colored cardstock, and selected to just print.  Notice in the picture below that I added two square boxes and as they are not shaded in they will not print.  I did shade in the text in a near black.  I decided to do the mini book in 5.3" so that I could place two cards on one page.  You could just cut the words out traditionally and layer but, I wanted to challenge myself to print some text.


Then, I changed the settings to cut and cut out the card. 


After I cut the printed cardstock out, I also cut two more copies of the folder to use for the inside pages.  Now, it was time to do the same thing with the "Layers: detail 2" by printing a dark midnight blue on the blue cardstock.  I cut the piece out on the "Layers: detail 1". 


I followed the directions on my YourStory glue strips and scored the paper of the cover.  The glue strip has to be cut approximately 1/8" shorter on both ends so that the glue does not seep out.  The great thing with the glue strips is that you can easily cut them to fit with scissors and if you are making a thicker book you can add more than one glue strip side by side.  Adding the pages and binding them is so easy with the YourStory.  Viola!

I also cut out the other layers and used the new Post-it paper to cut and print out some small details like his face.  I think that the belt would be easier as well using the Post-it paper.  A lot easier than getting glue all over and trying to chase those small pieces into place. 


If you are on email subscription, click on my blog blinkie below to view the video.


Now, the fun part of adding some cute artwork, words and a number for his age as well as the shadow for the pieces to go into the mini.  I used the cut feature.  As you can see I did change the mat size which is useful if you are using smaller paper or it can also help to move the items on the mat.  You can also cut with your Gypsy on the Imagine and place the items exactly on the mat where you want it.  Unfortunately, you can only use the original cartridges with the Gypsy and not the Imagine cartridges at least at this time.  I do hope they have the printing option as well as the ability to use the Imagine cartridges with the Gypsy.


To change the paper size, you will use the arrows to change the size up or down.


Yea!  I cannot wait until he has his party and can add some cute pictures to his new mini. 


Here are a few glimpses of the inside but, not all of it. 


Now on to some yummy blog candy!  Provocraft has donated the blue cuttlebug and accessories for us to giveaway as the grand prize.  Be sure to leave comments on each of the blogs along the way to increase your changes to win! 

I also am adding some blog candy to the mix as well.  I am honored to have one of the last donated Scrap'n Totes to offer as some yummy blog candy!  Marlo has graciously donated this prize to one of my lucky followers.  To enter for a chance to win, become a follower of my blog, leave me some blog love and be sure to check out the Scrap'n Tote website as well.  You can see more about the Scrap'n Tote storage system by clicking here!  Which color is your favorite?

In fact, Marlo is having a special this weekend only!  OMG!!!! Scrap'n Tote Sale for only two more days.... Saturday & Sunday ONLY! Use Coupon Code: ChristmasTime for 20% off Mist Green & Pink Suede Scrap'n Tote!!!!" Click the picture below for Discount code to use on your order of a Scrap'n Tote!


She is also having a new drawing for some wonderful Provocraft prizes.  Click here for more details!


EDITED:  Yea!!! my wonderful husband has the video done and I uploaded it above.  :)  [I did a video too but, my darling husband was tired and went to bed before I finished up.  Ok...I sound so tired in it too!  I guess crafting at all hours will do that to us all.  Hopefully, he will have it uploaded later today.] 

Be sure to check back tomorrow as well for another YourStory mini.