Hi my crafty friends, Brenda here and this week our challenge at Sweet Sassy Diva was a "back to school" challenge. I know some areas have already started back to school, but my DS starts on the 28th so he has a few more days of summer left. lol Of course he has been working all summer so it hasn't been all play this summer. For my project I did a little shaped card. I should have thought it out a little more than I did because it is a little delicate. lol I got all my cuts from Simply Charmed. I layed my design out in my Gypsy. I welded the "back to school", "notebook paper" and the "pencil" all together to form my card.
This is what it looks like on my Gypsy:
Here are the layers to my card broken down ready to cut with my choice of colors:
Here is my card without the layers. I folded over the "back to school" and creased with my bone folder.
Next I cut all my layers out and assembled them on my card. Stamped a sentiment inside and now it is ready to send out. I think I will send it to my granddaughter since she is going back to preschool this year. My card will fit in an A2 envie perfectly!
Showing posts with label Simply Charmed. Show all posts
August 19, 2012
Back to School!
April 12, 2012
Hanging with my Peeps!
Hi my crafty friends, this is Brenda from Friends Craftin' with Friends. This week the design team at Sweet Sassy Diva was asked to use hens or chicks on a project. I was planning on starting a flower album with my plants and flowers in it. I have been wanting the plant called "hen and chicks" for a while now and planned on getting some, taking pics and doing a lo. Well that didn't happen. Never went and got any plants, etc...So I had to come up with another idea and to be quite frank, this is all I could think of. lol Not much, but will do I suppose. After I was all said and done, I thought about doing a lo of one of my grand-daughters being a mother hen to a sibling. Yeah, then I get an idea!! lol Ok, for my card I started out with a 5 x 7 base. Planned out my card on my Gypsy. Ok don't look now, but I forgot to weld my vine!! Ack!! Oh well I made it work out. lol
Then I cut and assembled my pieces. And then arranged them on my card. My sentiment is computer generated and cut out with SU word window and the modern label punch. The carts that I used are Martha Steward Seasonal Cake, Creat-a-Critter and Simply Charmed.
Not the most orginal card, but still think it is pretty cute. lol I know the rest of the design team will wow you with their creations, so sit back, relax and enjoy the week!
Labels:
Brenda,
Create a Critter,
Cricut,
Gypsy,
Martha Stewart Seasonal,
Simply Charmed
March 5, 2012
Chase a Rainbow!
Hi all you crafty friends! Brenda here from Friends Craftin with Friends. This week on Sweet Sassy Diva we were challenged to use things like a rainbow, leprechan, pot of gold, green, etc...So I knew right away what I wanted to do. One New Year's Day we had a shower come through, then the sun came out and with all the black angry clouds was this beautiful double rainbow!! So of course I had to take pics of it. So that is what inspired my layout for today. I knew that I wanted to print some cloud paper as the base to my layout and I did so by using the Imagine cart "Best Friends". Searched my Gypsy for images and to lay out my design. The cart I ended up using was "Simply Charmed" and one little cloud from "Pooh and Friends".
Then I printed my base paper from my Imagine using the "Best Friends" cart. For the bottom of my base I used some green pattern paper from DCWV Farmers Market stack, love this print-reminds me of St. Patricks day. lol
Next I started placing my die cut images around on my base papers like I had it on my Gypsy. The only thing I ended up changing was a pic size and orientation. I thought I had taken a vertical picture, but I didn't.
Thanks for joining us here at Sweet Sassy Diva, I hope you find lots of inpiration this week! Be sure to come back and see what all the Design Team has in store you for, I promise you won't be disappointed!!
Next I cut out, inked and assembled all my images. For my inks I used Tim Holtz distress inks: Vintage Photo, Scattered Straw, Barn Door, Pumice Stone, and Peeled Paint.
Here are my die cuts all assembled, inked and stickled.
Next I started placing my die cut images around on my base papers like I had it on my Gypsy. The only thing I ended up changing was a pic size and orientation. I thought I had taken a vertical picture, but I didn't.
Thanks for joining us here at Sweet Sassy Diva, I hope you find lots of inpiration this week! Be sure to come back and see what all the Design Team has in store you for, I promise you won't be disappointed!!
Labels:
Best Friends,
Brenda,
Cricut,
Cricut Imagine,
Gypsy,
pooh and Friends,
Simply Charmed
November 28, 2011
Deck the Halls!
Hello all.... now the fun begins.... getting every nook and cranny of our house ready for Santa! I will tell you that my WHOLE family is crazy about decorating for Christmas. My sister has a plaque that says " If it doesn't move, Decorate it !" and that's pretty much what happens around here :) It all starts with my husband and daughter (last one at home) bringing ALL the boxes and tubs down from the attic and stacking them all over the place. Then it's at least a whole day to pack away everyday things and place the Xmas decorations in just the right spots.... we even bring out pictures from years past to make sure everything gets put in the PERFECT place ... sad, I know !
The SweetSsassyDiva Challenge this week is Trim the Tree. I guess I could have made an ornament, but no... I had to come up with the idea of starting a special garland for my grandkids to put on their tree, with the idea that I will add to it each year.... only time will tell on that part :)
I couldn't get a good picture of the whole thing in one shot, so there will be lots of them...
It all started on the Gypsy...
The clothing is from Paper Doll Dress Up and not really made to fit the cute animals from Create A Critter, so I had to do some playing around... First I unlocked the chain so I could set the height and width separately. I put the Create A Critter image on layer one and the clothes on layer two so I could adjust the clothing size over the critter. Sorry that I couldn't get a good picture of this part.
After the sizes were set for each of the critters it was time to cut....
I did some embossing before I started to put them together.
Then I added Puffy Paint, Stickles, Googlie Eyes and some Gel Pen lines.
The Candy Cane and Hard Candy are from Simply Charmed.
I attached ribbon to the back side and hung with these cute clips from Stampin Up.
My supply list :
Cricut Create A Critter
Cricut Paper Doll Dress Up
Cricut Simply Charmed
Cardstock - Stampin Up
Patterned paper -Hobby Lobby
Puffy Paint
Stickles
Gel Pens
Googlie Eyes
Ribbon - My stash
Tiny Clips - Stampin Up
I hope you will check out all the wonderful Trim the Tree creations the rest of the design team have come up with to inspire your creative side !
- Melinda
Labels:
Create a Critter,
Gypsy,
Mindy,
Paper Doll Dress Up,
Simply Charmed
October 25, 2011
Happy Fall Layout!
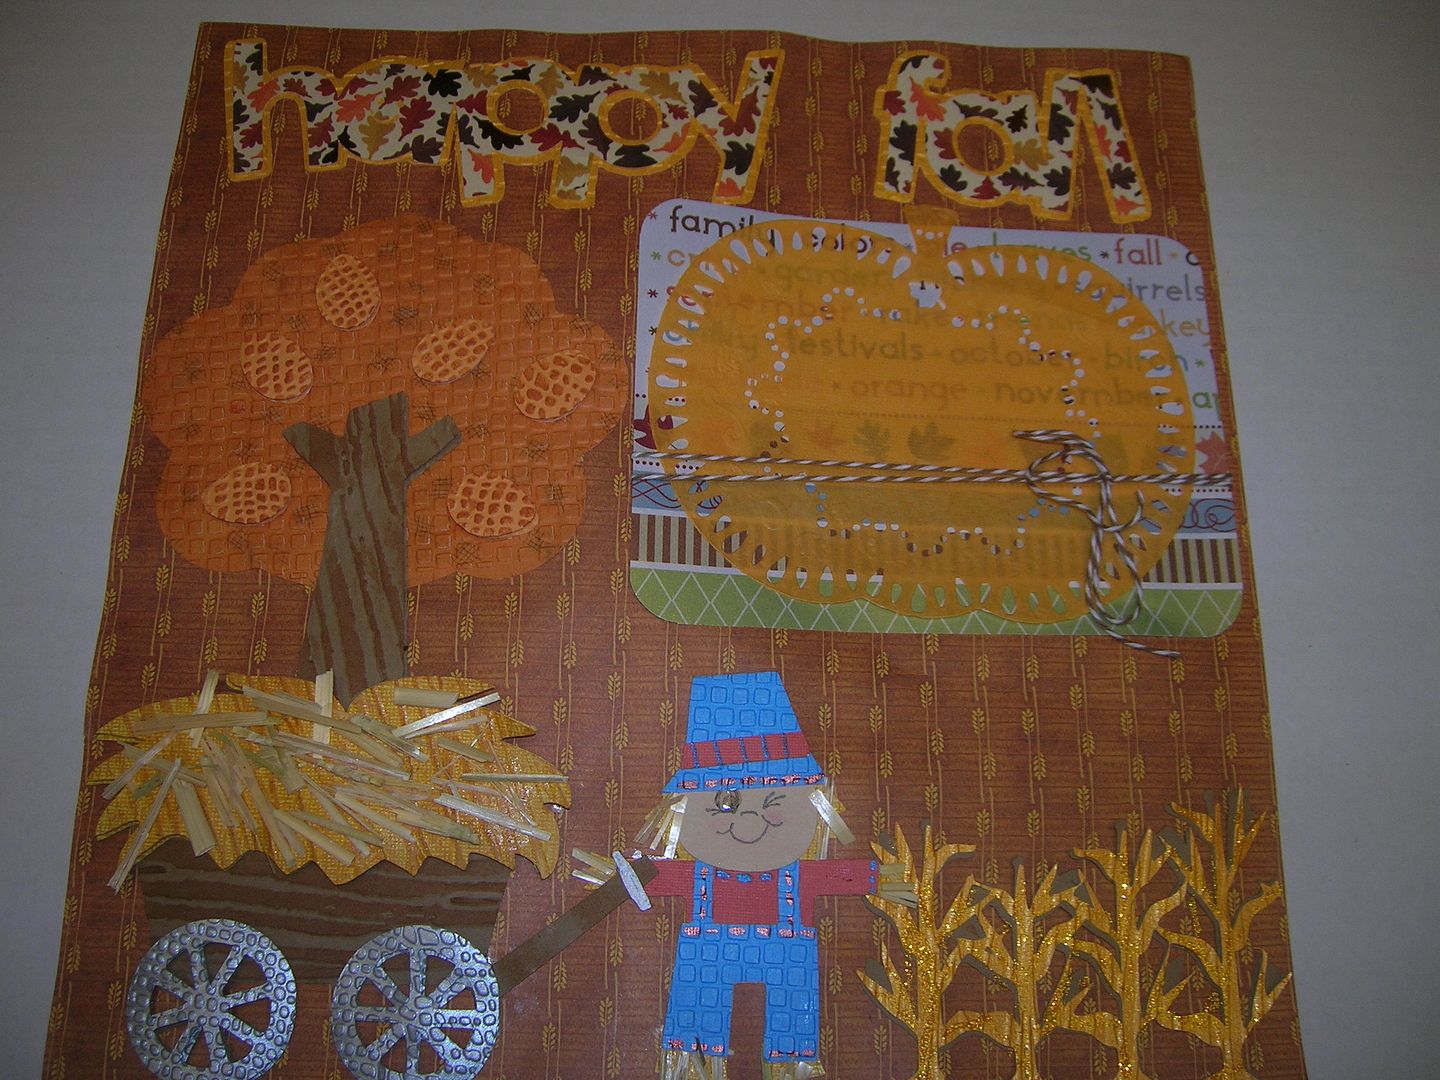
I am so excited to show you my double page layout today for the Fall is in the
Air Challenge. I had so much fun making this layout. I started out with the scarecrow couple from Simply Charmed. I also used Happy
Hauntings and Pop Up Neighborhood to complete the cuts. The recipe is at
the bottom of the pictures.
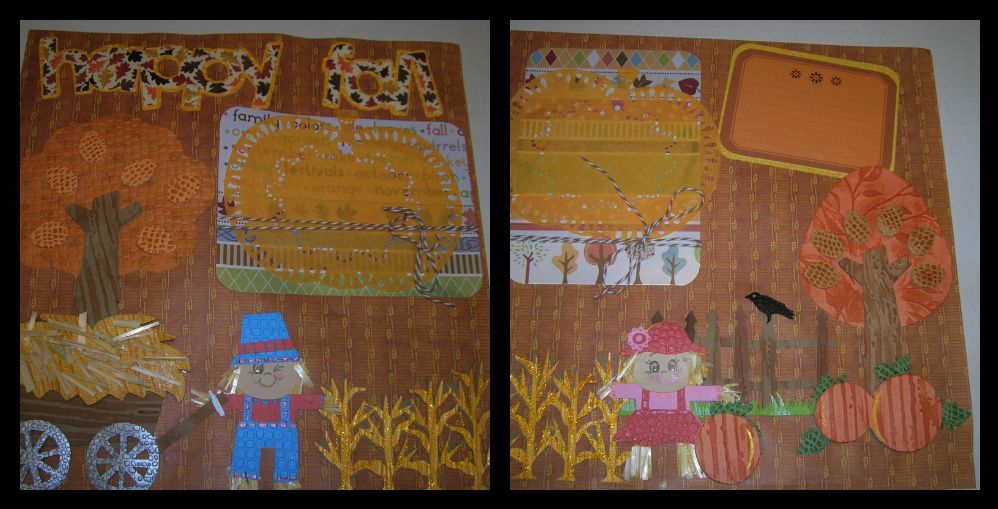
Here is the left side.
Here is the right side.
Pages side by side.
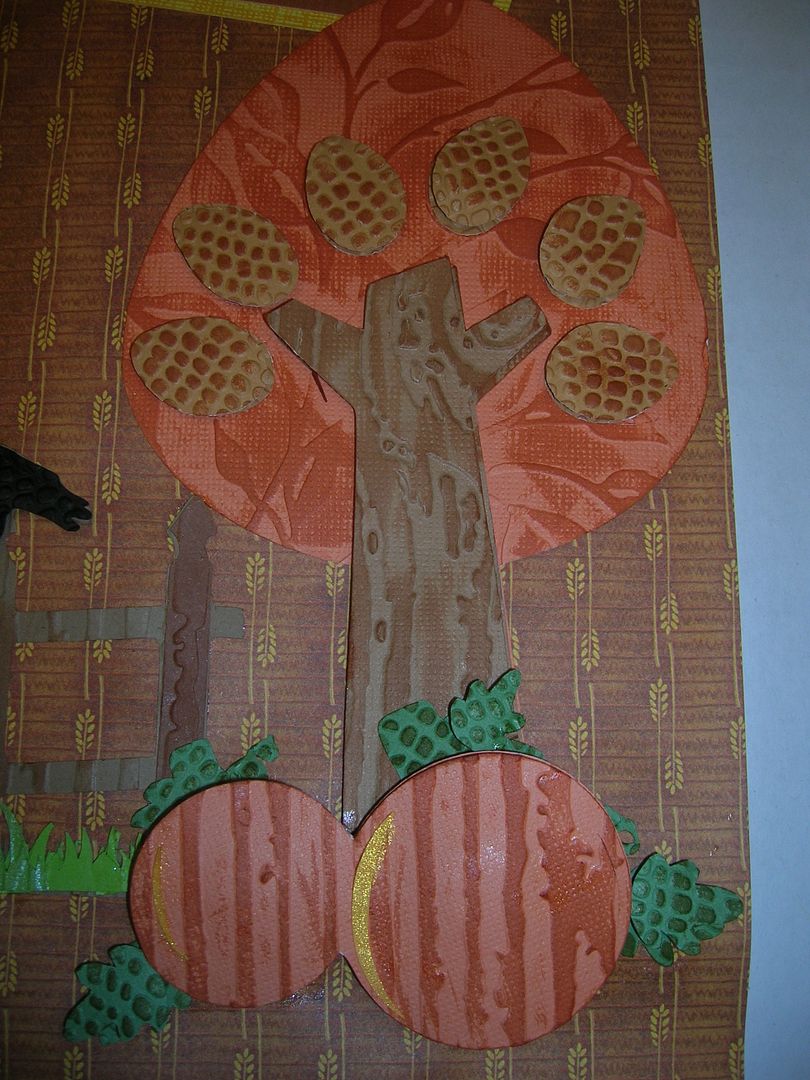
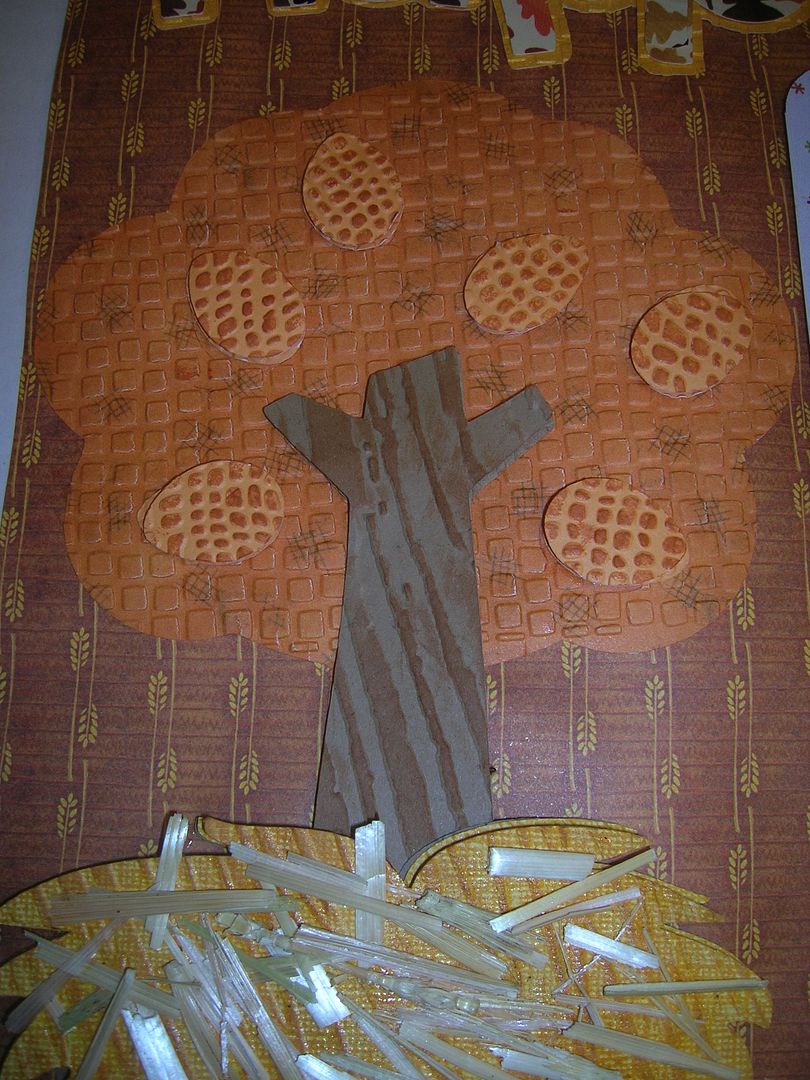
I used two trees. I embossed the trunk, the leaves and the tree base. The
leaves are cut twice and pop dotted. I also used Tim Holtz Ink to highlight the embossing.
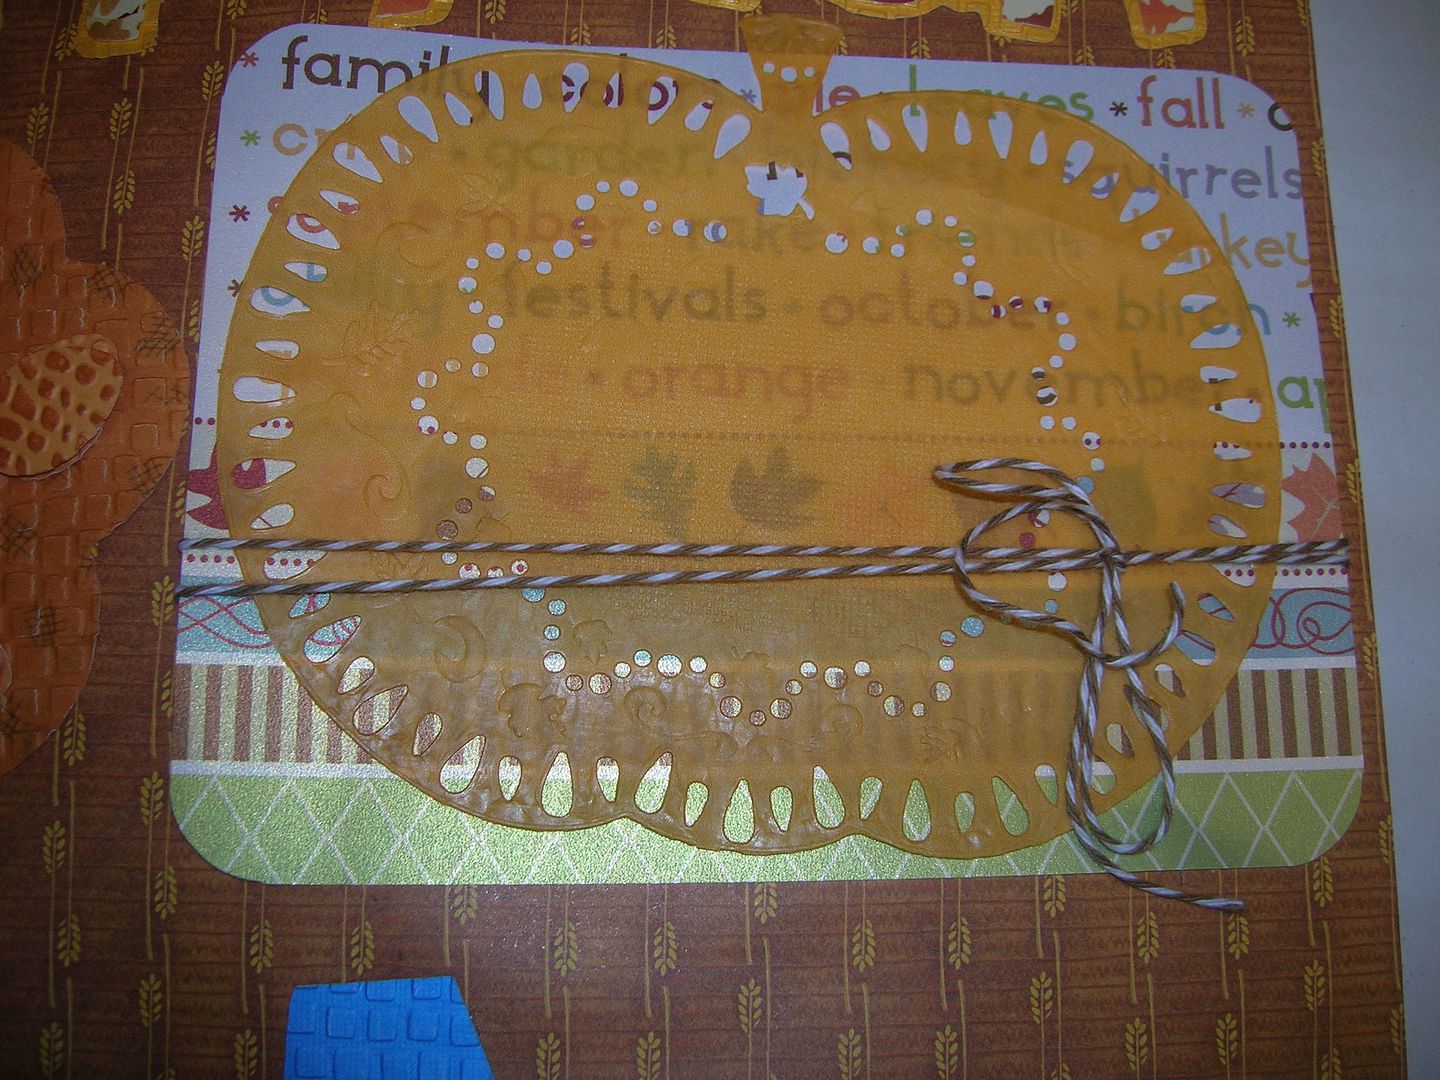
Pumpkins- removed faces using Gypsy, embossed, double cut and pop
dotted.The doilies are from the Dollar Tree. They had leaves and pumpkins.
Aren't they pretty? Close up of title
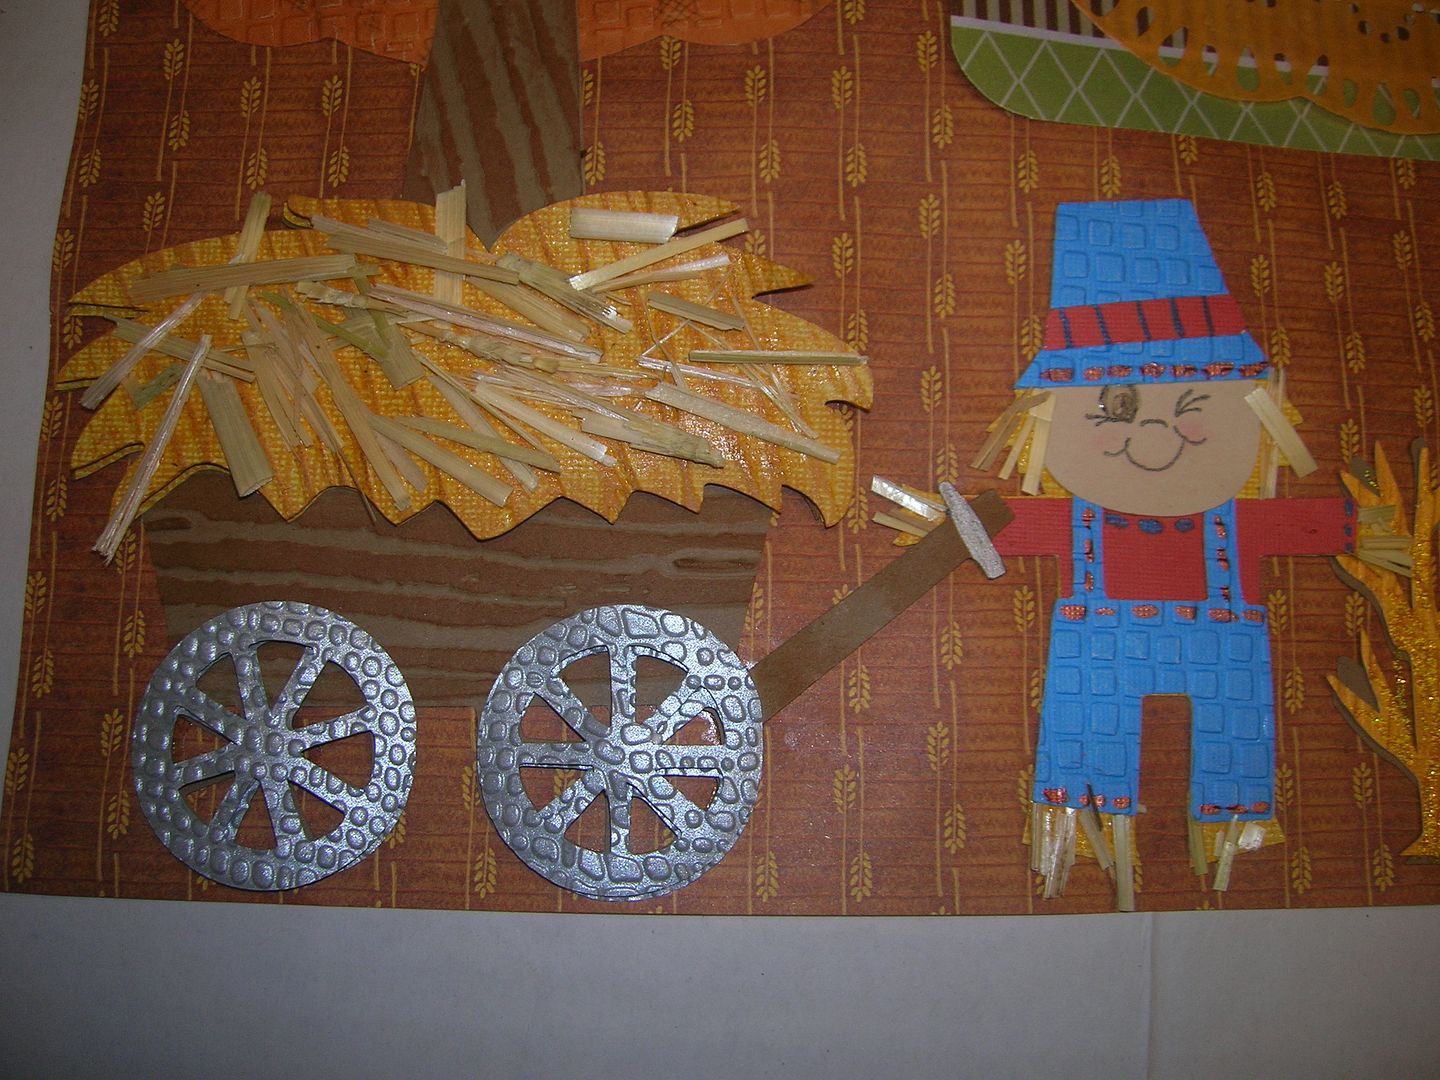
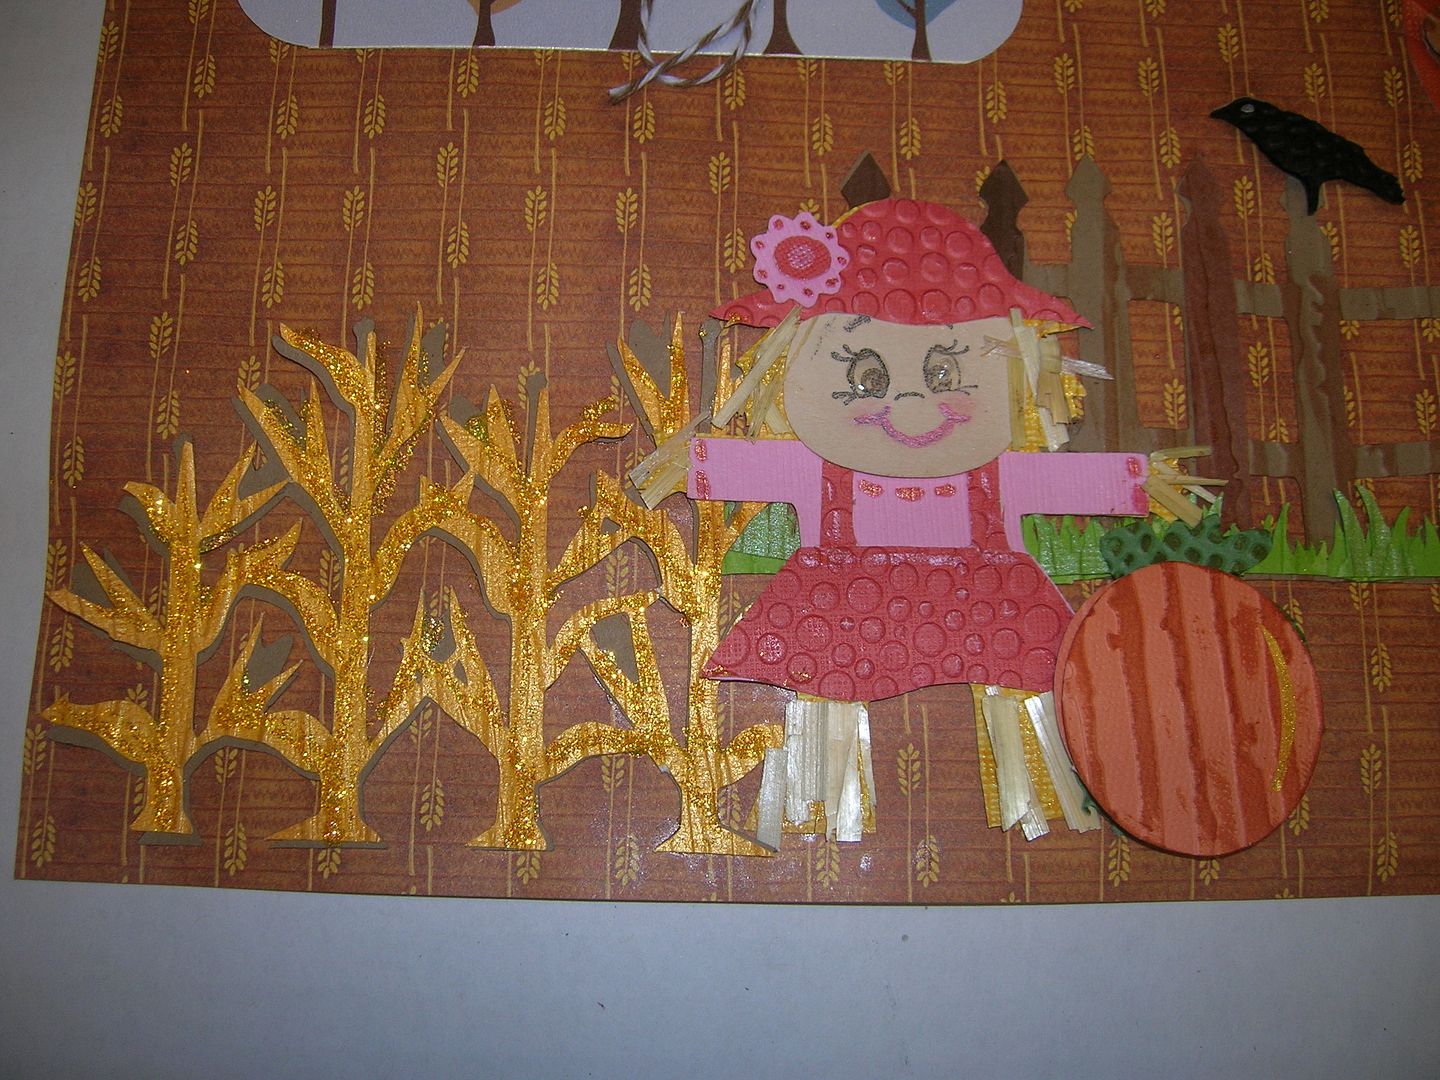
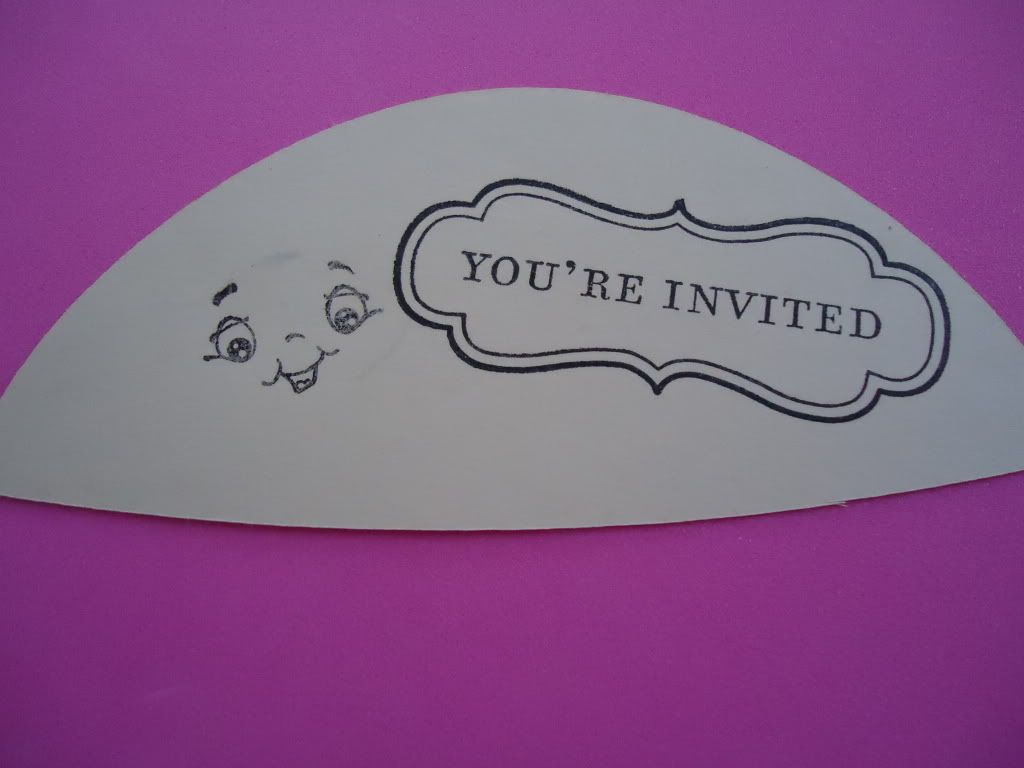
I used Peachy Keen stamps for faces, used chalk on face and added straw to
scarecrows. Clothes are embossed and I added Smooch ink for details. Hay wagon I used several embossing folders and added straw.
Corn stalks embossed and used Smooch ink and a little bit of Stickles.
Recipe for Cuts;
Simply Charmed
Trees page 55 and 56 cut at 6 inches
Girl and boy scarecrow page 57 cut at 4 inches
Happy Fall p. 57 4 inches
Pumpkins page 60 cut at 2.5
Happy Hauntings
Fence with crow cut at 3 inches
Pop Up Neighborhood
Wagon with hay page 58 cut at 4 inches
Corn stalk page 67 cut at 3 inches
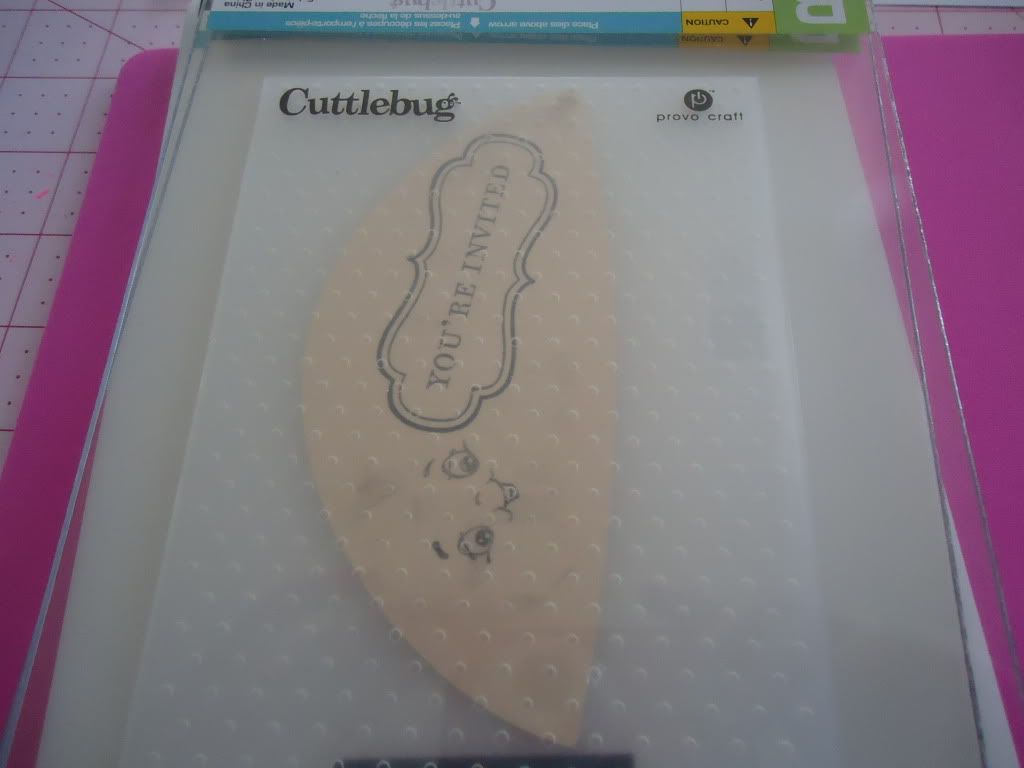
Embossing folders used :
Cuttlebug
mosaic, leaf, Distresssed stripe, Bubbles, branches and Uneven bumps
Tim Holtz Bark
I love the way it all came together. Hope you enjoyed seeing my layout.
Thanks for your comments and Happy Craftin. Don't forget to come back all week and see what everyone else on the DT has made.
- Suzanne
Labels:
Cricut,
Gypsy,
Happy Graduation,
Pop Up Neighborhood,
Simply Charmed,
Suzanne
September 1, 2011
Boo!
Hi there! Its Kim from Ricketts Cricuts! This week for Sweet Sassy Diva we are sharing some awesome Halloween Banners! I love Halloween! I love all the yummy candy that I get to buy for all the trick or treaters ;) (We have had a total of one in the past two years lol) I don't have a picture tutorial for you but I can give you the recipe for the banner!
Here is my banner!
Recipe:
Black Triangles cut at 4 inches using Birthday Bash
DCWV Pattern paper triangles cut at 3.75 inches using Birthday Bash
BOO cut using Ashlyns Alphabet at 3 inches
Ghost cut from Simply Charmed
Banner held together using Trendy Twine Orange and Black!
I hope you like it! Be sure and check back each day to see the next Halloween Banner at Sweet Sassy Diva!
Here is my banner!
| Spooky ghost from Simply Charmed cut at 2.5 inches. I added a Peachy Keen Monster face with purple chalk around the eyes and pink cheeks. Banner is held together with orange and black trendy twine! |
| Here is the complete banner! Paper is from the DCWV Halloween Stack :) |
| I added white faux stitching around the edges! Font is Ashlyns Alphabet! My current favorite font! |
Black Triangles cut at 4 inches using Birthday Bash
DCWV Pattern paper triangles cut at 3.75 inches using Birthday Bash
BOO cut using Ashlyns Alphabet at 3 inches
Ghost cut from Simply Charmed
Banner held together using Trendy Twine Orange and Black!
I hope you like it! Be sure and check back each day to see the next Halloween Banner at Sweet Sassy Diva!
Crafty Hugs!
Kim
Labels:
Ashlyn's Alphabet,
Birthday Bash,
Cricut,
Kim,
Simply Charmed
July 31, 2011
Picnic in the Park!
Hi Everyone!
It's Becka with http://www.creationswithbecka.blogspot.com/http://www.creationswithbecka.blogspot.com/ here today. Are you all enjoying your Summer? The kids are out of school and I have reduced my hours at work, so I have Fridays off now, and let me tell you I wish I always could work a 4 day work week because it is so nice to have that extra day. Lately, I have been trying to spend it in my craft room. But my craftroom is upstairs in my house and I don't have air conditioning so it gets really hot up there. Especially because it has been 100 degrees here. Yikes! But the swamp cooler works well and I just wear lots of tank tops and shorts LOL!
When I think of Summer, I always think about talking long walks down by the Truckee River and having a pinic in the park. But with a pinic always comes ants, so I made this cute little card.
Can you believe that I could not find ants on a Cricut cartridge anywhere, every time I searched my Gypsy it brought up pants- How funny is that? So I used these old CM stickers I had.
I used this watermelon on page 46 from the Simply Charmed cartridge. I used the watermelon on the shift, then I deleted the face on the watermelon, so I could stamp a face with a Peachy King stamp. This is how I set it up on the Gypsy
Next, I used K.Andrew Amazing You stamp set for the sentiment. And Peachy Keen Snowman faces for the stamped face.
Hope you all enjoyed my post today and make sure you stop by tomorrow to see what the other design team members make.
July 29, 2011
Happy Summer!
Happy Summer! This week for SweetSassyDiva we are designing picnic projects! Well when I think of a picnic I automatically look for the watermelon! I LOVE watermelon! Here is a quick card! I forgot to take pictures while making the card but the recipe and directions are below the card in case you want to know how I made it! :)
Card Recipe:
Black A2 card
Green paper from DCWV Safari Matstack cut at 5.25 by 4 inches and mounted
white cardstock cut at 1.5 inches by 5.25 inches layered on lower portion of green paper
Red ribbon with white polka dots glued down where the green and white meet
Watermelon from Simply Charmed cut at 3.99 by 2.18 and popped up
Happy Summer Sentiment by Pink By Designs Summer Vacation stamp set
If you want to see more of my creations check out my facebook page or blog here!
Happy Crafting!
Kim
July 24, 2011
You're Invited to a BBQ!
Hi everyone
Becka here with http://www.creationswithbecka.blogspot.com/ . This week for our SSD DT challenge we were asked to make something with a BBQ in it. So I decided to make this BBQ invitiation for an upcoming BBQ we are having.
I used Simply Charmed cartridge.
Here is the cut I used from Simply Charmed:
Here is how I set the hamburger up on the Gypsy
Set up for paper on the mat
I used Peachy Keen Wide Eye Kids stamp and CTMH "Invited" stamp for the top bun
Then I used the small dots Cuttlebog embossing folder to make little seeds on the top bun.
Then I put all the BBQ info on the inside of the card. Hope you all enjoyed my post and please check back tomorrow.
Subscribe to:
Posts (Atom)


