MyFreeCopyright.com Registered & Protected
Showing posts with label Happy Hauntings. Show all posts

November 1, 2011

Monster Beauty Treatment!

Hello. My name is Nadia Herbst-McConnell. Bobbi Jo, the SweetSassyDiva herself, has asked me to share a project with you.


I am a paper crafter whose first love is fabrics! A bookkeeper and business owner by trade, I have an arts degree in fiber. For a time, I created juried art dolls that sold in galleries.


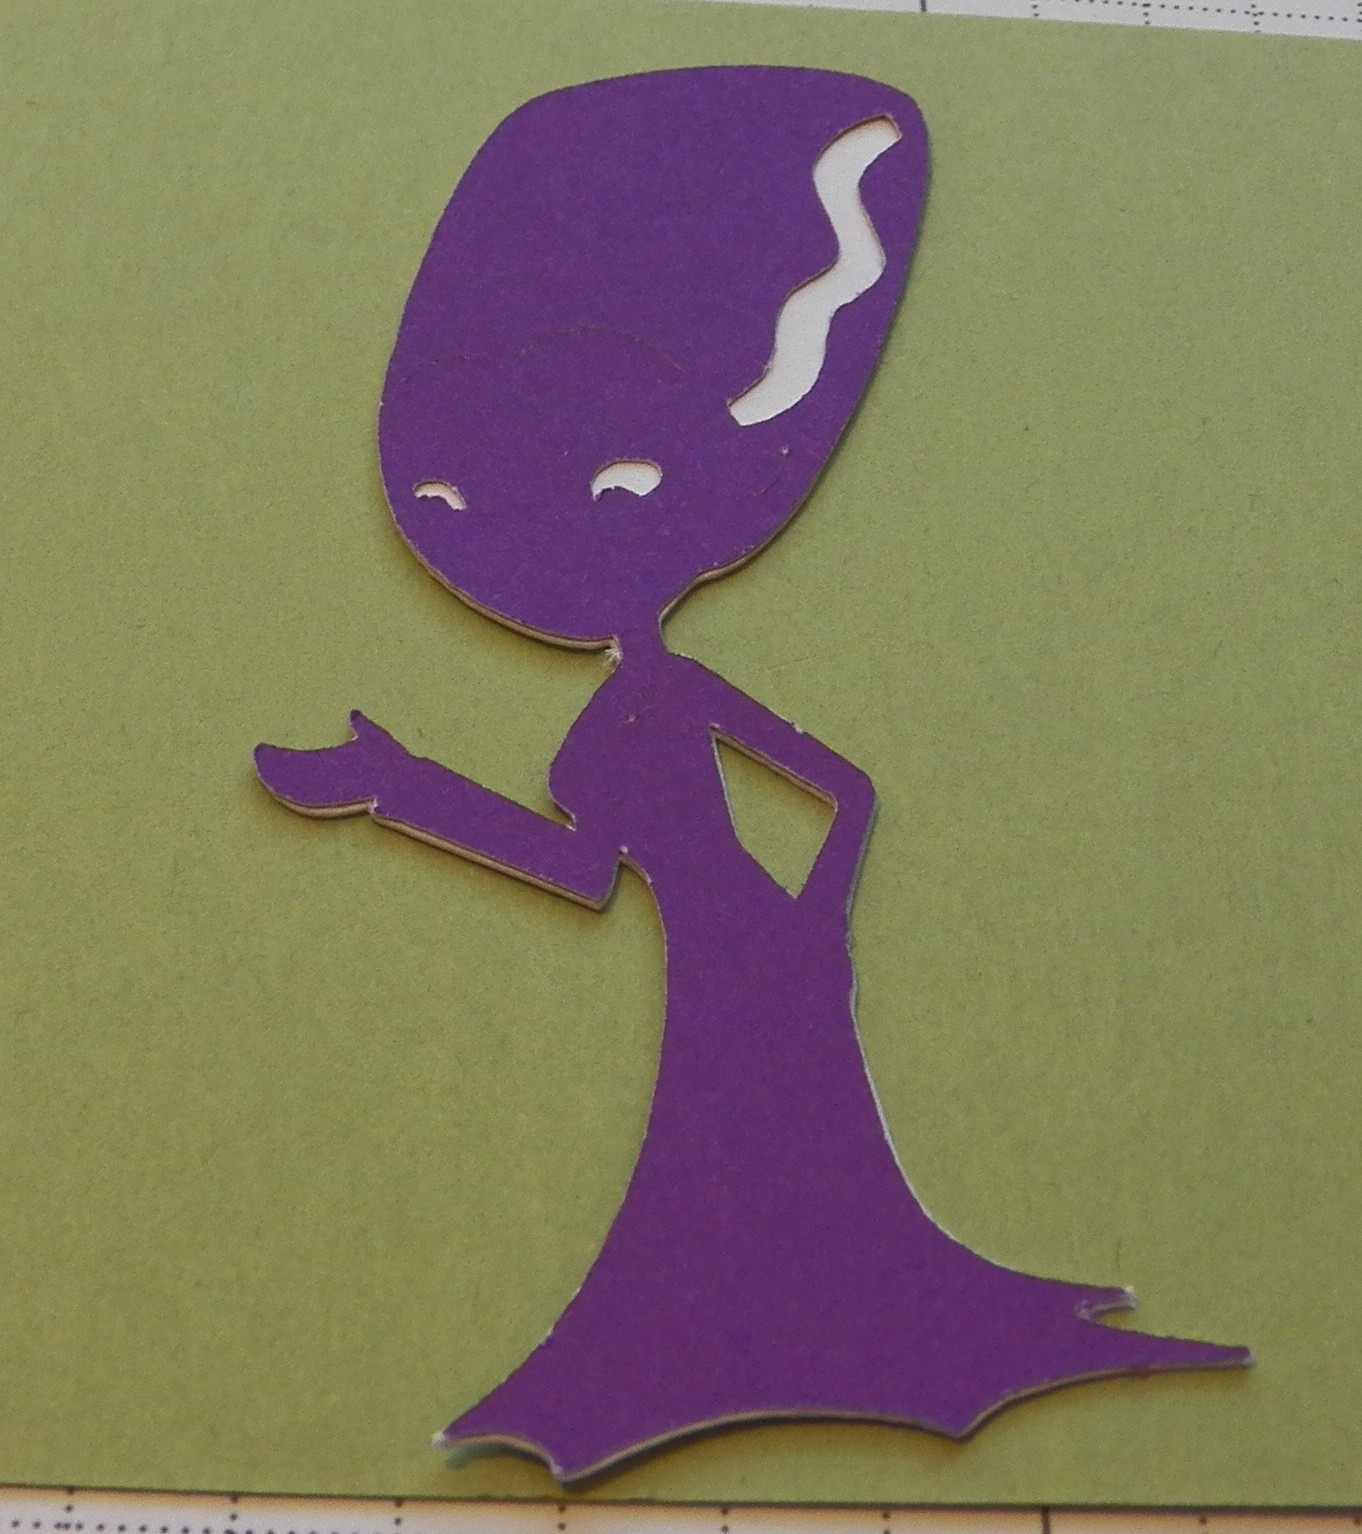
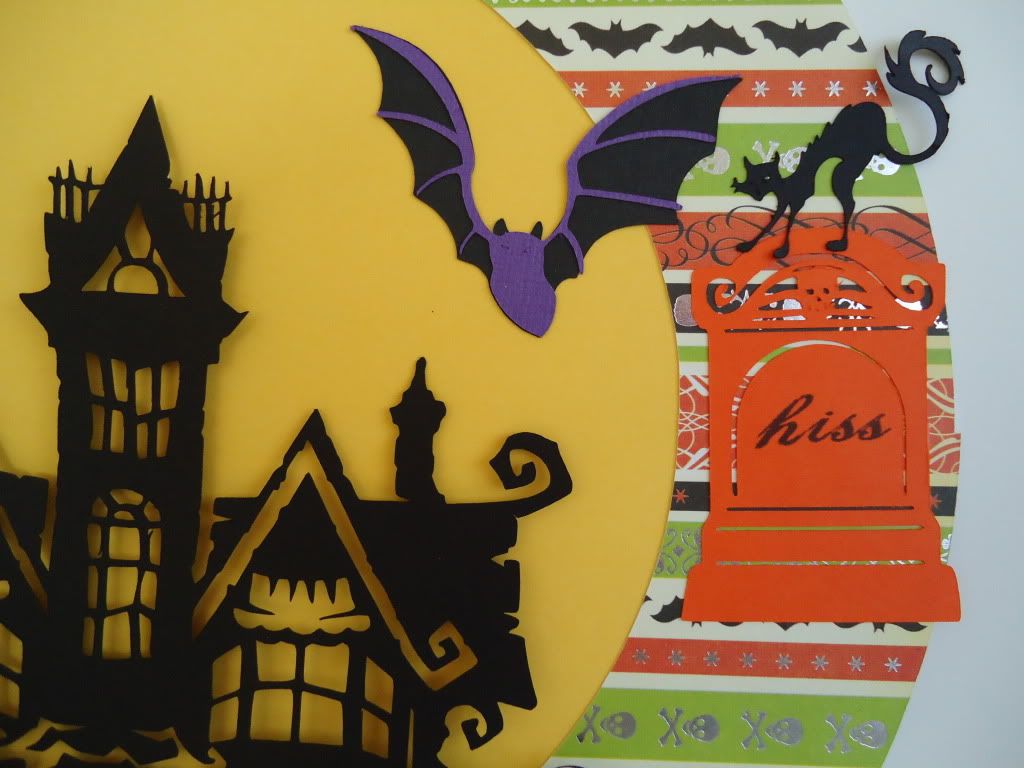
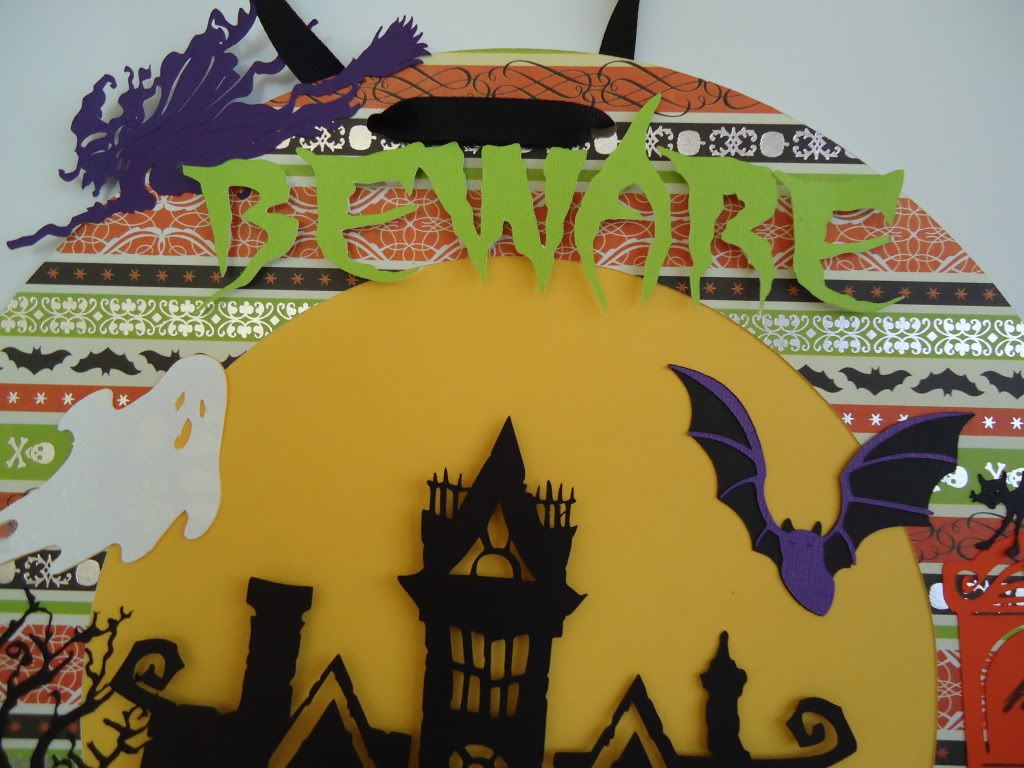
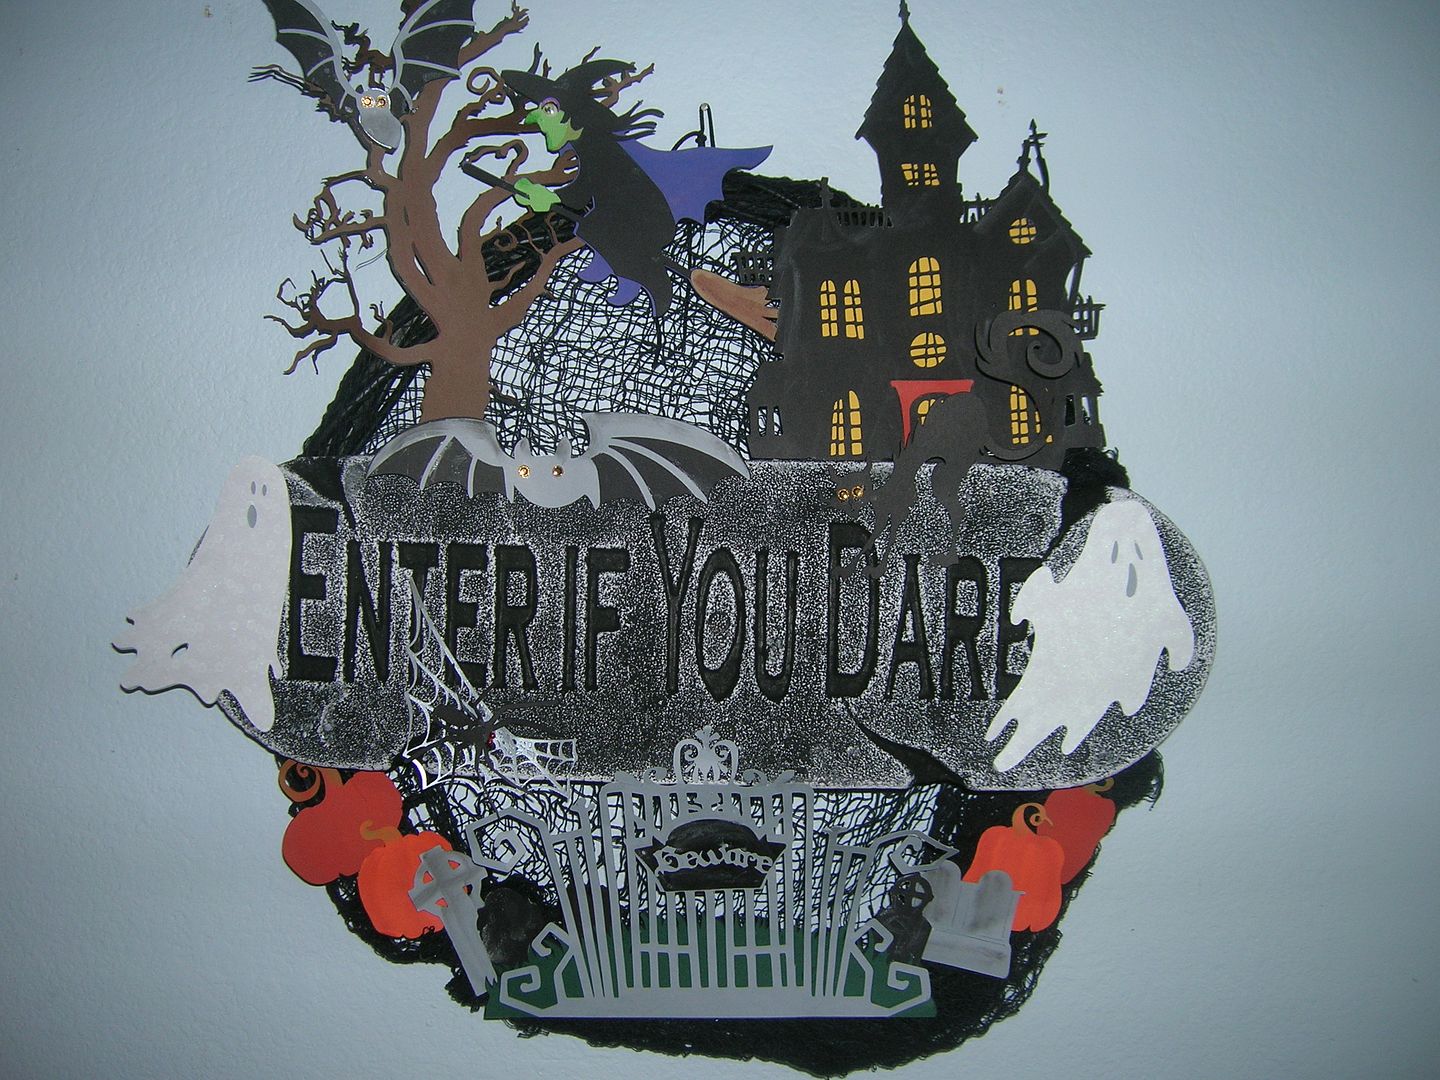
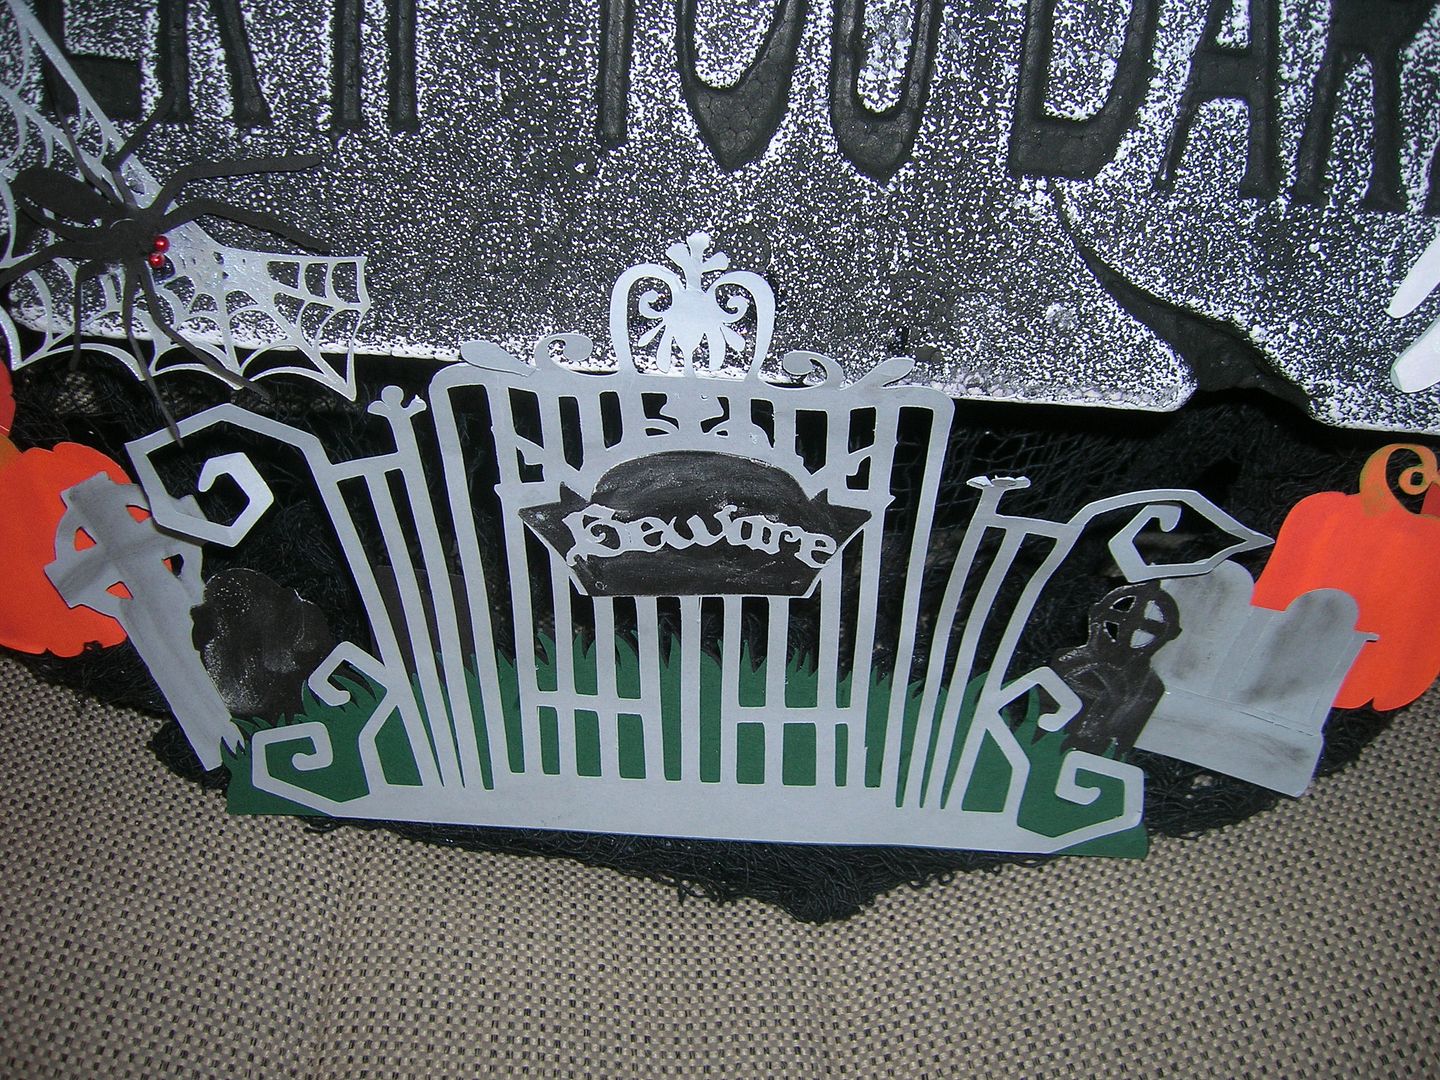
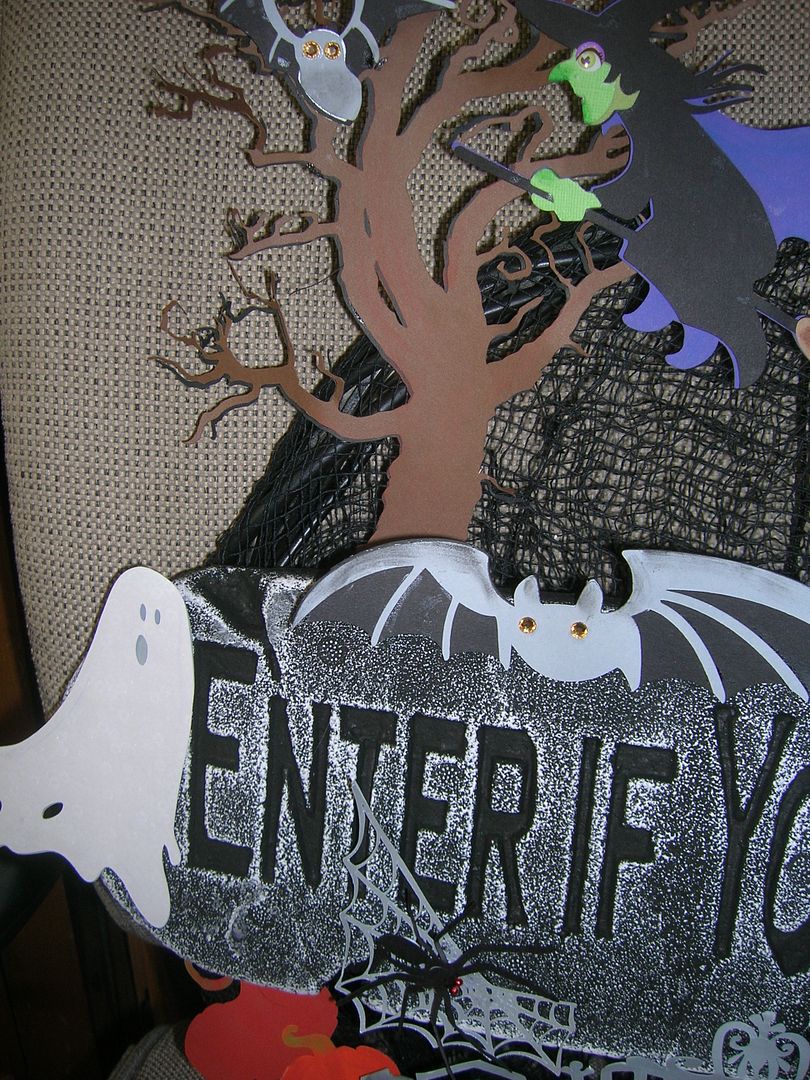
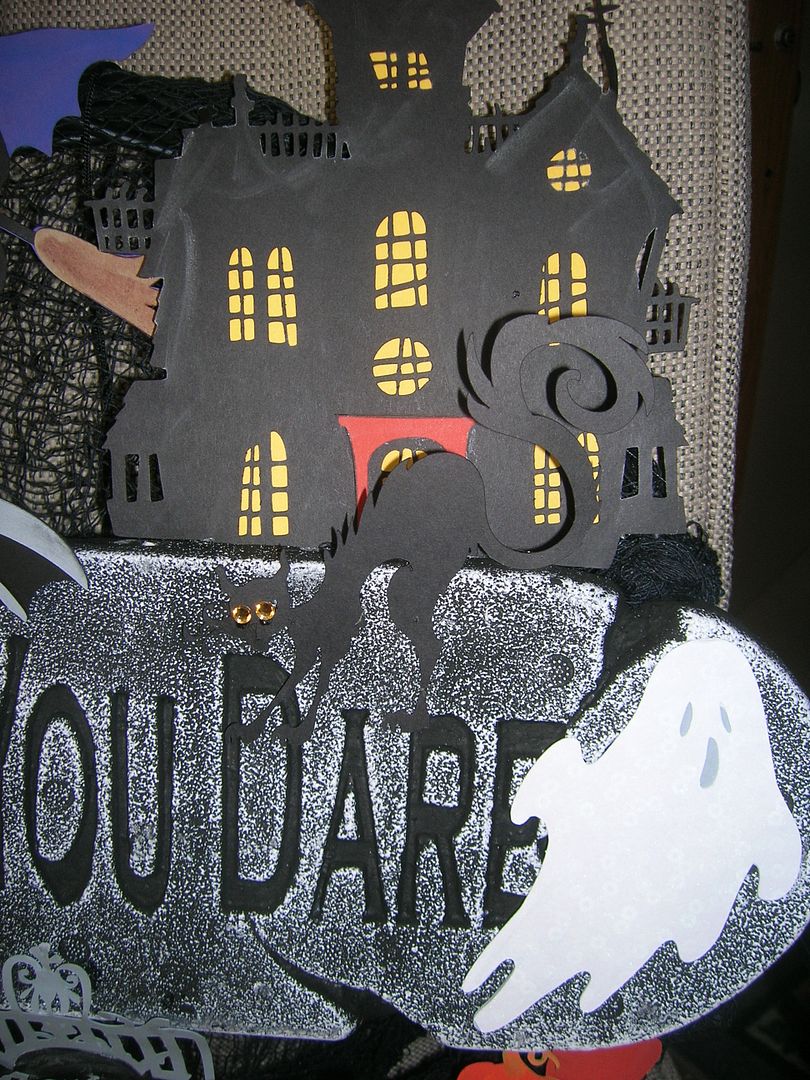
Until recently, my Cricut and work with paper have largely been for package decoration or simple cards. It is only recently that I realized that I could really diverge from the art on the cartridges to get the image I wanted. I do so primarily by manually cutting away or adding to the paper die cut form. Each project that I complete helps me to learn a bit more. By adding detail, even when they are not altered and simply cut as rendered, the scene is so much more interesting to me.


The wonderful thing about crafting with paper and glue (as opposed to fabric and stitches) is the time frame. I can complete a vignette from conception to completion in two to four hours. Compared to working in cloth, this is amazing! Working in paper has also proven to be so much less expensive. I can purchase a $300 Alencon lace to sew, or I can create, photocopy, or stamp a similar image for next to nothing to use for paper crafting.


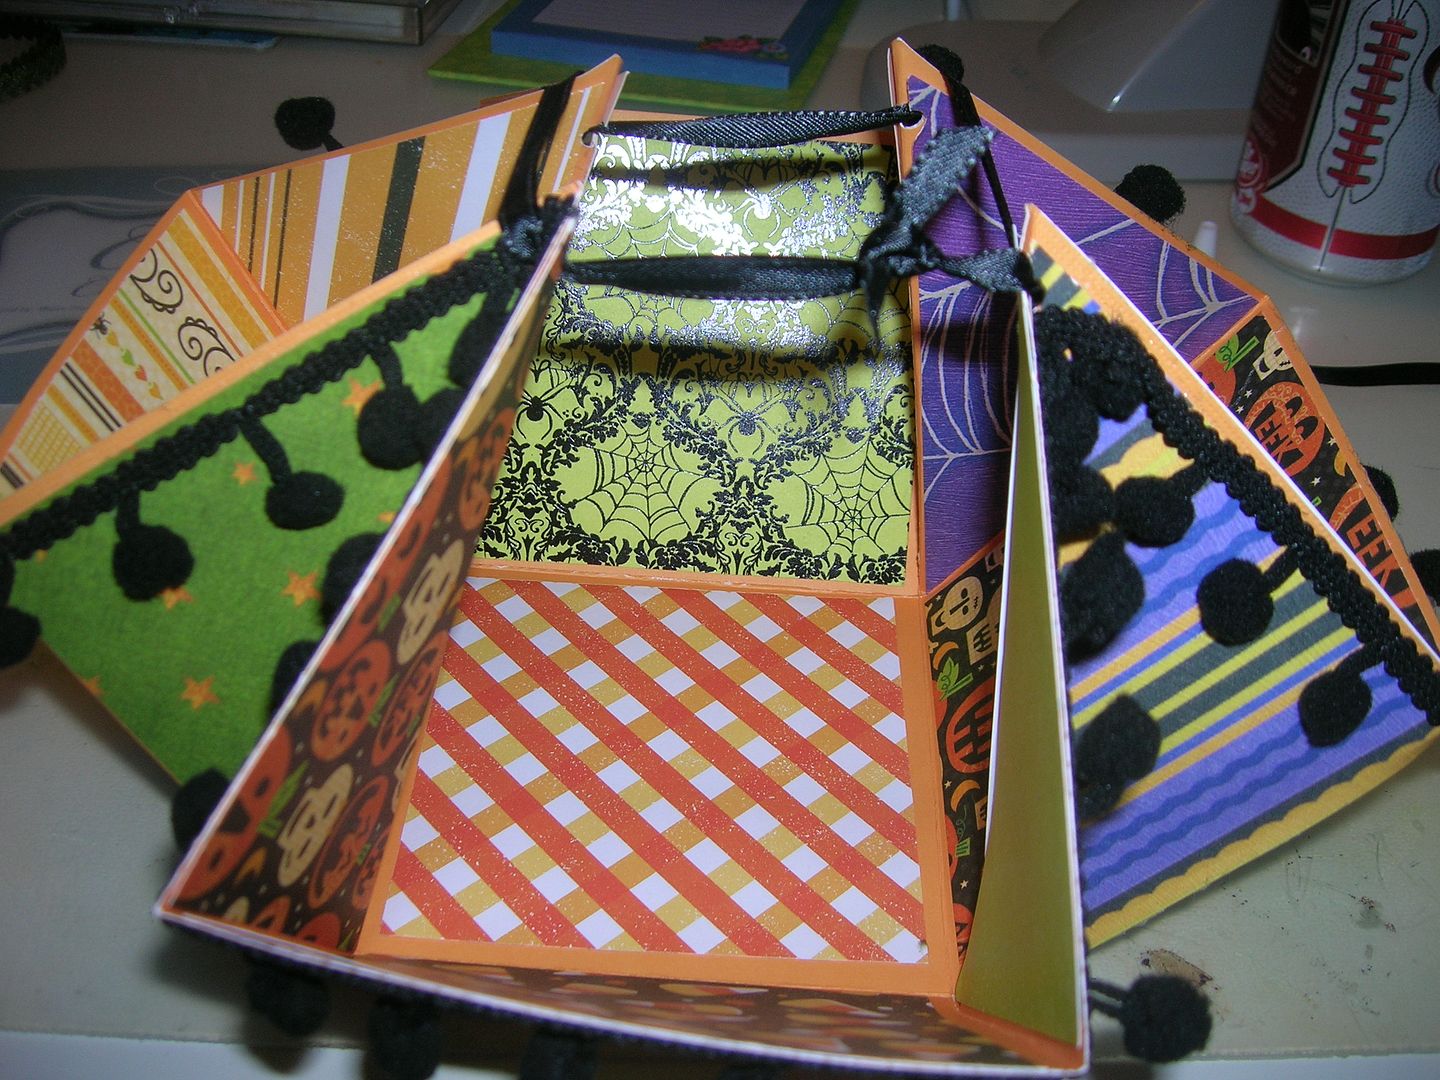
My primary interest in using my Cricut is to have fun! I get the biggest kick out of creating little vignettes, and have so enjoyed the reaction from other Cricut enthusiasts! The ease and speed of using die cut forms keeps it fun for me!


This vignette features a figure that is created by using the legs on the Rock Princess cartridge and the head and shoulder of the Mrs. Frankenstein on the Happy Haunting cartridge. I cut down the monster’s hairdo and added some little curlers I made from rolling paper.


I just discovered Liquid Appliqué. This creates the bubbly bathwater. Glued-on beads make the floating bubbles in the air.


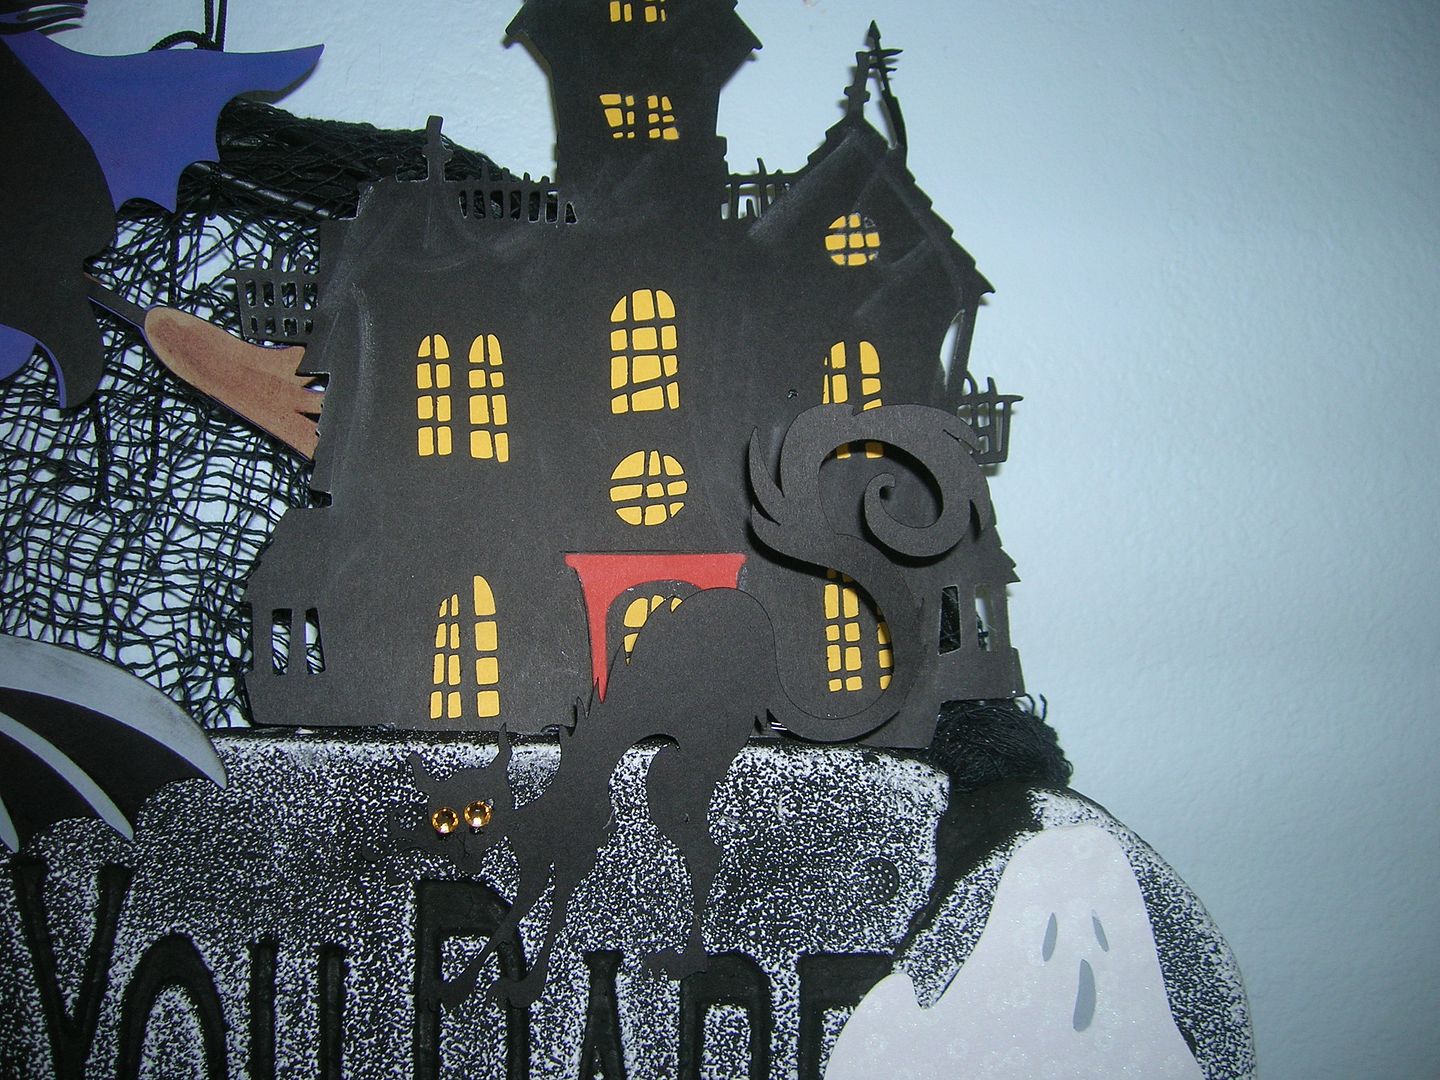
The window is from the October 31st cart. I cut away the shutters and sill and added a hand-cut window treatment, using brads for sconces. I love putting home decorating miniatures in my scenes. I have made window treatments for so many years that making them in paper, and in a matter of minutes, is just the most fun for me!


The spider webs are also from October 31st. The one coming from the ceiling was cut away to fit. Woodwork and towel rack were hand cut to accommodate the potion bottles (cut from Splish Splash) and towel (from Everyday Paper Dolls).


This finishes 6-3/4” x 8” and has been adhered to a mat.


You are invited to visit to see my other vignettes and projects.


Be sure to check the daily deals at Group On! You can save a lot of money and get local deals! 

Groupon negotiates huge discounts—usually 50-90% off—with popular businesses. We send the deals to thousands of subscribers in our free daily email, and we send the businesses a ton of new customers. That's the Groupon magic.

Be sure to Click Here! For more information and join today!  It does not cost anything to join and why not save on Group On!

October 20, 2011

R.I.P.


This is Misty over at The Daily Scrapper
I love the way this super cute treat box came out. I am going to make 20 for my son's class. :) Using the Cricut cartridge Happy Hauntings, the skull is Layer 1 shift on page 39 cut at 2 "  and the box is page 101 cut at 10" I used a black coredinations sheet and cut it using fit to page on a 12 x 12 which ended up cutting at 10 inches. Then I cut mats starting at 3 X 2 1/4 and going down by 1/4 each time. The skeleton is a part from a different cut on real dial size and 2 inches. The patterned paper comes from Doodlebugs design pack. I have no idea where there the ribbon came from. :) Add in a white gel pen and lots of pop dots and you have a cute scary treat box!!!

October 19, 2011

Happy Halloween!

This week at Sweetsassydiva, we are making something for giving or receiving for Halloween. This is definately a challenge for me as Halloween is not my favorite holiday. But that being said, I had fun making these treat holders and matching cards for my grandkids.
I tried to take pictures all along the process starting with laying out the cuts on the Gypsy  I used Happy Hauntings and cut out 2 images at 2" and one at 3". for the really small layers I try to cut extras... seems like some of the pieces go missing when I have just one....


and putting the paper on the mat.


Next are the steps to put the layers together...


Now for the treat holder,  here are the sizes and where to score for the fold.


I used the 2" image for the treat holders and and the inside of the card and the 3" image for the card front.


My Supply list:
Card stock is all Stampin Up - Black, Whisper White, Pear Pizzaz, Pumpkin Pie, Old Olive, Basic Gray


The purple is from my scrap box as is the patterned paper.


The stamps and punches are Stampin Up


All of the other supplies are from my supply stash that has long since lost the exact names.


I hope you will check out Sweetsassydiva everyday to see what my fellow design team has to inspire you.


As always, thanks for stopping by :)


Mindy


October 18, 2011

Treat Surprise!

Happy Halloween to all you Sweet Sassy Diva blog followers.  In just two
weeks it will be Trick or Treat day.  I love seeing all the little kids
dressed up in their costumes.  For the Design Team Challenge this week we
were asked to make a Halloween treat goody bag or gift of some kind.  Well
here is my treat box.  I love making these boxes and have made them for all
sorts of occasions.  They are perfect to fit with candy or other goodies.
 I often fill them with goodies from the $1 bins or stores.
So here is the finished product.  
You start out with a 12 x 12 piece of  good cardstock.  
You then score or fold at 4 inches and 8 inches both ways so you end up with 9
squares. Make good creases with a bone folder or ruler and then open up.

Next score each corner at a diagonal to the center square corners.  See
picture.  Make a good crease on these corners.  First I fold them out
and then in so they have  good crease.
Next you cut 18 square at 3.75 x 3.75. I used scraps from other Halloween
projects but you can also use  paper and make a pattern.  It's up to
you.
Five of the squares you will glue to squares on one side.  Four squares you
will cut diagonally in 1/2 to do corners.  keep paper from overlapping fold
lines.
Turn over and do the same on the other side.  
Now you are ready to punch a hole at each corner.  Do not punch to close to
edge as it will tear.  I used my Crop a dile but you can also use a regular
punch.
You are now ready to decorate the side if you wish with die cuts, ribbon, etc.
 I used a pumpkin from Pumpkin Carvings cut at 3 inches.  The witch
2.75, the ghost 3 inches and the spider 3 inches were cut from Happy Hauntings.
 I also used some trim to decorate around the edges.  Make sure you
put trim on outside top and  face diecuts down towards center square.

For this next step take thin ribbon and thread through the holes and tie.
 I leave about 3 inches between each hole when I pull it together.
 Tie a knot and trim.
Here are the four sides of the box.  
The last step is to add ribbon.  Wired ribbon works the best but I have
used regular ribbon.  I cut each piece to 9 inches and tied a single knot.
 There are three pieces on each
- Suzanne


What is your favorite Halloween candy? 


side.  If you use wired ribbon you can then fluff it up.  The wired
ribbon I used is from the Dollar Tree.

Now you are ready to fill your box with treats, candy or whatever you wish.
 Hope you enjoyed my post and tutorial. Please come back this week to see
what other great treats the Design Team comes up with.  Also please stop by
 My blog  to
see my other projects.  I love followers and comments.  Happy
Halloween

October 12, 2011

Beware!

Hi everyone! It's Becka Here from Creations with Becka. This week the DT for Sweet Sassy Diva was asked to make a wreath. Here is the wreath I made for my front door. I used October 31 and Happy Haunting for all of the cricut cuts and K.Andrew Designs Fall-o-ween stamp set for the "hiss" on the tomb stone. The patterned cardstock is from last years Halloween paperstack from DCWV.
Don't forget check out my 850 follower giveaway HERE.

October 9, 2011

Enter if you DARE!!

This year has gone so by so quickly.  I can't believe it is already October
and time for Halloween decorations.  Bobbi Jo asked the design team to make
a wreath for this week.  I had several ideas and finally decided to make a
Halloween wreath.  The start of my wreath came from the Dollar Tree where I
got the wreath, the foam sign that says Enter if you dare and the black netting
each for $1.  The rest of the wreath was done with paper cuts.
Here is the completed wreath.  
I spray painted the wood wreath.  
This is a foam sign.  
I wrapped the wreath with this cool black netting and tied it to the wreath.
 I then glue gunned the sign in the middle.
Then I made my cuts with the Happy Hauntings, Pumpkin Carvings and October 31st
cartridges.
Here are detail pictures.  I used a lot of chalk on the edges and used
white and light gray chalk to give the appearance of spider webs on the cuts.

The recipe is as follows:
Happy Hauntings
cemetary gate 6 "
haunted house 10 "
witch and ghost 5 "
bats 3 and 2 1/2 "
October 31st
tree 10"
grave stones 3 "
cat and spider web 3"
Pumpkin Carvings
pumpkins 3"
I hope you enjoyed my wreath and will come back this week to SSD to see what the
other designers create.
Thanks for looking and Happy Craftin.

October 2, 2011

BOO!

Hi ~ Lori here from ScrappinMyStressAway with a Halloween Banner.  I created this banner for the Art Philosophy theme at Sweet Sassy Diva's today.  I made this banner for my friend to put on her front door.   She wanted more cute than scary.
I started with paper from this K&Co. Halloween paper pad.  It is double sided paper ~ love this!!
I opened up my Art Philosophy Cartridge on my gyspy and put three banner triangles and borders on my mat sized to 5.42 inches tall.  Since the paper is double sided, I just crammed all six pieces onto the mat and flipped one triangle and one banner.
I cut them out and adhered the borders to the top of each banner piece.
I sized the word BOO from Art Philosophy at 2.54 inches tall.
I cut out the shadow layer in black cardstock and the top layer with black glitter paper from the paper pad.  I used orange stickles in the cut outs.
I put four roses on my mat at 4.76 inches tall and cut them out.
This is how these 3D flowers cut out.
You wind them up from the outside in.  It works great if you have a quilling tool.  If not, you can use a skewer or rattail comb.  Once you wind the flower up, slide out your tool and let the center unwind just a bit.  Use some liquid glue to adhere the flower to the circle (base) in the center.  Above you can see the difference in color depending on which way you roll up the double sided paper.
I took black stickles and painted the edges with a foam brush.
I adhered the letter and flower to each banner piece.
I cut out the spider from October 31st at 4.29 inches tall.
I cut out the witch shoe from Happy Hauntings at 4.01 inches tall.
The cat is from Happy Hauntings sized at 9.58 inches tall (4.25 inches when using Real Size) and the witch is also from Happy Hauntings sized at 8.82 inches tall (4.84 inches when using Real Size).
I used green glittery ribbon (found at Michaels) to string my banner together.  I love it and I hope you do too!!  Thanks for having me on your blog today Bobbi Jo!


If you would like to order the cricut cartridge or this stamp set, please send an email to Click Here! and I will send you an invite to my CTMH party.