MyFreeCopyright.com Registered & Protected
Showing posts with label Pumpkin Carvings. Show all posts

October 31, 2012

Happy Halloween!


Here's a fun idea to decorate the side panels of your front door.  Using Cricut Cartridge Pumpkin Carvings, just design it on your gypsy, ccr or ds. Hide the outside square and size them to fit into 6x12 matts.  Actually, I just placed them on my gypsy mat and hid the outside squares and placed 4 on a 12x12 piece of cardstock.  Then, I took my paper trimmer and cut it down the middle making a 6x12 piece of paper at the end. 

Here is a close up. 


This could also be cut out of vinyl but, regular cardstock works wonderful.

Have a Happy Halloween and be safe!

January 24, 2012

Take me back to Autumn!

Hi this is Lori from ScrappinMyStressAway.  This week at SweetSassyDiva's our theme is a Scene.  I created a Pumpkin Patch Scene 2 page layout.  Every fall, I take my daycare kids to The Bellevue Berry Farm and Pumpkin Patch near my house.  We look forward to it every year!

This layout took me 3 days and (merging) two different ideas to complete!!  I changed my mind so many times I lost count!
I started with this hill from Pop Up Neighborhood (found in the Accessory Function) sized at 5.00h x 11.49w.  I copied a second scene and flipped it.


I opened up a new Layer and took the shift layer of the Accessory Function and put the hills on my mat twice.  I flipped the second one.

I opened another Layer and put the Accessory Layers on it twice.  This was the trees and trunks.  I flipped the second layer.  I positioned the pieces on my mat by color for easier cutting.

Once I cut out the hill layer (without the trees) and set them on my workspace, I thought there was too much sky showing.  I cut another set of hills.

I needed some other pieces for my Pumpkin Patch, so I opened up an old file that I started but did not use.  I tried to cut the wheat from Pop Up Neighborhood, but as you can see below the paper tore.  I liked the barn, pull cart and the tractor.  I thought I might use the pumpkins but changed my mind. 


I went back to my first file and added these pumpkins from Pumpkin Carving.  I welded two sets together (sized at 1.24 inches) to make a large border.  I grabbed the cart and campfire from Old West, but ended up not using them.  I found the Pumpkins from Chic and Scary and sized it to 6.32w x 2.18h so it would fit across the top of my 4x6 photo.

I journaled on the hay in the cart.  I pop dotted the barn and some of the pumpkins.

I added twine across the bottom.  I filled in the pumpkin border with some additional pumpkins.

I used some lime green stickles to color the stems on the pumpkins.

I have been saving this cloud paper for some time ~ glad I finally got to use it!!  Thanks for stopping by!


October 18, 2011

Treat Surprise!

Happy Halloween to all you Sweet Sassy Diva blog followers.  In just two
weeks it will be Trick or Treat day.  I love seeing all the little kids
dressed up in their costumes.  For the Design Team Challenge this week we
were asked to make a Halloween treat goody bag or gift of some kind.  Well
here is my treat box.  I love making these boxes and have made them for all
sorts of occasions.  They are perfect to fit with candy or other goodies.
 I often fill them with goodies from the $1 bins or stores.
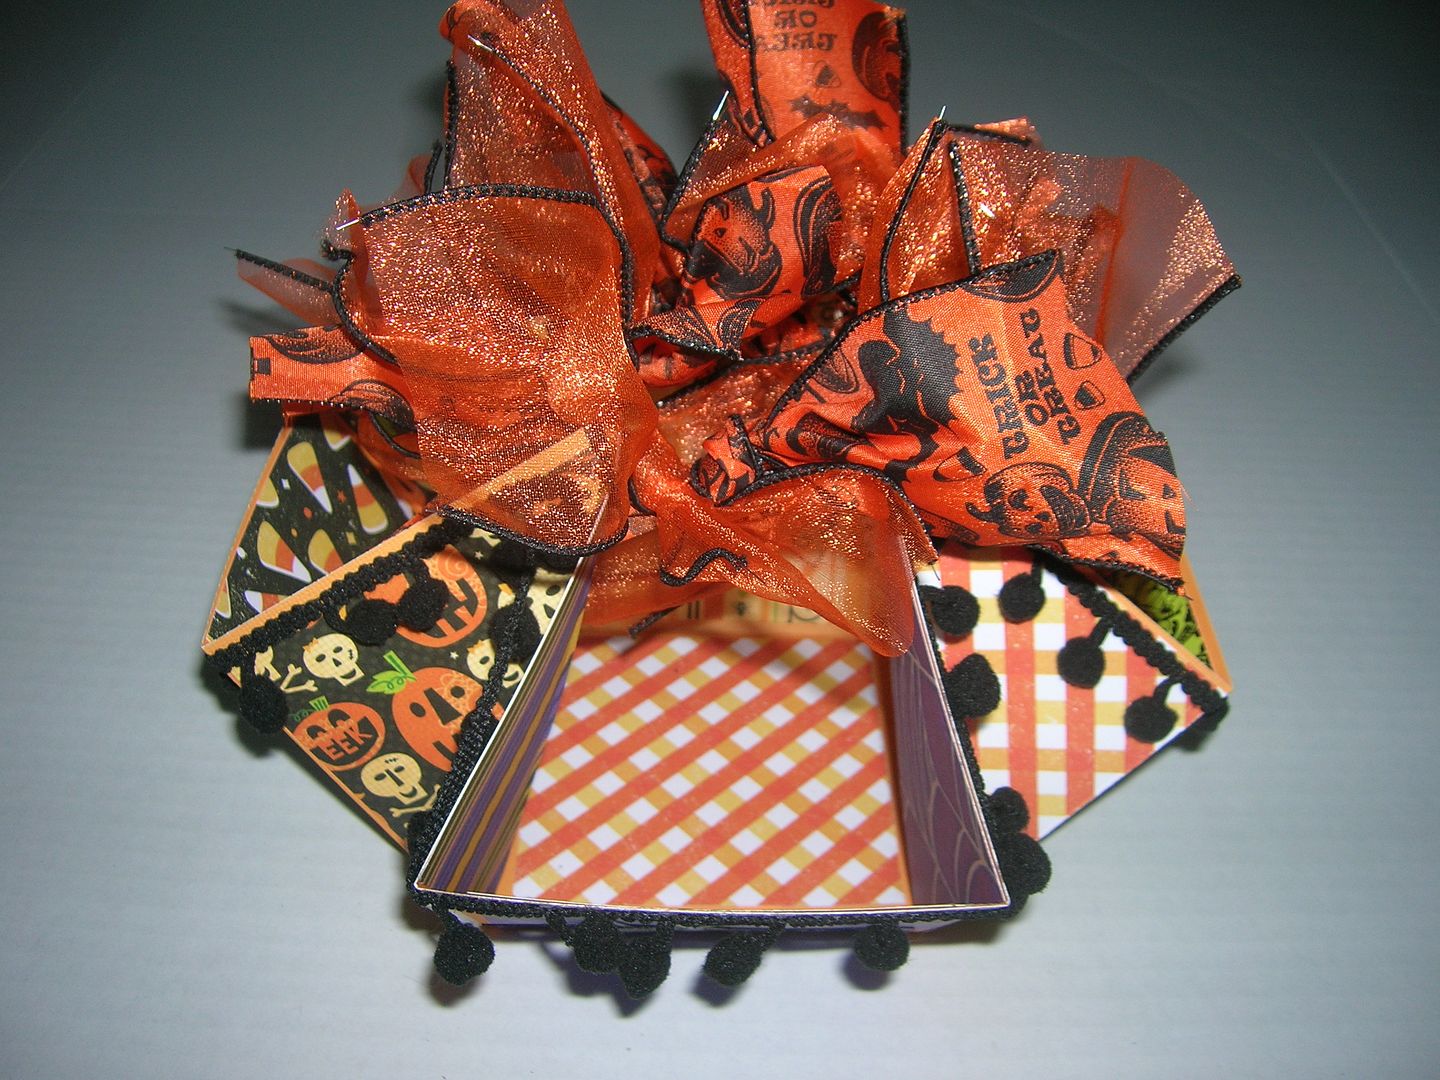
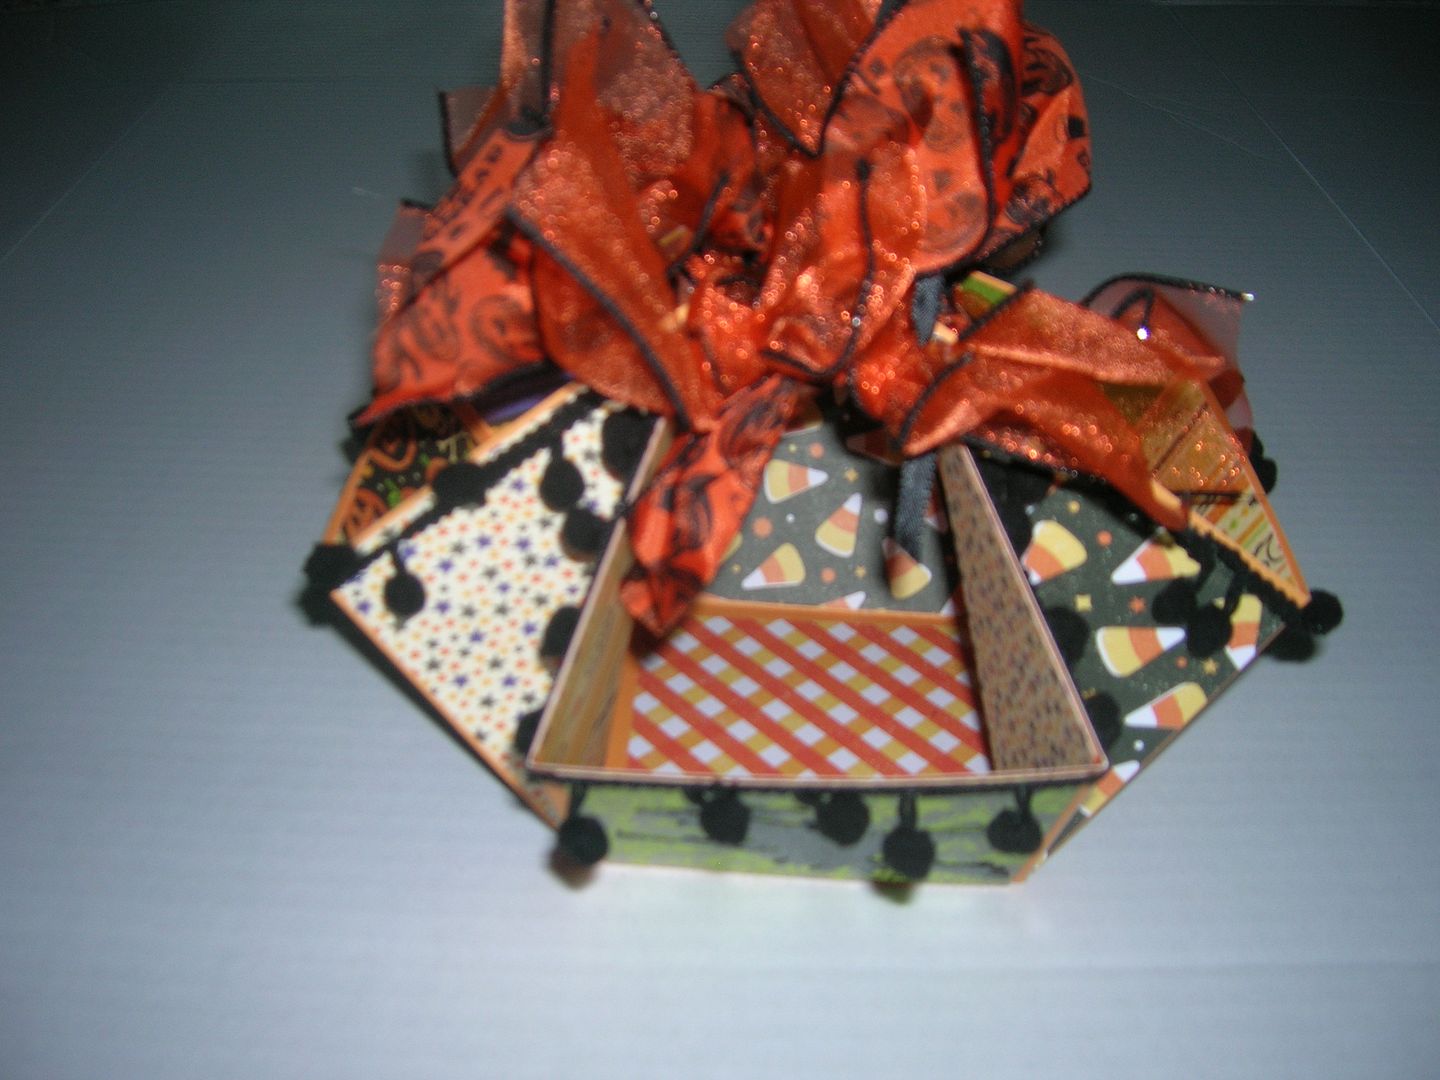
So here is the finished product.  
You start out with a 12 x 12 piece of  good cardstock.  
You then score or fold at 4 inches and 8 inches both ways so you end up with 9
squares. Make good creases with a bone folder or ruler and then open up.

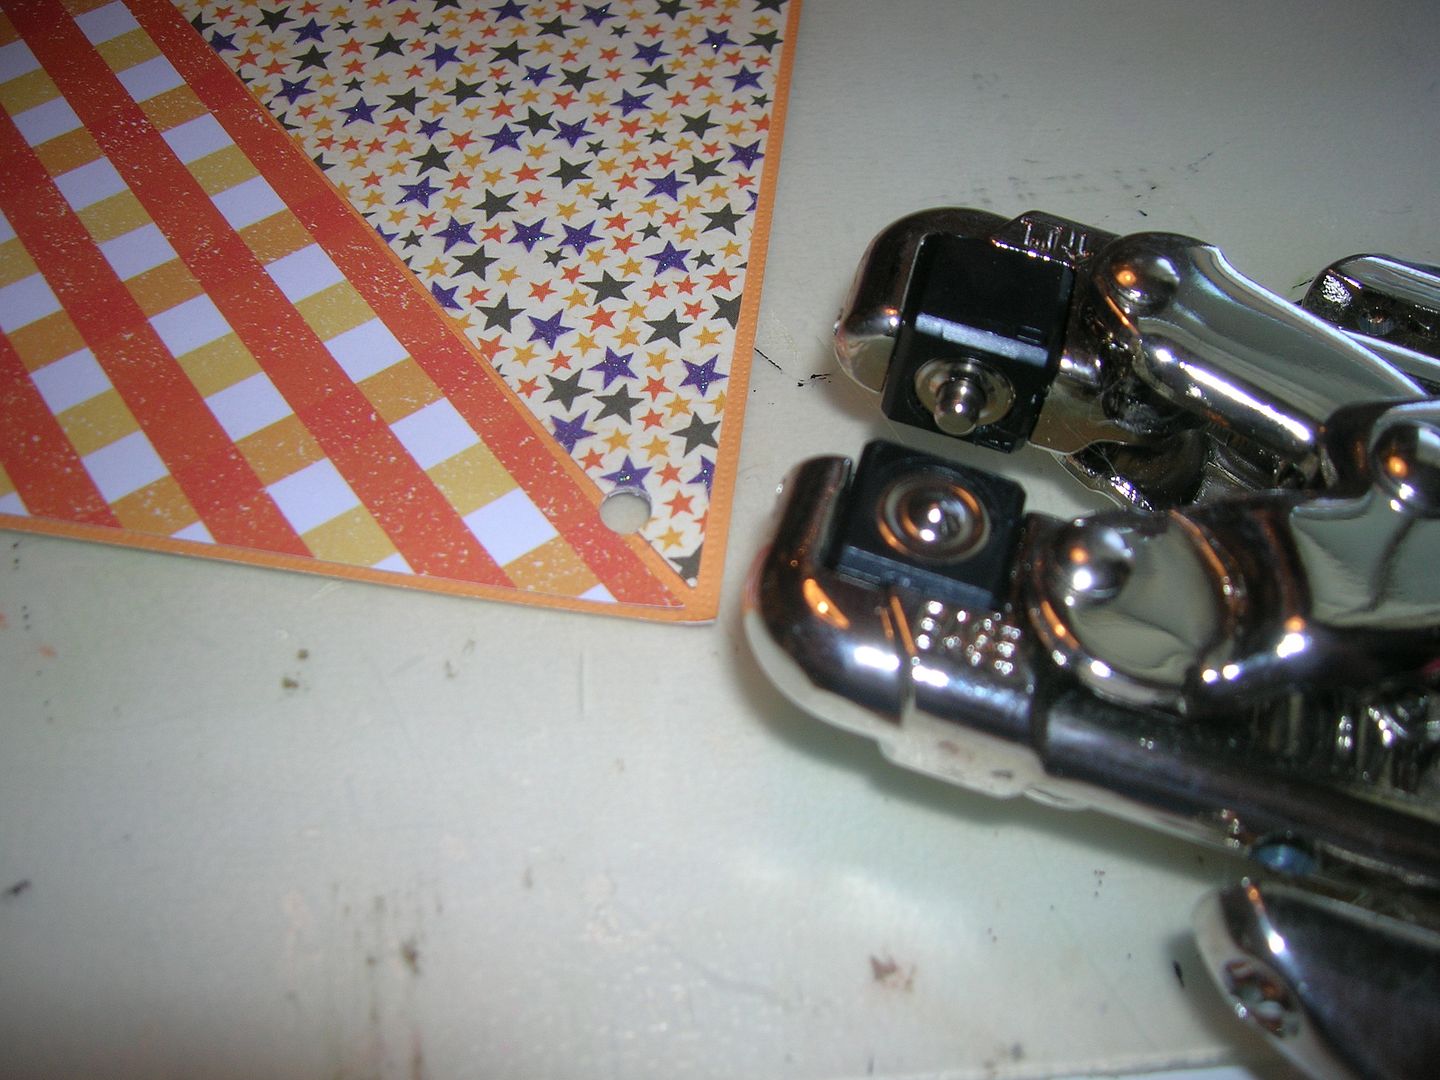
Next score each corner at a diagonal to the center square corners.  See
picture.  Make a good crease on these corners.  First I fold them out
and then in so they have  good crease.
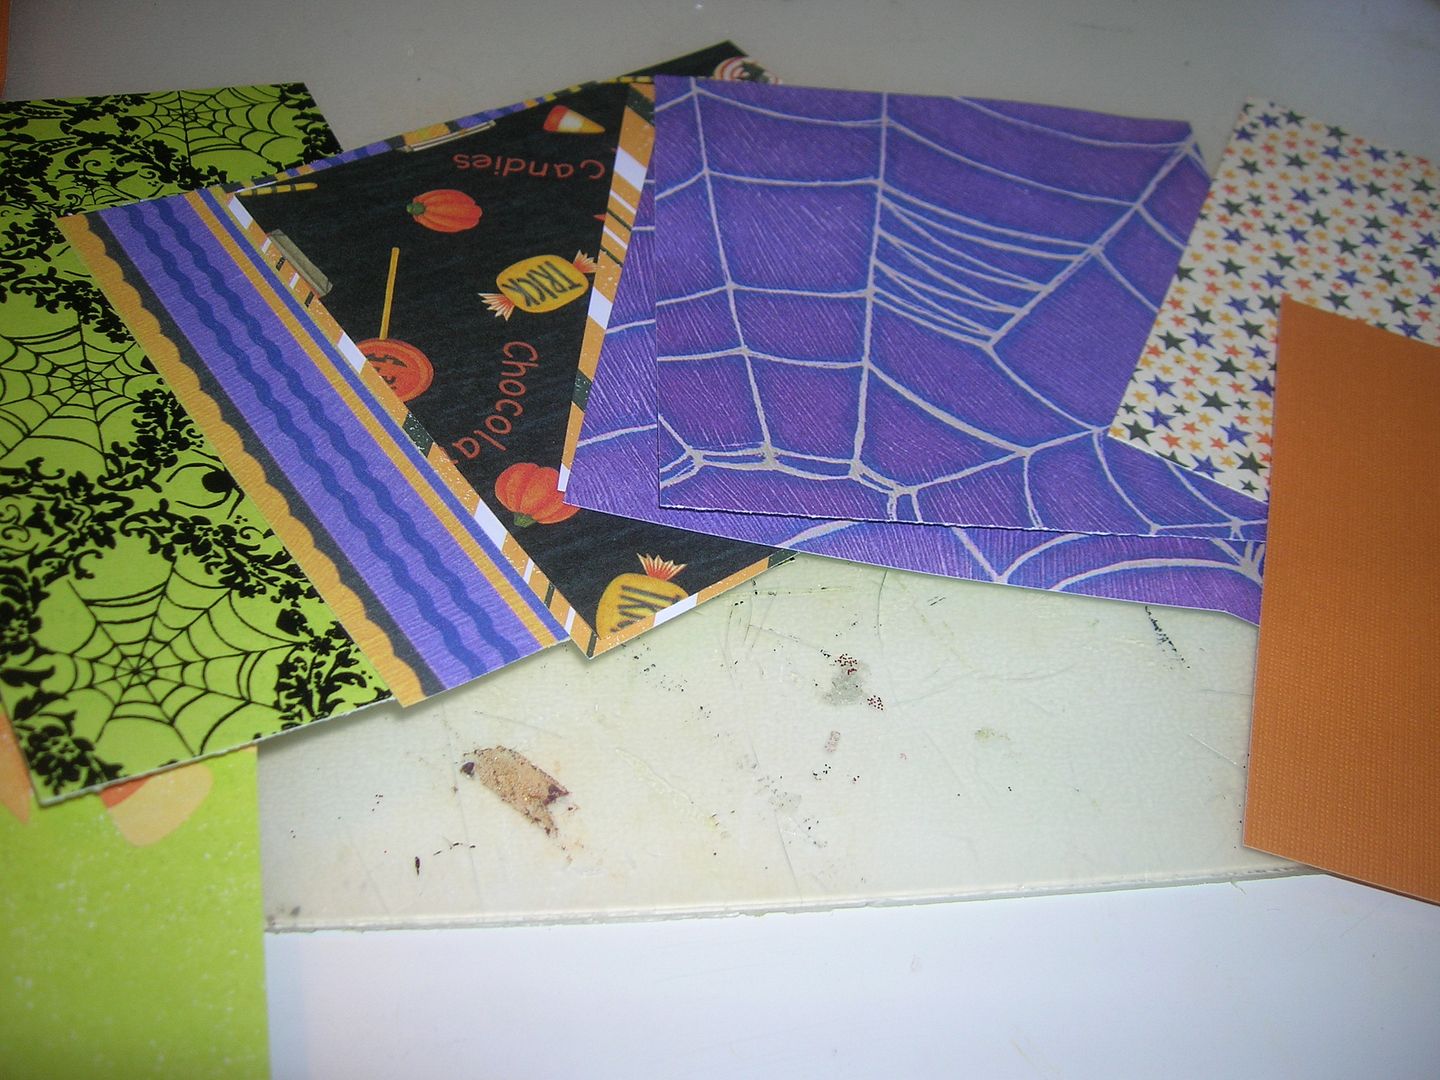
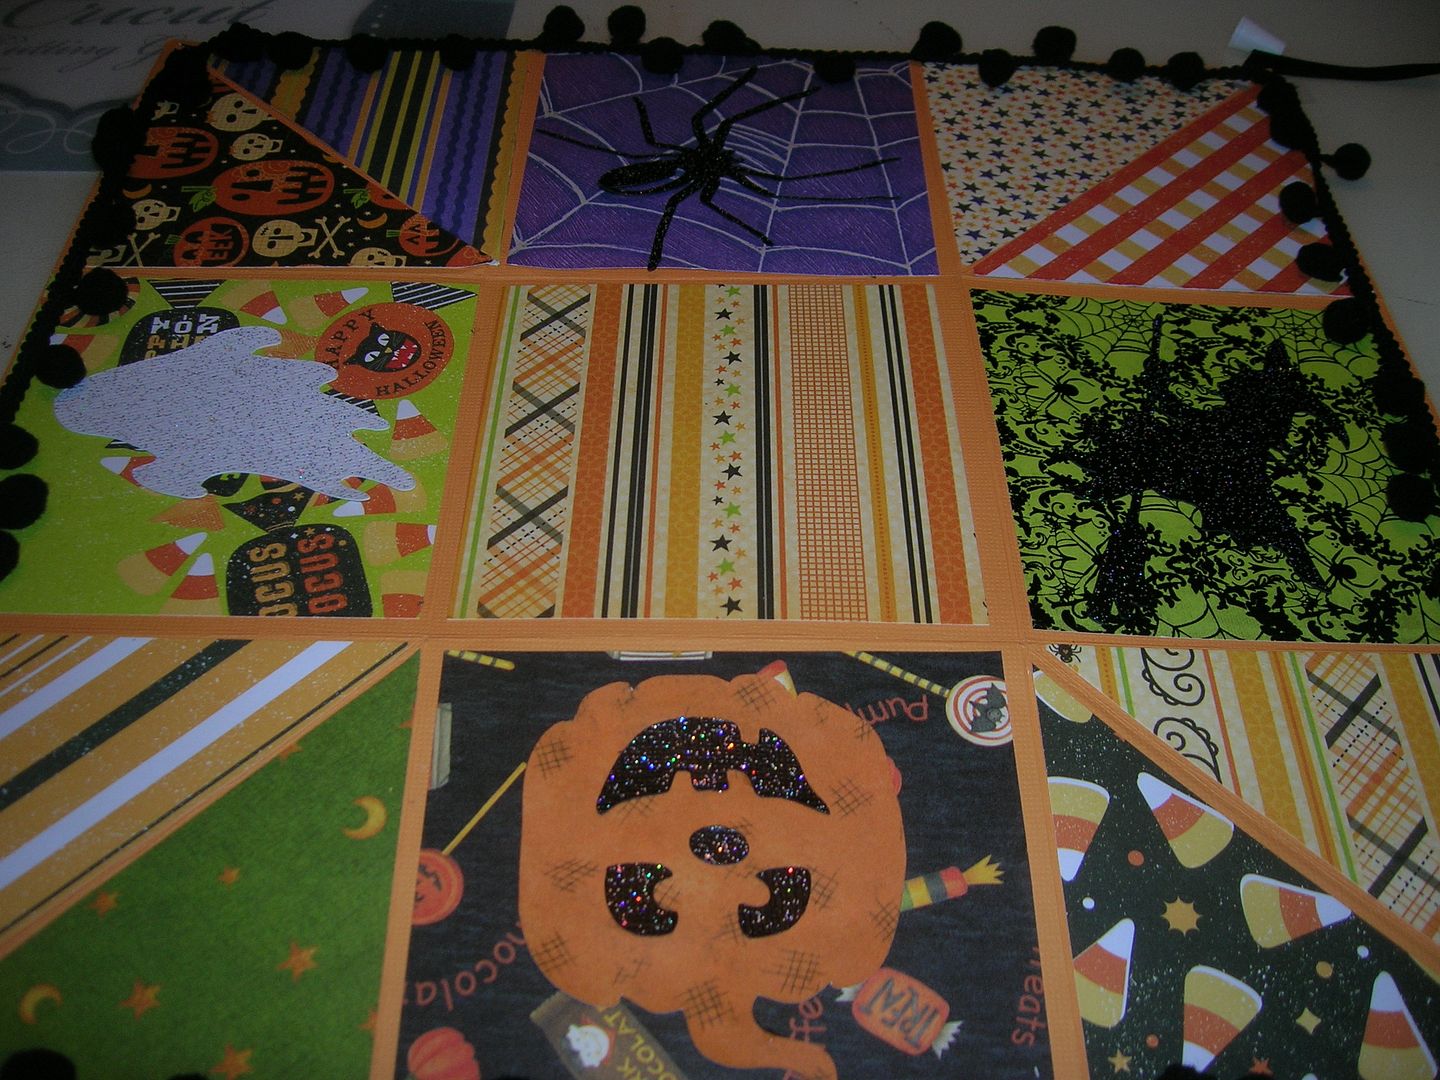
Next you cut 18 square at 3.75 x 3.75. I used scraps from other Halloween
projects but you can also use  paper and make a pattern.  It's up to
you.
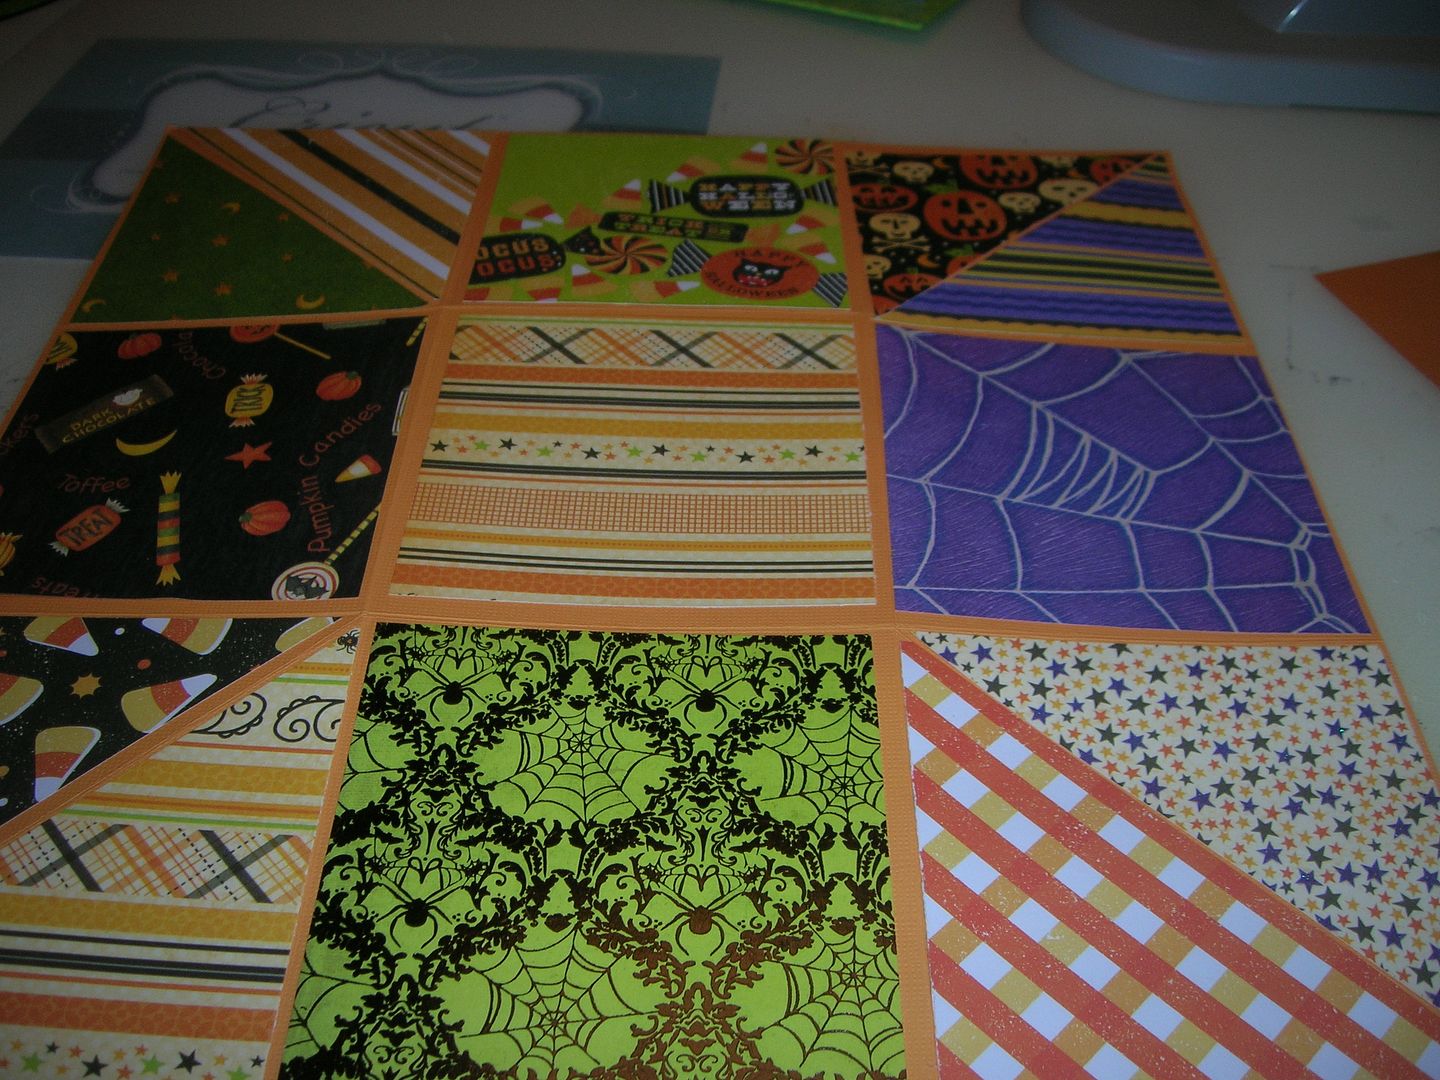
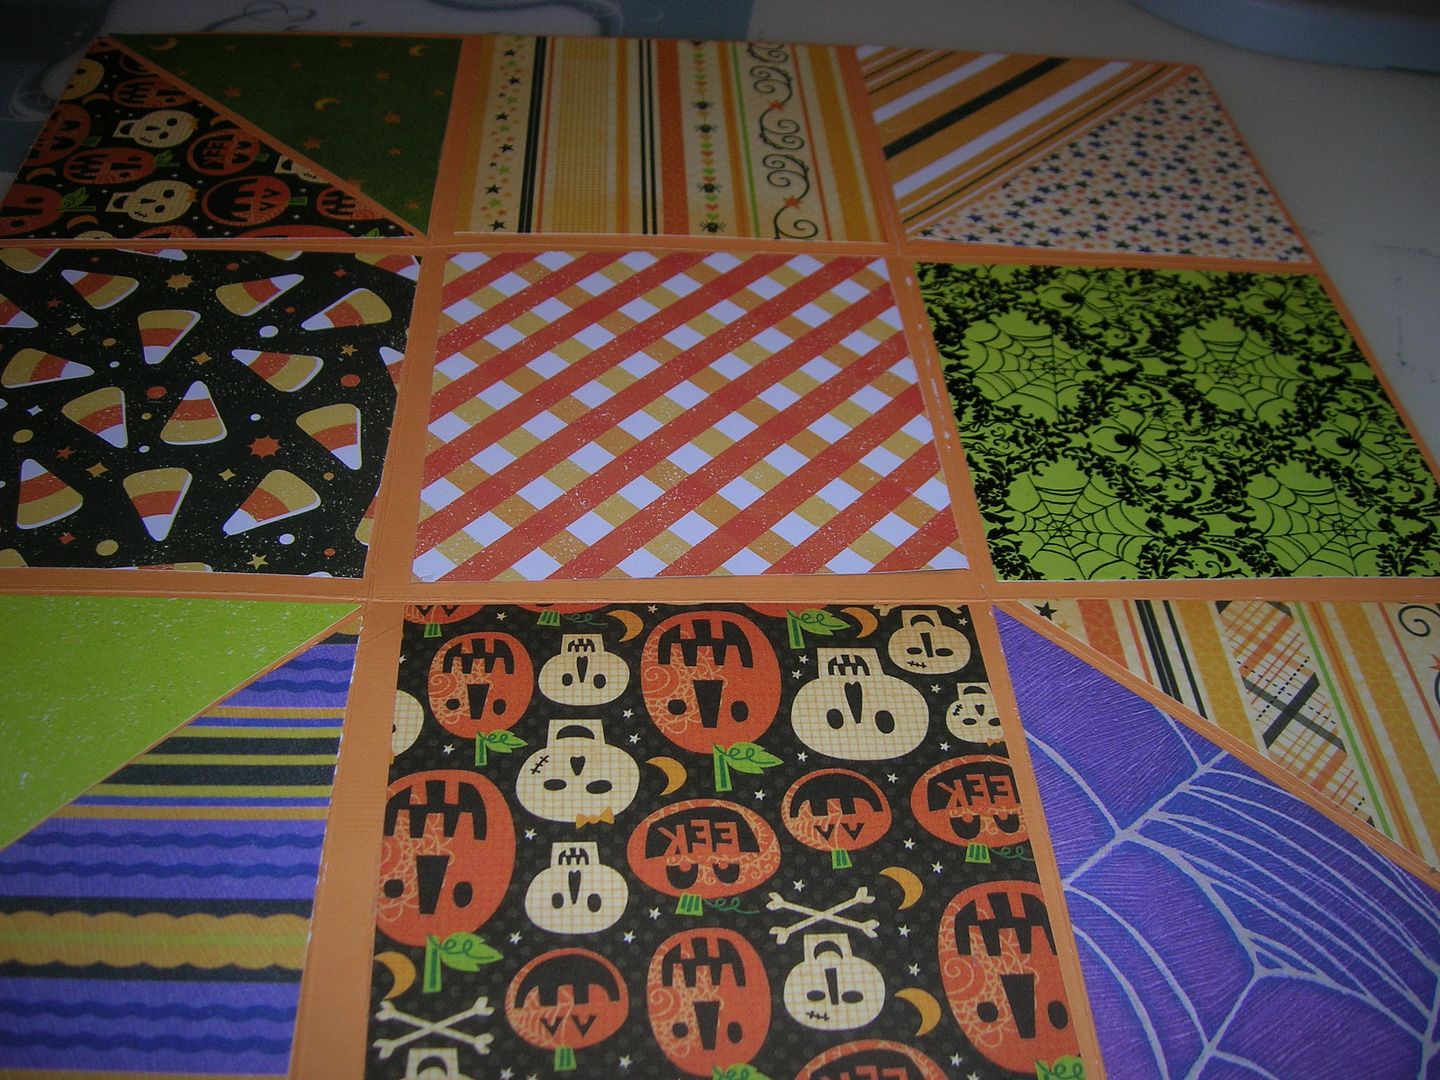
Five of the squares you will glue to squares on one side.  Four squares you
will cut diagonally in 1/2 to do corners.  keep paper from overlapping fold
lines.
Turn over and do the same on the other side.  
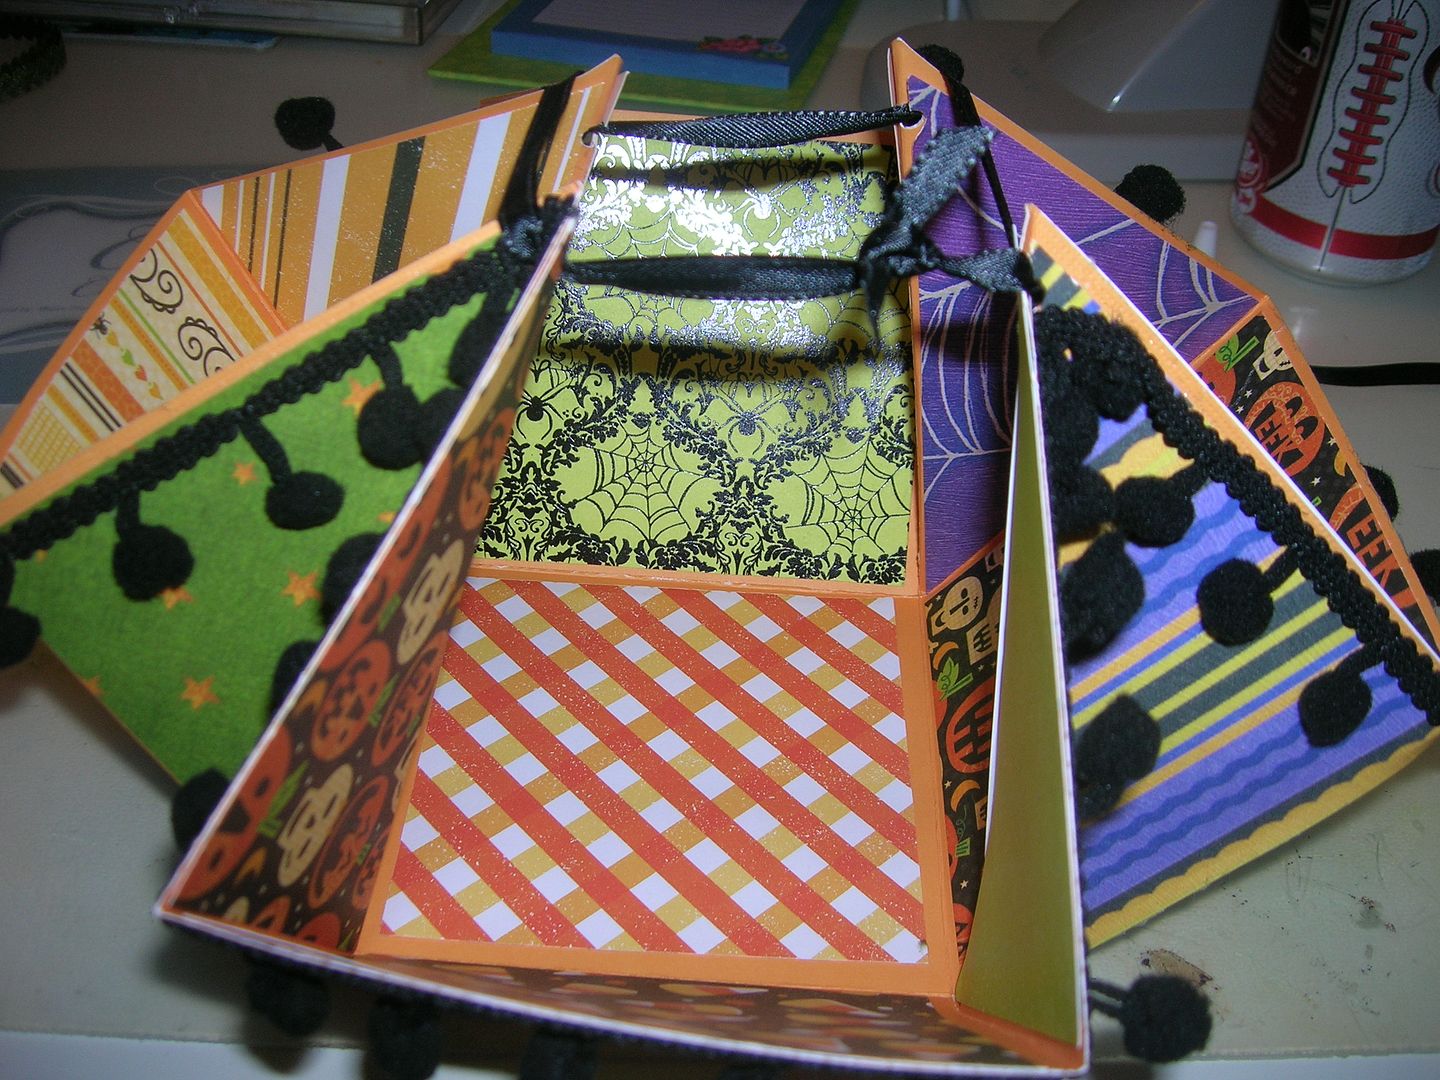
Now you are ready to punch a hole at each corner.  Do not punch to close to
edge as it will tear.  I used my Crop a dile but you can also use a regular
punch.
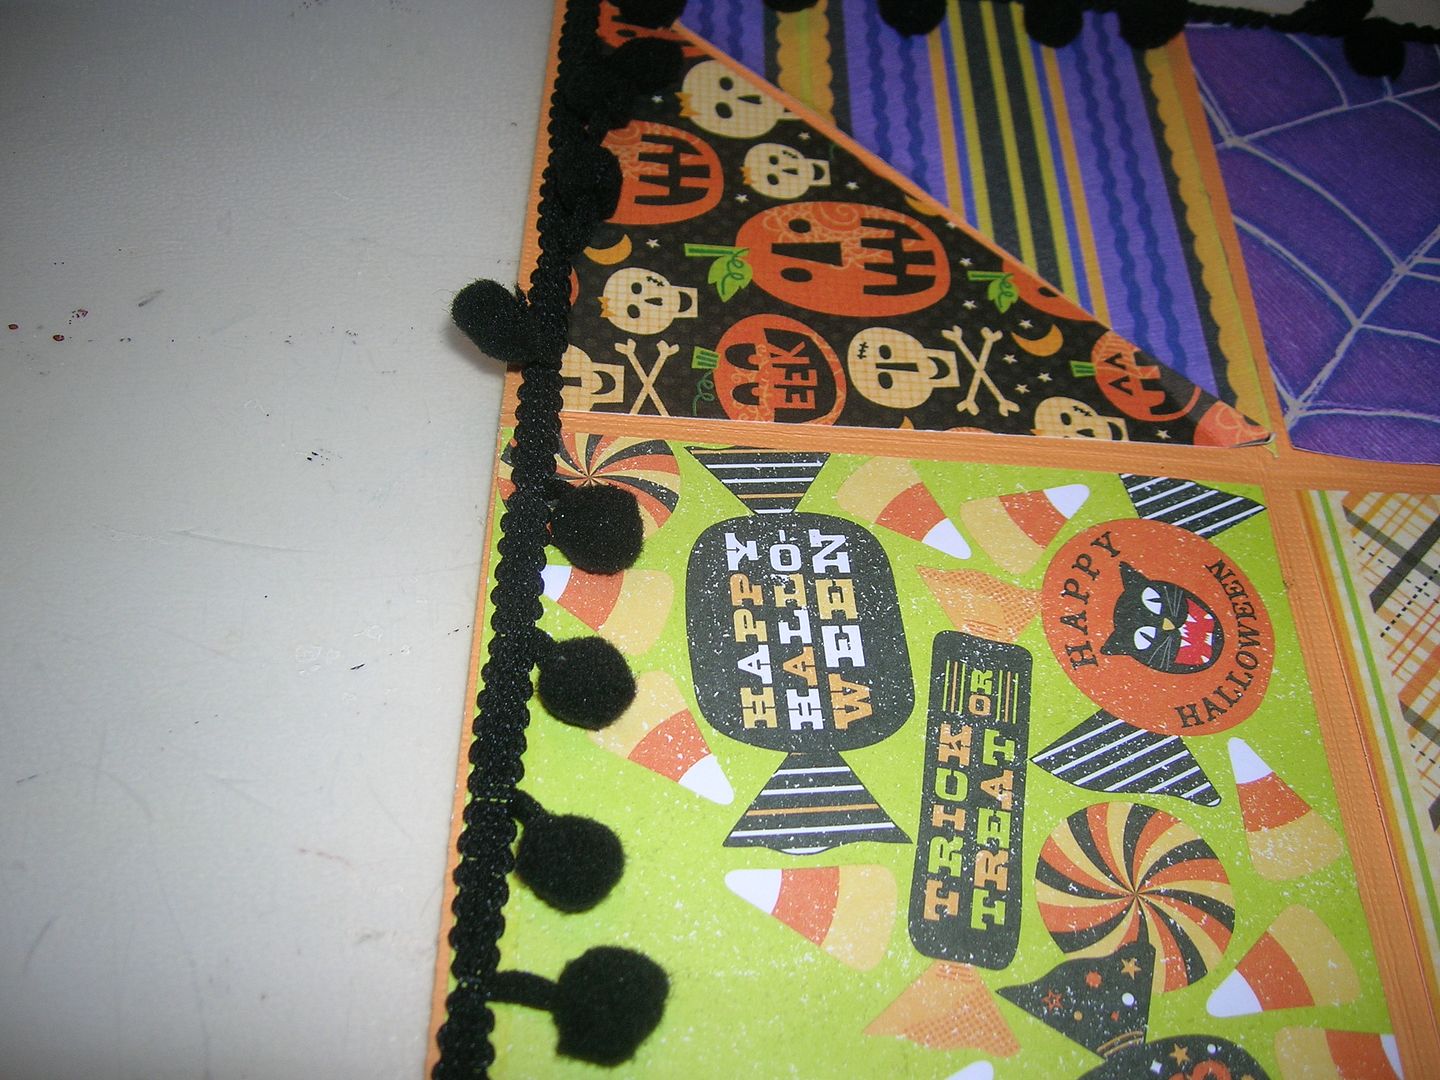
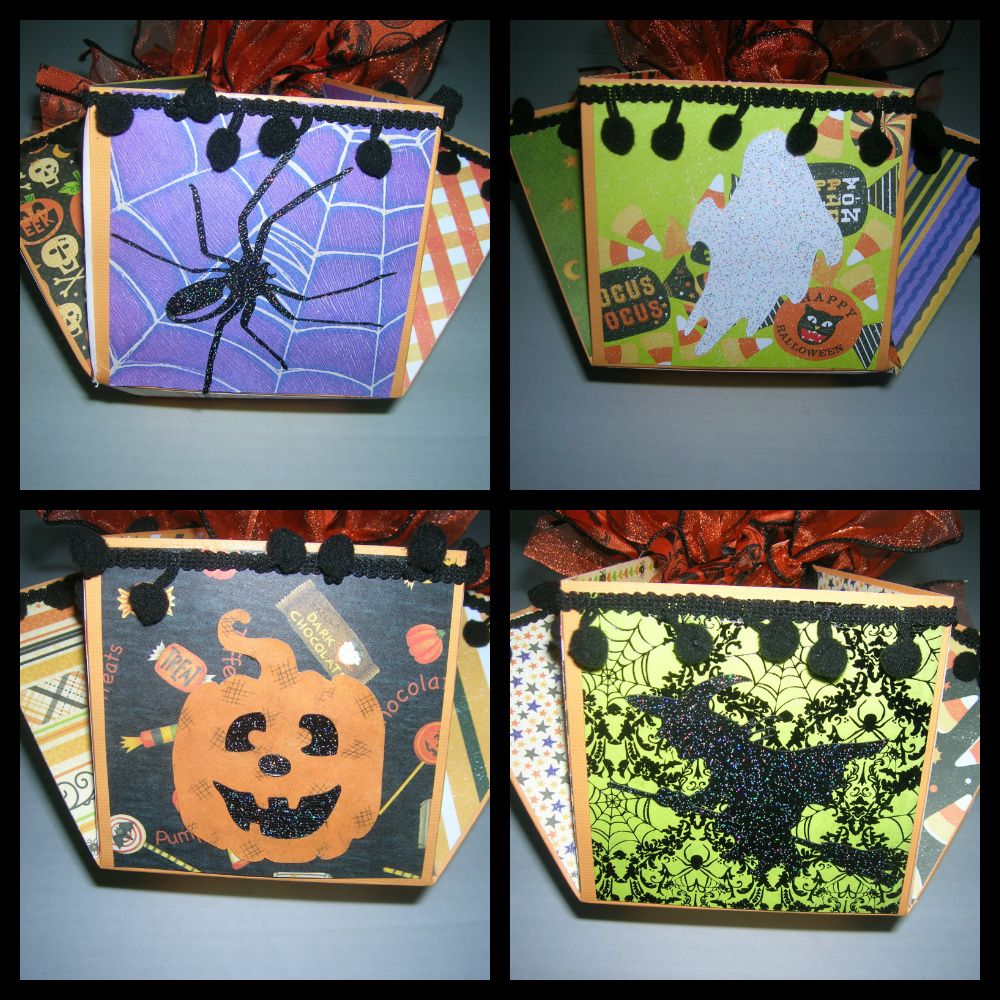
You are now ready to decorate the side if you wish with die cuts, ribbon, etc.
 I used a pumpkin from Pumpkin Carvings cut at 3 inches.  The witch
2.75, the ghost 3 inches and the spider 3 inches were cut from Happy Hauntings.
 I also used some trim to decorate around the edges.  Make sure you
put trim on outside top and  face diecuts down towards center square.

For this next step take thin ribbon and thread through the holes and tie.
 I leave about 3 inches between each hole when I pull it together.
 Tie a knot and trim.
Here are the four sides of the box.  
The last step is to add ribbon.  Wired ribbon works the best but I have
used regular ribbon.  I cut each piece to 9 inches and tied a single knot.
 There are three pieces on each
- Suzanne


What is your favorite Halloween candy? 


side.  If you use wired ribbon you can then fluff it up.  The wired
ribbon I used is from the Dollar Tree.

Now you are ready to fill your box with treats, candy or whatever you wish.
 Hope you enjoyed my post and tutorial. Please come back this week to see
what other great treats the Design Team comes up with.  Also please stop by
 My blog  to
see my other projects.  I love followers and comments.  Happy
Halloween

October 9, 2011

Enter if you DARE!!

This year has gone so by so quickly.  I can't believe it is already October
and time for Halloween decorations.  Bobbi Jo asked the design team to make
a wreath for this week.  I had several ideas and finally decided to make a
Halloween wreath.  The start of my wreath came from the Dollar Tree where I
got the wreath, the foam sign that says Enter if you dare and the black netting
each for $1.  The rest of the wreath was done with paper cuts.
Here is the completed wreath.  
I spray painted the wood wreath.  
This is a foam sign.  
I wrapped the wreath with this cool black netting and tied it to the wreath.
 I then glue gunned the sign in the middle.
Then I made my cuts with the Happy Hauntings, Pumpkin Carvings and October 31st
cartridges.
Here are detail pictures.  I used a lot of chalk on the edges and used
white and light gray chalk to give the appearance of spider webs on the cuts.

The recipe is as follows:
Happy Hauntings
cemetary gate 6 "
haunted house 10 "
witch and ghost 5 "
bats 3 and 2 1/2 "
October 31st
tree 10"
grave stones 3 "
cat and spider web 3"
Pumpkin Carvings
pumpkins 3"
I hope you enjoyed my wreath and will come back this week to SSD to see what the
other designers create.
Thanks for looking and Happy Craftin.

September 18, 2011

Happy Haunting!

This is Jen from 3 Cats and a Bug. This week here at SweetSassyDiva's the DT is honoring the first day of Autumn (September 22!). Besides watching the leaves change color, Halloween is the next best thing! My kids are grown now, but I still remember all the fun I had taking them trick or treating. I still love watching all the cute kids come to the door. Next year will be even better watching my son with his baby, although there won't be any going door to door for several years yet. Ok, I got a bit off track there, so back to my project! LOL

I made a shape card from the Pumpkin Carvings cartridge using Design Studio. I used the owl cut @ 5, a rectangle shape cut @ 1/2 (from George and basic shapes) and another owl cut @ 5 and welded them all together. On the second owl (on top) I used the hide contour to hide everything except the outside shape. I also cut 2 more owls, again @ 5 using the hide contour to hide everything except the owl on one cut and on the second one (not shown) I hid everything except the outside cut. I cut the last one on brown patterned paper. I also cut the Happy Haunting @ 1.5 and hid the outside shape.


I used Flower Soft on the branches and stickles for the Owl's eyes and beak. I used a white gel pen to add faux stitching to the outside of the oval. I glued the brown patterned paper to the backside of the front of the card. Then I glued down the Happy Haunting.


On the inside of the card using MS Seasonal cart, I cut Happy Halloween @ 2.22.


Visit my blog at 3 Cats and a Bug to see more Halloween cards!

Be sure to enter the SweetSassyDiva Design Team Call!