MyFreeCopyright.com Registered & Protected
Showing posts with label Doodlecharms. Show all posts

November 30, 2012

Sample Project Highlights and Cricut Cartridges for Sale!

I was organizing some of my cricut cartridges and I noticed I had some duplicates as well as some that I just thought was time to sell. 

If you are interested in any of these, please email me (by hitting reply on your email subscription to this blog) or comment on this link with the title of the cartridge that you are interested in.  I will need your email contact information.  Note: I cannot be responsible for lost or errors on behalf of blogger or any email nor ISP.  

Payment is by paypal only and the product will only ship out after the funds are fully deposited. 

Many of these are rare, exclusives, hard to find and/or retired.  I have photographed them in sets of two but, they are available individually.

These also work in all of the cricut machines including but, not limited to the baby bug, original, cricut create, cricut expression, Anniversary Edition Expression 2, Expression 2, Cricut Imagine, Cricut Cake, Martha Steward Cricut Cake, and/or the cricut mini. 

You can also use these with Cricut Design Studio, Cricut Craftroom, Jutebox or even just straight in the cricut machine(s).


B is for Boy Cricut Cartridge* $30.00 plus shipping

Click here!  for sample project and free tutorial not included in the sale.

SOLD Sugar and Spice lite Cricut cartridge*

Click here! for sample project and free tutorial not included in the sale.


Carousel cricut cartridge* (see below) $60.00 plus shipping

Click here! for sample project mini album not included in the sale.

SOLD Cricut Everyday cricut cartridge.** exclusive (see below)

Click here! for sample mini album project not included in the sale.


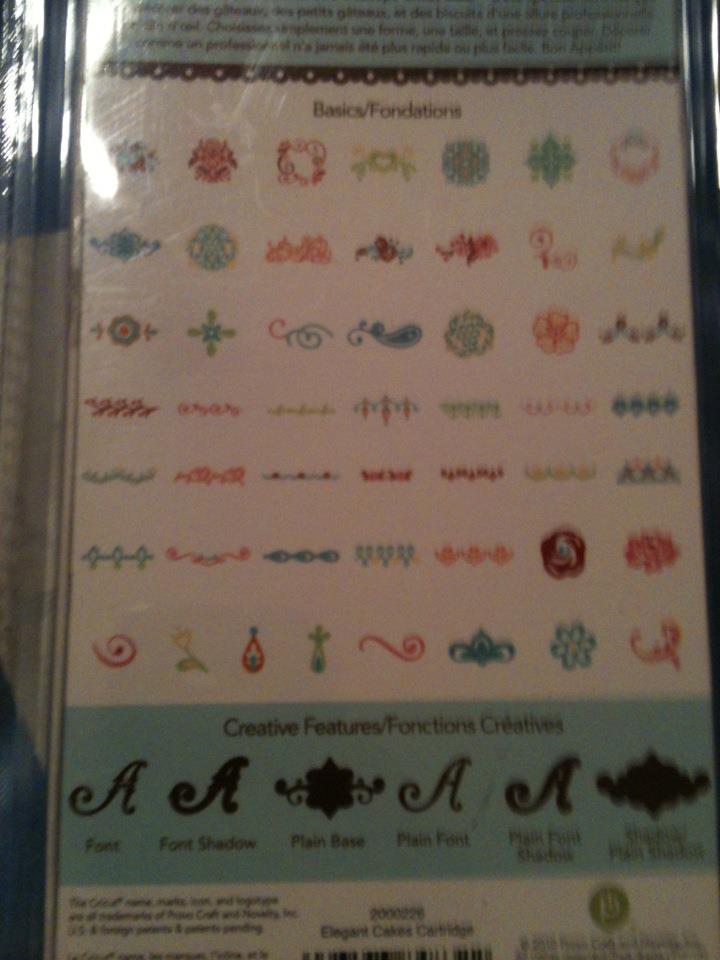
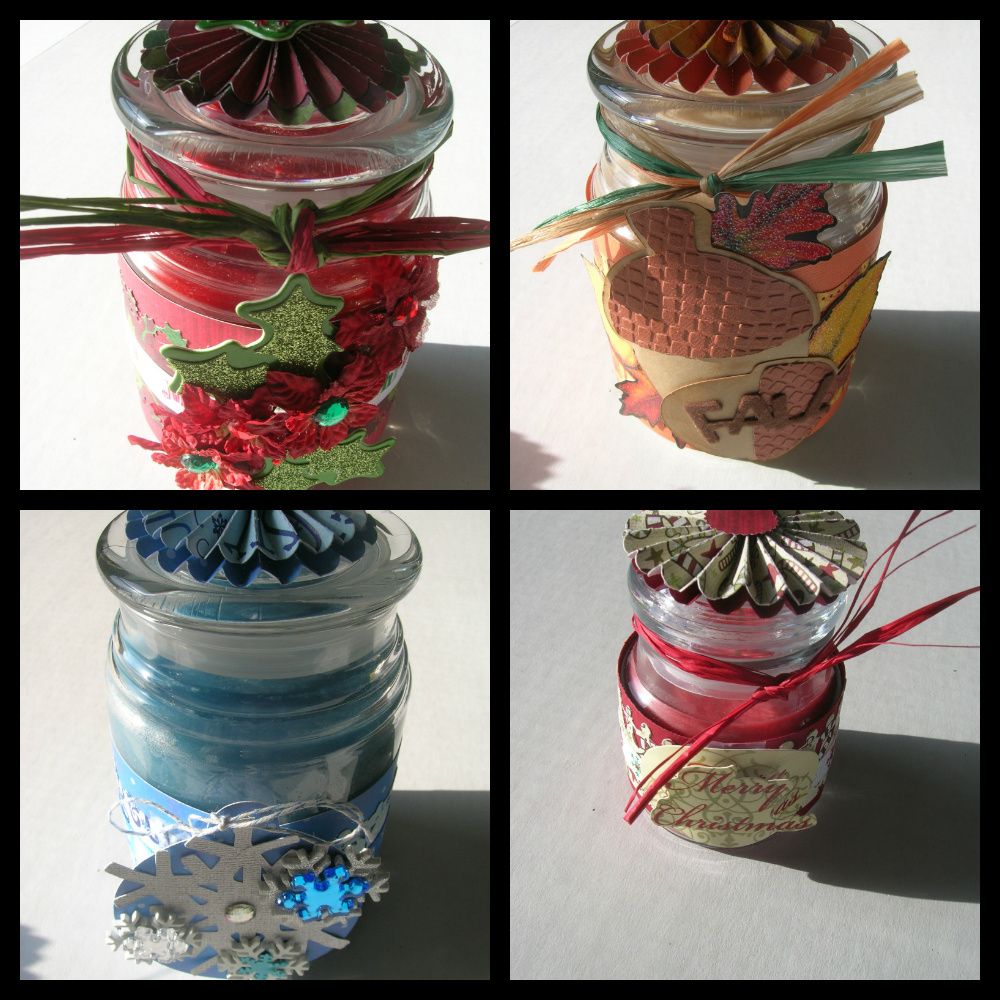
Elegant Cakes Cricut Cartridge not just for the cricut cake machines.  It cuts out amazing cuts for all cricut machines as do all the carts I am listing. $24.99 plus shipping

Click here! for a sample mini album project not included in sale.


sample layout not included in sale:


click here to see tutorial!

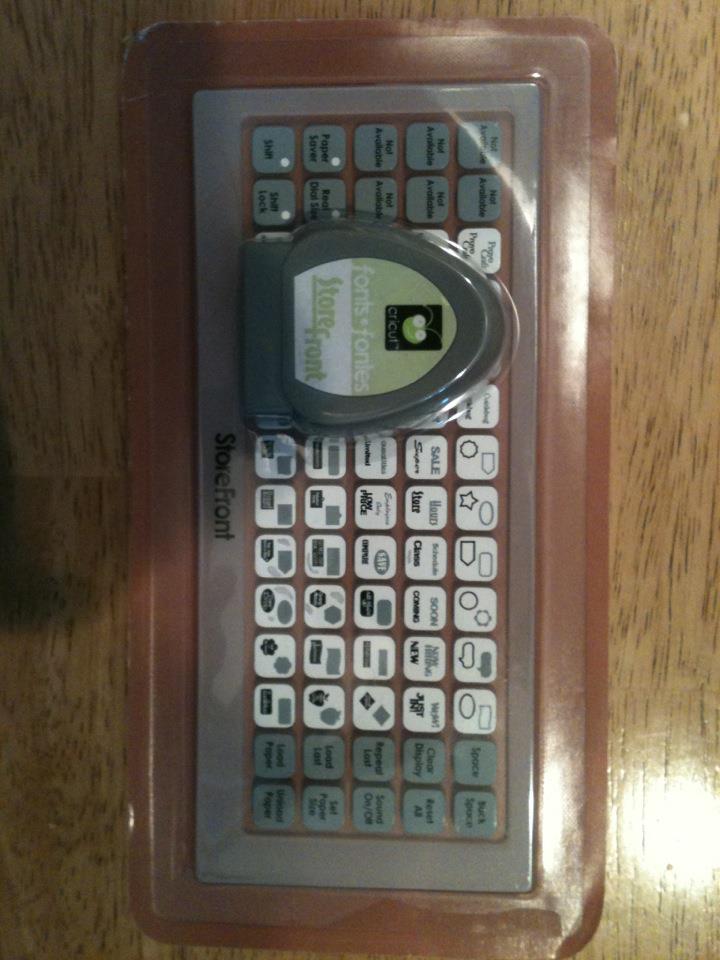
EXTREMELY RARE! Cricut Storefront cricut cartridge $79.99 plus shipping.  This was only given as a sample during CHA etc.  This is the one that has the beloved Cricut cuts etc. 


Jubilee Celebration Cricut Cartridge $26.00 plus shipping

click here! for a sample project using cartridge not included in sale.

Doodlecharms cricut cartridge $31.00 plus shipping

Click here! for a card  sample using cartridge not included in sale.
Click here for 20+ projects sample using cartridge not included in sale.


SOLD "Just Because" Cards cricut cartridge or Just Because Cards cricut cartridge


Click here!  for sample card using cartridge not included in this sale.


Robotz cricut cartridge $24.99 plus shipping


Preserves cricut cartridge $24.99 plus shipping

Click here! for sample project layout using cartridge not included in sale.

Jubilee Celebrations cricut cartridge $26.00 plus shipping  (yes, I do have more than one copy)


Savory Cricut Lite Cricut Cartridge* $24.99 plus shipping

Bloom Cricut Lite Cricut Cartridge* $24.99 plus shipping


SOLD Shall We Dance? Cricut Cartridge great for ballet for a little girl or all sorts of genre.** exclusive (see below)

Click here! for a sample project using cartridge not included in sale.

SOLD French Manor Cricut Cartridge ** exclusive (see below)

Click here! for sample card using cartridge not included in sale.


Cricut Imagine best friends cartridge *** (see below)

Click here! for a sample layout using cartridge not included in sale.

Cricut Imagine Kate's Kitchen cartridge or Kates Kitchen cricut imagine cartridge *** (see below)

Click here! for a sample card using the cartridge not included in sale.

Cricut Imagine cartridge snapshot: everyday only works in the cricut imagine **** (see below)

Cricut Imagine cartridge Heirloom only works in the cricut imagine **** (see below)

Click here! for a sample card using the cartridge not included in sale.


Please share this post on facebook and any other messageboards or such
To see what these carts do, please click on the cartidge links under this post in the Labels section or on my blog on the right hand side is a list of projects by cartridge.

*Note: these were originally available at walmart but, it seems it is no longer available. Don't let these slip from your fingers.

**This is an exclusive cricut circle cartridge only available to members paying for exclusive membership to the cricut circle.


***Note: the cricut imagine art cartridges only work in the cricut imagine for print and cut, print and/or cut only.  However, you can also use them in the cricut expression 2 on cut only feature.

 ****Note: the cricut imagine paper cartridges only work in the cricut imagine.


October 9, 2012

Happy Fall Y'all!

Hi my crafty friends!  Fall is in the air and the trees are starting to turn their beautiful colors.  Oh how I love fall!  Sunny, cool days are just perfect for getting outside.  Nice crisp evening are perfect for sleeping, but the one thing I don't like-shorter days! lol  I love when it stays light out until 9:30/10pm but of course as fall draws near we lose that.  I will survive and it will make the longer days all the sweeter when they come back around.


  Brenda here and this week at Sweet Sassy Diva our theme is fall!  I decided to design a card using my Gypsy and the basket from Doodlecharms.  I welded two of the together.  This is what it will look like once two are welded together:


I also layed out my layers to my basket on another layer in my Gypsy and I decided I would add a pumpkin to the mix and got it from the Freshly Picked cart.


After cutting out my basket layers I decided to run my basket layer through the Cuttlebug with an embossing fold like looks like wood from Stamping Up.  I cut my leaves out of scrap paper using My Creative Time dies and my sentiment is from her as well.  I used my Spectrum Noir Markers to color the leaf in my circle sentiment.  I inked my leaves and basket with Tim Holtz distress inks-Walnut and Vintage Photo.  Here is my finished card, I am pretty pleased with the way it came out although I would have welded my pumpkin to my base if I had thought about it first. lol I hope that you will have go at a shaped card for the fall!  Happy crafting! 


February 11, 2012

Love you!


Hey this is Misty over at The Daily Scrapper
Today I had fun making this Vintage Valentines Day card. I love the pink music note papers on the Heirloom Imagine Patterns Cart so I combined that with the Doodlecharms heart and tada easy peasy card!!! For those of you curious I do still have the same working Imagine woot woot!!!

January 29, 2012

Design Team Challenge - Hidden Journaling!

Good Morning! This is Jen from 3 Cats and a bug. This week SSD’s DT theme is hidden Journaling. It was great motivation to get working on baby shower pictures! I only used 3 cartridges on this LO, Doodlecharms, Disney-Pooh Font and Tags, Bags, Boxes and more. The snow globe {Doodlecharms} was cut @ 8. Pooh {Pooh Font} was cut @ 5 and flipped in Design Studio and the cookie jar was cut @ 3. The word baby was left overs from another project. The tag {T,B,B &M} was adjusted in Design Studio and cut @ 4 X 4.7.
The photo mats were cut @ 4.25 X 4.25, except for one, which was cut @ 4.25 X 8. I used my Scor Pal to score a line on the long photo mat @ 4.25. I added the photo to the front and red line tape to the outer edge of the backside to create my pocket. I added my tag inside the pocket before attaching it to the LO.
I used a sheet of circled paper and cut it in half and added it to the outside edges of my double pages. I then added a 1 X 12 blue border to the inside of each patterned paper. The snow globe was cut in half and then everything was glued down.
Be sure to stop back and see what else the DT has created! Thanks for looking! if you haven't checked out the Blitsy site, you are missing some great crafting deals! It's free to take a peek and never a fee! :D Click here! If you haven't checked out the Blitsy site, you are missing some great crafting deals! It's free to take a peek and never a fee! :D Click here! New items added three times a week.

January 28, 2012

Sweet Explorer!


Hey there Daily Scrapper again well Misty for short LOL.
You can see my blog over at The Daily Scrapper
Today's layout is just for my daughter who loved to explore and learn at her old preschool. She enjoyed her friends and teacher so much. After a move she is now at a new school she loves also, but I know she misses her old friends.
I used Doodles Charms and Create a critter with Bazzil solids and Quick Qoutes Good Times patterned papers.
I love mixing and matching colors to make the elements. Because isn't a blue turtle just fun!!!!!!! I also used a bunch of white gel pen to add an extra boost to the colors.
Enjoy!!!

Be sure to stop back tomorrow to see what the new challenge is for next week! Also, check the archives to see what else has been created! Thanks for looking! if you haven't checked out the Blitsy site, you are missing some great crafting deals! It's free to take a peek and never a fee! :D Click here! If you haven't checked out the Blitsy site, you are missing some great crafting deals! It's free to take a peek and never a fee! :D Click here! New items added three times a week.

Did you hear the rumor?

Free shipping on cricut.com using the code “PlungeFree” on Cricut products now through March 1! 


December 22, 2011

Snow Globe!

 This weeks theme at SweetSassyDiva is Let It Snow... make something with a snowflake, snowball, snowman... you get the idea, and of course, use your Cricut ! I am afraid we are going to have a white Christmas here in New Jersey, so I had to make my snowman from paper. I scraplifted this idea from a fellow blogger, but I am sorry to say I didn't save the site. So I am sending out a big thank you to whoever it was :) I kind of got carried away with the snow theme... snow globe, snowman, snow flakes. I started with the snow globe from Doodlecharms - sized at 4.23, copied, flipped and welded together.
                              The outer circle was done using a tag from Doodlecharms, sized at 3.72
 and a second, sized at 3.24 and centered inside the larger one. 
                                                                                   The trees are from Winter Woodland sized 2.41.
                                                                    The snowman is from Christmas Cheer, cut a t 2.41
           After some stickles, puffy paint, gel pen and ribbon I was happy with my snowman, snow globe.
Supply list: Cricut Doodlecharms, Christmas Cheer, Winter Woodland Papers - Stampin Up, DCWV, Hobby Lobby Ribbon - Hobby Lobby, Stickles Puffy Paint Gel Pen Merry Christmas everyone !
- Mindy!

November 4, 2011

Gift Jars!

Hello Sweet Sassy Diva bloggers.  This week the challenge for the DT was
Tis the Season.  So I packed up my Halloween things and got out my
Christmas goodies.  I for one was ready to move on to another color
palette.   For this project we could make anything a card, layout, altered
project, gift.  You name it!  Well I decided to make and share some of
my Gift candles.  I made some of these last year and they were a big hit.
 It is a great idea to make a few and then if someone stops by unexpectedly
with a gift or you need a hostess gift you have them available.  They are
great for Thanksgiving, Christmas, and New Years.  Oh and I guess you could
even do a Halloween one if need be.   They are quick and easy to put
together and you can  use scraps,Cricut cuts, or any embellishments you
have around.  Here are the 4 completed candles.
The large ones were purchased at Michel's on sale 3 for $10 and the small one
was
$1.  So watch the sale ads.  
Directions:

1.  For the tops  I used the Tim Holtz Rosette makers which I love as
it is so quick and the rosettes come in three sizes- 3/4 ", 1 " and 1 1/4".
  This is especially handy for small rosettes.
If you don't want to make rosettes you can put die cuts, embellishments,
flowers, etc. on top.
2.  Pull off the labels.  This is easy peasy on M's candles.  If
you have a candle and it won't come off then just cover it.  I like to cut
the flavor of the candle off the label and stick it to the bottom.
 3.  Cut strips of 12 inch paper for the large candles.  You can
leave it plain or punch with punches.  I cut the bottom layer at 3" and
 the top layer at 2.75.  The small one was 1 1/4 " and 1 ".   I
then glued a strip of coordinating ribbon down the center.  You could also
punch a strip with your punches.  
4.  Glue the strips together and then put ATG strips or glue on the back
and roll it around the jar.  They will just meat in the center.  I
then put strips of invisible tape over the meeting point.
 Make sure you keep it tight so it won't slide down.  
5.  Now you are ready to decorate.  See the next group of pictures for
details.
The first one was done using embellishments of holly, pointsettias, gems and
raffia.  I found a bag of raffia at M's with red, green and cream that I
knew would come in handy.  I added a holly to the top of the
rosette.
The Thanksgiving jar I used the acorn from Doodlecharms cut at 5" and 3".
 I embossed the acorns and added some embellishment leaves and the word
Fall.  The Fall colored raffia is from the tie from a package of pasta my
hubs bought.  
The blue one I cut out a snowflake from Art Philosophy with the ornament shadow
at 3".  I added some snowflake gems and bling.
The small one I added a Merry Christmas embellishment and some
raffia.
Here are a few more pictures and ideas from last years candles.  
I hope you have enjoyed this idea and the directions.  I would love to see
your comments.  Please come back all week to see what the other DT members
have created.

October 24, 2011

All around Fall!

I absolutely love fall colors. I could decorate my entire house in these colors for year round. They are so warm and inviting to me. So I really enjoyed making this wreath for my fall decorations.
All of my paper came from DCWV (mainly the new fall cardstock stack) and some from the neutral stack. I cut the paper into strips that were 4x8 pieces. I pinched the bottom sides together and glued them (could have stapled them but didn't try that one).
After I had them all glued and dried I inked the edges so there were no white ends on the larger end.
Then I glued the ends together to make a circle. This took a while because of letting it dry as I went. (patience was much needed and I lack it greatly)
Once I completed the circle and it was dry, I cut a 6' circle for the center of my wreath. I lined it with leaves cut from doodlecharms at 1' in red, orange and green. I then tied a bow (still a skill in developement) used floral wire to attach it thru the center of the circle and there it is my fall wreath.
*recipe*
dcwv cardstock
cricut cartridges doodlecharms, george and basic shapes
ribbon
lots of glue
TONS of PATIENCE
I have a few others that I made in the past week or so, and I thought I would add them as well. If you happened to see my birthday banner you saw all of the fairy princesses and butterflies that I had cut out for my daughter's birthday. I kept some for scrapbooking and still had some left over. I didn't want to just throw them away so I made a "memory wreath" for her. This is a great project for kids (considering the first time I made one I was in elementary school) Christmas is coming so this would be a fun indoor cold yucky day project....
I used a wire hanger, bent into a circle shape, the table cloth that I bought for the birthday party (cheap plastic one) and her decorations with some of the ribbon from the gifts. The good thing is nothing has to be cut straight just into strips. Tie the strips to the hanger, squish them together as tight as you would like until it is completely full and then glue on the rest....and there it is a simple wreath. (I used white trash bags in elementary school with plastic poinsettas)
Last bit and I'm gone....I've been busy ;) This one is the circle of friends that was made for my daughter's birthday party as well. I wanted something for each girl to be able to take with them, so it wasn't a "wreath" so to speak but could easily be made into one with wooden dows, or, styrofoam, anything you want. This is basically a 6' rosette with a fairy in the center (cut from once upon a princess) the banner (cut from blackletter) is upside down and the girls names were glittered in them. The birthday girl takes center stage. I asked for favorite colors before the party, or room colors, so that each one was tailored for each guest. I hope you enjoy.

Angie