MyFreeCopyright.com Registered & Protected

September 8, 2012

Coupon Book!

This week at Sweet Sassy Diva's BLOG we are celebrating All About Grandparents in honor of Grandparent's Day Sunday September 9th.

This is Lori from Scrappin My Stress Away and I used one of the free Cricut Digital Images that was loaded on my Gypsy when I updated in August.  The Digi is called Mother's Day Coupon Book.  There is a similar cut on the Mother's Day 2010 Cartridge that would work too.


I sized the coupon book cover to 3 inches.  I wanted to add Mimi and Papa to the cover and used Doodletype for the font.  I sized the letters to 0.69 inches.

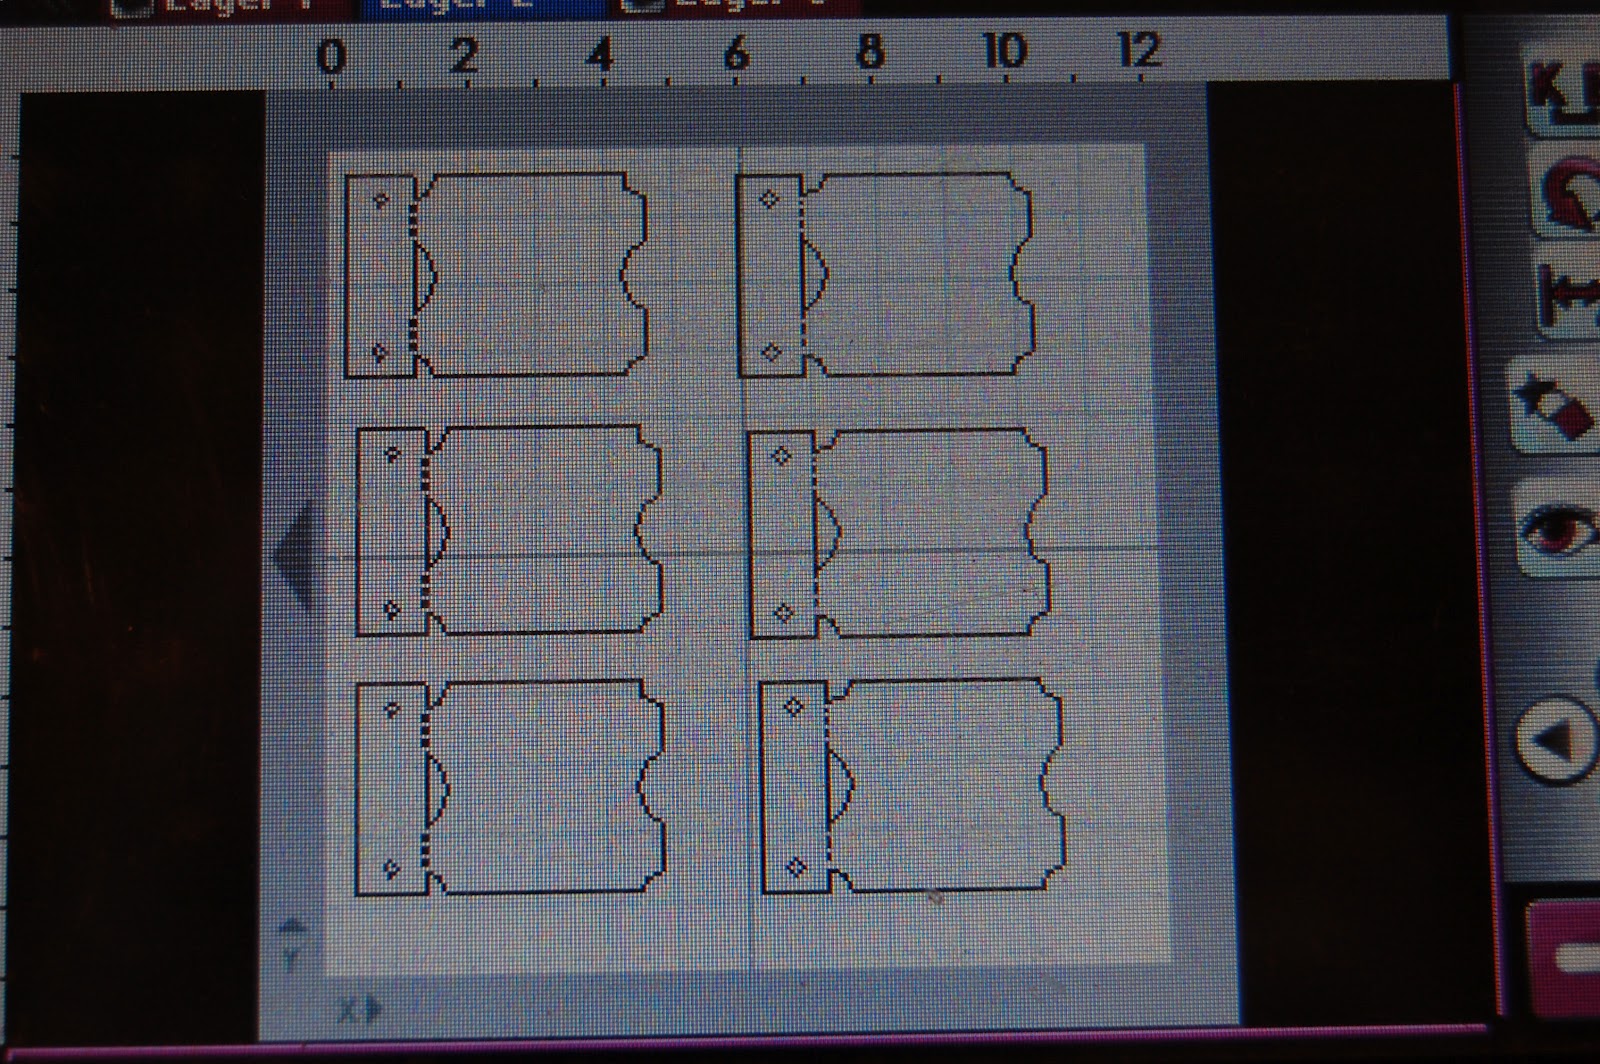
I opened Layer 2 and placed 6 coupon pages on my mat sized to 3 inches.

I opened Layer 3 and kept Layer 2 visible.  I used Doodletype to place my words in the center of each coupon.  The letters are sized at 0.61 inches.
After trying both of my gel pen holders and failing, I used a mini Crayola marker with a pencil gripper to draw on my paper.


Bottom right coupon did not print very well, so I left it out of the book.  Had I not just spent a half an hour trying the other pens, I probably would have had the patience to re-do that coupon.
Who am I kidding....Tanner would not help "bake" the cookies, he would "eat" them anyway!!

I cut the cover out of patterned cardstock.  I cut the title out of dark blue cardstock.  I kept the template from my title and ran the letters through my 1" Xyron.

I used the template to line up my letters.

Perfect titles every time!!

I scored the cover and assembled the coupons inside.

I used a dark blue ribbon to bind the coupon book.  Here you can see the inside pages.


Tanner will love giving this book to his Mimi and Papa for Grandparent's Day!

What do you do to celebrate Grandparent's Day?


September 6, 2012

Grandkids make life Grand!

Hello my crafty friends, Brenda here and today my challenge for Sweet Sassy Diva was the theme "Grandparents".  For my project I made a layout of our sweet grandkids.  We have 6 in all but don't get to see 2 of them but I was able to get a picture of the other 4 together.  We love having our grankids here but it doesn't happen very often to have them all together because of some living in different states.  But this evening we happened to have everyone at the house at the same time for a few minutes so we all grabbed our camera, put the kids on the sofa and started snapping away.  Those poor kids didn't know what was going on. lol  For my layout I started with a sketch as I really didn't have an mojo on how I was going to scrap this picture.  I use sketches as a jumping point when I really don't have a clue as to what I want to do-they are so great for that!!  Here's my inspiration sketch:


I got out my trusty Gypsy girl and layout it all in in her.  Here is how it looks on my Gypsy:


After designing my layout on my Gypsy, I choose my base paper from DCWV's Natural Stack.  I stayed with a neutral background to go with my picture.


My heart came from George and Basic Shapes and my banners came from Art Philosophy.  My circles I just used punches for.  I am using my Scrap N Easel to place my papers/picture on, it lets me dry fit everything and stand back to look at it.  Then when I have everything tweeked I can glue down. I inked all my die cuts with Tim Holtz Walnut Stain distress ink. Here what my layout looks like starting out:


The tiny heart are from an old punch. And here is my layout all done:


Some close ups:


I hope that you have been inspired to get your craft on and make something today.  Crafty hugs, Brenda


September 3, 2012

Grandkids!

very proud!!! I am lucky to have 2 wonderful grandkids. As you will see in my layout, they both have a huge smile and are full of fun.
Hi everyone, Mindy from Grammies Craft Room with my 3rd layout. I told my daughter that it is much easier to do these when you have great pictures !

I started with my Gypsy and Cricut Alphabet to make my letters. I put circles sized at 1 inch on my mat then added the letters inside... sized at .52. I grouped the circle and letter together and cut out. I then added more 1 inch circles and cut them out in brown to go behind the cream letter circles.


I inked all the edges with brown then arranged and attached. The sticker is from Close To My Heart.


It's so easy to love a project that has pictures of my wonderful grandkids :) 

I hope you stop by again to see what the rest of the design team has done with this theme !!

September 1, 2012

Glittery Challenge!

This is the easiest theme we've had so far!! Who doesn't LOVE to add glitter to a project?

Hi everyone, Mindy here from Grammies Craft Room with a fun fold card. I got the original instructions from SplitcoastStampers.

I started by cutting my flowers from the Art Philosophy cartridge, pages 29 and 57. I stamped them with the corresponding Close To My Heart set Hooray Bouquet ( D1491).

Then I cut my cardstock and patterned paper as shown on the photos.


Glitter was added to the bird, flower and the dots of the I's.

I had fun with this theme and hope you will come back to see the other glittery projects my design team pals have to inspire you!

August 26, 2012

All that Glitters!

Good Morning!

Welcome to SweetSassyDiva's!  This week the design team theme is glitter.  Those of you who follow my blog (3 Cats and a Bug) know that for me, glitter means Stickles!!  I love using stickles on my layouts, I would say I go overboard with them, but I don't think that's possible.  : )

I've had this idea for a layout in my head for awhile, but it was only a partial idea... until now.  I've been wanting to use a train to hold photo mats since my Grandson loves trains.  Being only 7 months old, he has a variety of toys, so no theme really holds with him yet, so I was just holding onto the train idea.  Since I had some cute pictures of him on the floor with a bunch of toys, I decided to go with the train idea and assorted toys.  I only used two carts on this layout, B is for Boy and MS Birthday.  I prefer the train on MS Birthday, which was cut at 3.

The money was cut @ 4.  I used red stickles on his heart and lips and clear on his hat.
The stickles really make everything stand out so much more.

The dump truck was cut @ 3.5.
I used brown and clear stickles on the dirt.
 I cut out the lion @ 4, the keys @ 3 and the Prince Charming and crown @ 3.5 and the rings at 3.5.


For the train, I decided to add some left over pictures to it.  For the two passenger cars, I just used a square punch. 
On the back side, I used scotch tape to hold them in place.


For the other two cars, I used the hinge method.  On my gypsy I placed two of the same cars on one mat.  Next I added scotch tape to the top of some plain white paper on my cutting mat and cut out the two cars.
Do NOT remove from the machine, I just hit load paper, so I had room to move.  ((I should have hidden all the lines, except the insides one before cutting, but I forgot.  I did do it after cutting the white paper, before I cut the photos.  Shown is the missing white piece, the only cut that should have been made, although it didn't hurt anything.))
Next I inserted the pictures underneath the white paper, so I could see exactly where it would cut.
Since my mats are in pretty bad shape, I taped the pictures down on the mat and then cut them out.
I took the two pictures and inserted them into each remaining cars.

The left side of my two page layout...
The right side....
And together...

Thanks for looking.  Hope to see you over at 3 Cats and a Bug!

August 23, 2012

Breathtaking!


I so love the squishy babies.  They are so pure, precious and full of love and promise. 

Welcome to the new followers! Here is another gorgeous baby that I had the pleasure of capturing. If you have your due date, now is the time to schedule your session. Schedule this month (session dates as far out as 8 months) and receive a complimentary maternity session. Contact me for specifics.

Be sure to check out my facebook page http://facebook.com/capturedbybobbijo/ and be sure to follow to see specials.


August 21, 2012

Gift Bag!

Hi!!  This is Lori from Scrappin'MyStressAway!!  This week at Sweet Sassy Diva's, our theme is Back to School projects.  I bought some extra school supplies and hand sanitizer to take to Tanner's Back to School night/Meet the Teacher night.

I started out by cutting a piece of red cardstock to fit the front of the bag (8x10 for this bag), then cutting the school book paper 1/4" smaller to layer on top.
Next, I grabbed my Gypsy and grabbed these books from the Recess Lite Cartridge sized to 2.41 inches.

I cut them out using red, blue, green and white cardstock.

I grabbed the Back to School image also from Recess sized to 3.10 inches.

I cut them out using red, blue and green cardstock.

I put the images on the bag using my ATG adhesive.

Here is a sneak peek to what I put inside (so far)....maybe I should have used a bigger bag!!
In our school, they can only require the basic school supplies for our children.  I know that the teachers provide most of the extras out of their own pockets.  I like to donate what I can...plus I just LOVE back to school supplies so it's a win-win!!!

Thank you for having me over today Bobbi Jo!!